
Contents
Hiring a landscape gardener to build a pond can get expensive fast. But building a free-form pond is one of those projects that’s more approachable than it looks, as long as you take your time with the prep work. The digging is the hardest part. Everything after that is about patience and attention to detail.
The steps below cover the full process to build a garden pond, from choosing a site to bordering the finished product. If you’re the kind of person who likes seeing results in a weekend, this is a satisfying project. You’ll end up with something that would have cost several times more to have done professionally.

Choose Your Location
Where you place your pond matters more than most people realize. You want a spot that gets plenty of light, with some direct sunlight to help aquatic plants establish and grow. A full-shade location tends to limit what you can plant and encourages algae problems.
Avoid building your garden pond near deciduous trees. It seems obvious once you think about it, but fallen leaves are one of the most common ongoing maintenance headaches with garden ponds. If leaves end up in the water regularly, they decompose, throw off water quality, and create a mess that’s tedious to clean out season after season.
Dig the Hole

Start to build your garden pond by marking out the shape using pegs and string, or chalk on the ground. If you’re planning to keep fish, the center should be about 3 feet deep. You’ll also need a shelf around the perimeter for marginal plants (and to give frogs and other creatures a way to climb out).
Dig the entire area down to shelf level first, about 6 inches deep. Then, starting about 6 inches in from the sides, dig out the deeper center section. Before moving on, check the sides and bottom carefully for any large stones or sharp objects that could puncture your liner later. This is one of those steps that’s easy to rush and expensive to regret.
Line the Pond
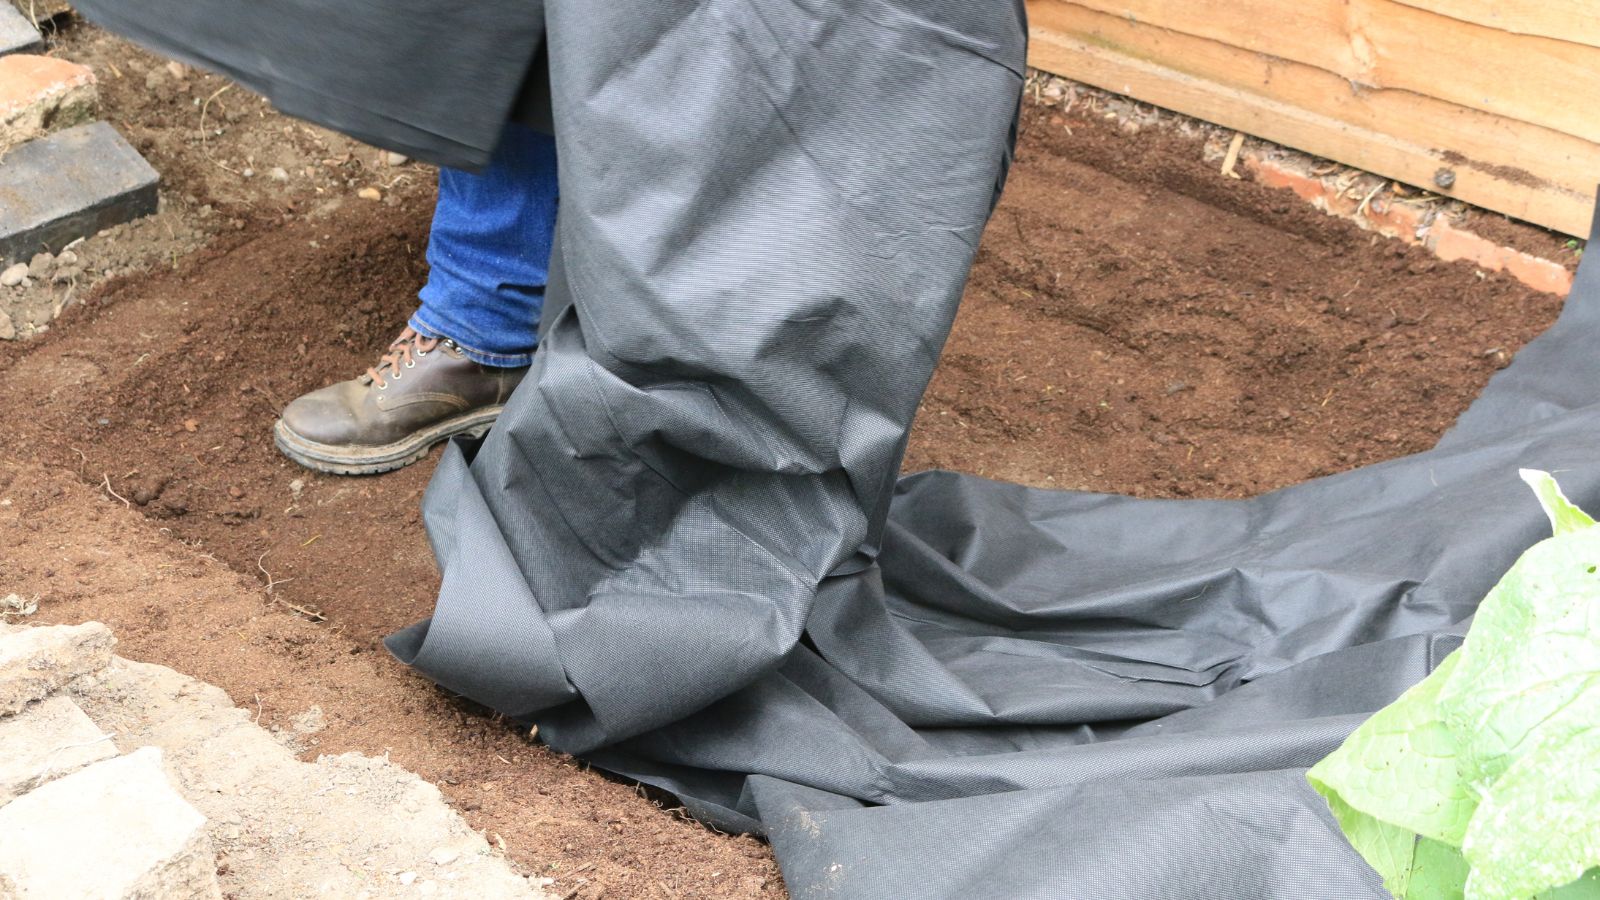
Lay about an inch of sand across the bottom of the hole, then line the entire pond with a thick protective layer. Old blankets, carpet underlay, or a proprietary pond underliner all work well. The goal is a cushion about an inch thick between the soil and your liner. Make sure the underliner comes up over the edges slightly. You can trim any excess later once everything is in place.
Insert the Liner

For a pond that’s about 3 feet deep, 6 feet long, and 4 feet wide, you’ll need a liner measuring at least 15 feet by 13 feet. Lay the liner over the pond and gently push it down into the hole, working it into every part of the shape. It’s easiest to get into the pond for this step (take your shoes off first).
Pay particular attention to the shelf area, making sure the liner sits snugly against the transition between the shelf and the deeper section. Leave some pleats and folds in the liner rather than pulling it completely taut. It will stretch and settle once the pond fills with water. Make sure there’s at least a foot of overhang around the edges, which you can trim and hide once the water is in.
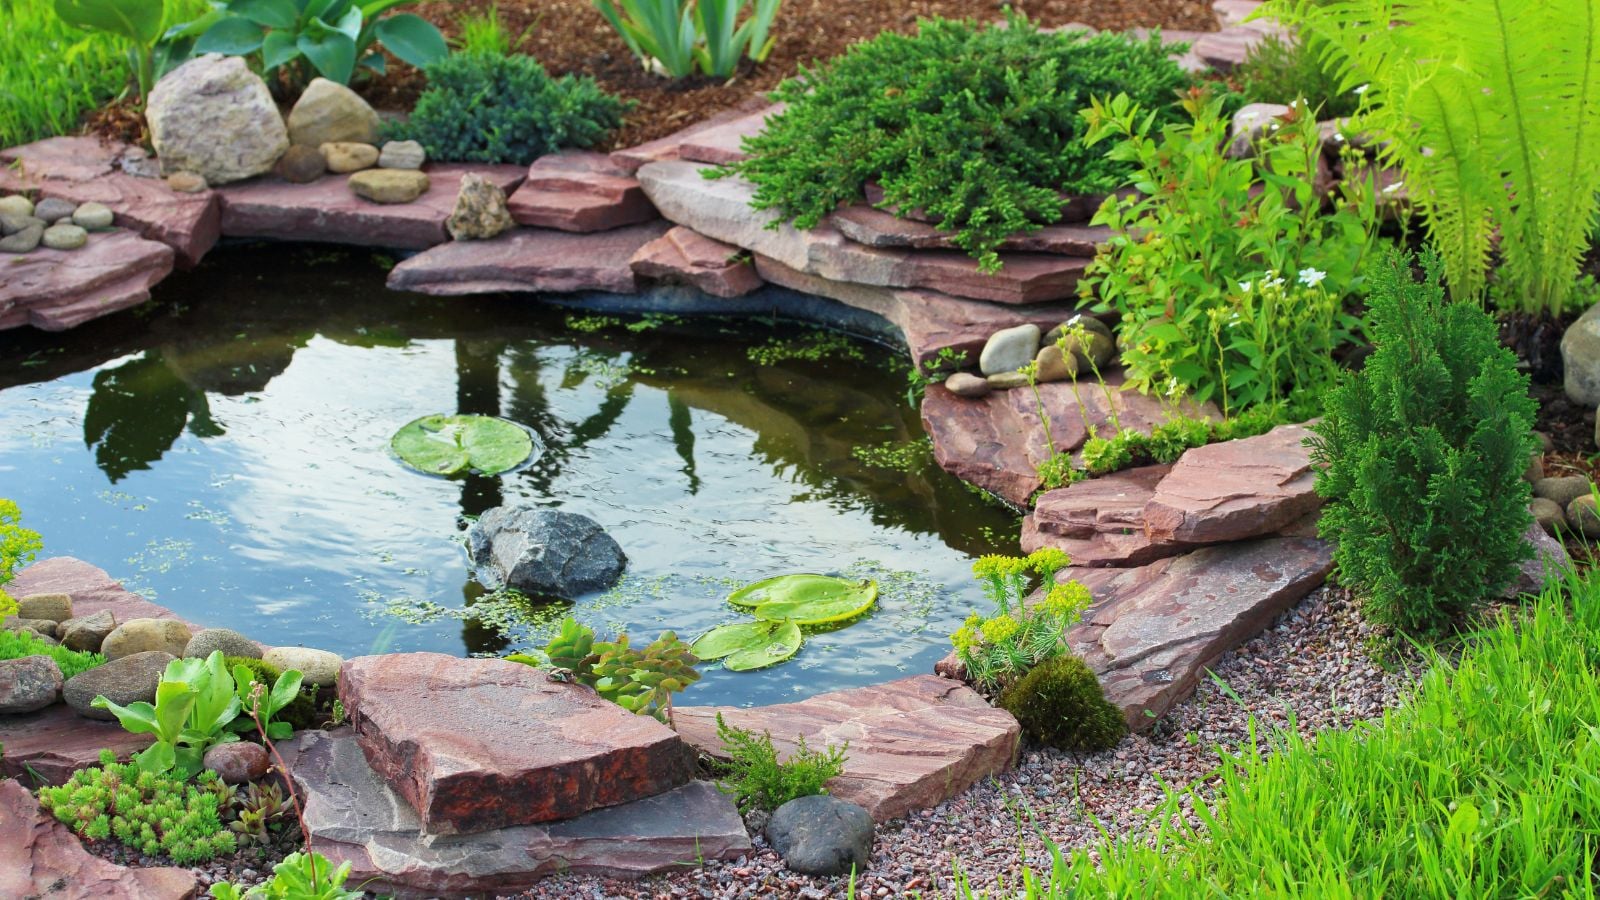
Border

Once the pond is full of water, you’ll need a border to hide the exposed liner and give the pond a finished look. Bricks, slate, cobbles, or stone slabs all work well, depending on the style you’re going for.
If you’re cutting slabs to size, wear goggles and a mask while using a grinder. Position your border material with a slight overhang over the water, then trim off any excess liner and secure the stones with mortar. Even heavy stones can shift and end up in the water (tearing a hole in the liner in the process), so make sure everything is solidly embedded before stepping back to admire the results.
Wait at least two weeks before adding any plants or fish. Tap water contains chlorine that needs time to dissipate, and rushing this step can harm anything you introduce too early. If you’d rather not wait, pond water conditioners can speed up the process.


