How to Propagate Petunias From Cuttings in 7 Simple Steps
Petunias are a common garden flower that make their appearance in many gardens during the spring. But did you know you can propagate these lovely plants and make even more for your garden? In this article, gardening expert Paige Foley shares a few easy steps to follow when propagating petunias in your garden this season.


Contents
Many gardeners know you can grow petunias from seed or purchase seedlings from a garden center, but did you know you can propagate from cuttings? Petunias are versatile plants easily grown in borders, landscapes, containers, and vegetable gardens. You can easily propagate them to fill empty spaces during the season.
Propagating petunias from cuttings will help fill in gaps in the garden, save money, and yield blooms quicker than seeds. Also, you will get an exact clone of your cut petunias. When you grow petunias from seed, there’s a chance they will revert to one of the parents. Growing from cuttings guarantees you the same flower color as the original plant.
If you are looking for a cheap way to grow more flowers, consider giving propagation by cutting a try. Let’s explore how to properly propagate petunias from cuttings for a vibrant floral display.
Cuttings vs. Seeds

Many gardeners grow petunias from seed or purchase starters from a garden center. Purchasing is easier, and you typically have flowers instantly. Growing from seed is time-consuming, and you might not always yield the expected flowers.
Garden centers only carry a limited variety of petunias each year. Growing petunias from seed will allow you to grow different varieties that aren’t always available in seedlings. Plus, seeds can be purchased online, giving you even more options of varieties you can grow.
If you are growing a particular variety that is difficult to find or is rare, propagation is a proven way to get more of that specific petunia. Garden centers will eventually sell out of plants, and propagation is a great way to add more flowers after the garden centers have sold out.
Vegetative propagation is when you cut stems from your existing petunia plants and root them. By planting cuttings, you will yield blooms and foliage much quicker than seed. Cuttings are ideal when you need many flowers to fill the area, as it is much cheaper than purchasing potted plants.
How to Propagate Petunias From Cuttings Step-by-Step
Flowers can get expensive if you are trying to fill large areas. Cuttings will help cut back on costs (no pun intended!) and give you beautiful blooms earlier. Here’s how to propagate petunias from cuttings successfully.
Step 1: Gather Materials

Begin by gathering the materials necessary to grow your cuttings. Preparation is essential so you can determine if you need additional supplies. I hate when I start a project and realize I am missing something. You need to be prepared because, once you take your cuttings, the stems won’t last long when removed from the mother plant.
You will need:
- Rooting hormone
- A sharp knife or shears
- Potting soil
- A container
- A tray or bin
- A plastic dome or plastic wrap
- Water
Rooting hormone is not required but will help your cuttings establish well in their new containers.
If you are making a DIY propagation greenhouse, you may need additional tools or materials to make a functioning greenhouse. There are many great examples online that are relatively cheap and still functional.
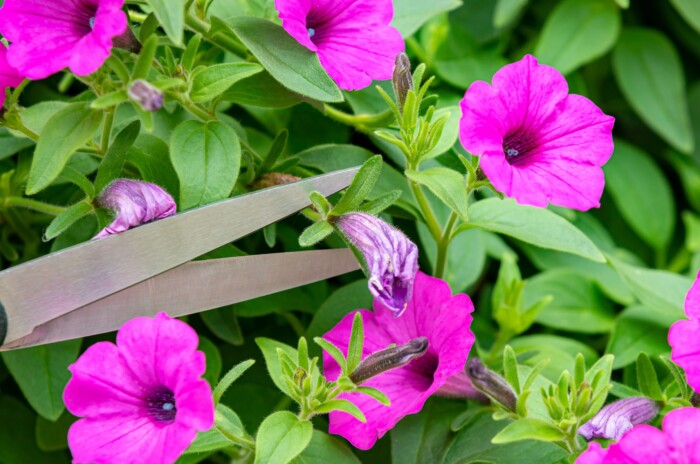
Step 2: Make Your Cuts

Once you are ready to begin propagating petunias from cuttings, choose the variety or varieties you wish to make your cuttings from. Next, identify the wilting or leggy stems. These types of stems need to be removed anyway for a healthy petunia plant.
If you propagate more than one variety, keep them separate and labeled. If there are no flowers on the cuttings, it will be difficult to determine the variety. You will eventually figure out what’s what once they set flowers.
You will cut the stems about halfway down the length of the entire stem, just above a set of leaves. You are looking for new growth points (nodes) along the stem. Nodes are where leaves meet the stems. Cutting in this specific spot will help your original petunia grow fuller.
Step 3: Strip Leaves and Dip In Root Hormone

After you’ve made all your cuttings, strip the leaves from the bottom portion of the stem. Where the leaves once were is where your new roots will emerge. Leave a small cluster of leaves at the top
At this time, you will want to remove any buds or blooms from the stem. This will allow the plant to focus on growing roots versus producing buds and seeds.
After stripping the leaves, you can place the stems into root hormone. Rooting hormone can be found at garden centers and online. It comes in gel, powder, and liquid form, and all types are effective.
You do not need to dip the ends of cuttings in rooting hormone, but it is beneficial. The hormones aid in root production, making the petunia cuttings more likely to succeed.
Step 4: Pot Your Cuttings

Once you have made all your cuttings and optionally added root hormone, plant the cuttings into the appropriate containers. Water the soil in your containers before planting to make them easier to work with.
Make an indentation into the soil using your finger or the end of a pen. Then, place the cut stems into the soil. Cover the bottom of the stems with soil and place them in a proper location. Water more if necessary.
Step 5: Place in a Proper Location

Keep cuttings in a relatively cool place. If grown in an area that is too warm, they will dry out too quickly and die. Once you’ve identified a location, place a plastic dome or plastic wrap over the cuttings. This will create a greenhouse effect without having a greenhouse.
Be sure the dome and plastic wrap have proper ventilation. You don’t want the plastic touching your petunia plants, which can cause the leaves to become mushy and die. If you have a greenhouse, place your cuttings in a greenhouse unless the temperature becomes too warm.
Provide direct sunlight for at least 6 hours a day and water frequently. Allowing seedlings to become too dry or wet will cause them stress, and they will struggle to survive. It’s important to keep a close eye on your seedlings to catch any problems that might arise.
Step 6: Transplanting

Within 3 to 4 weeks, your petunias should be ready for transplanting into their permanent home. If you’re curious whether the cuttings are ready, gently remove them from their container, soil and all. When you see roots towards the outside, the plants have established good roots and are ready for transfer.
You will want to acclimate your petunias to the outdoors before leaving them out permanently. This process is called hardening off and can be beneficial for the plant.
Over a week, slowly place your petunia seedlings outdoors to acclimate to being outside. Increase the time outdoors each day until they are outside for most of the day.
This will help them adjust easier and create less stress so they thrive when finally left outdoors. This process isn’t always necessary. When propagating petunia cuttings in a greenhouse, you typically don’t have to harden them off. Greenhouses are close to natural outdoor conditions. If the plants were growing indoors in a house or garage, consider slowly moving them outdoors so you don’t shock them.
Step 7: Post-Transplant Care

Once you have transitioned your petunias outdoors and they seem to thrive well, monitor them for any issues. They will need proper sunlight and water to produce lush foliage and endless blooms. Petunias require a minimum of 6 hours of sunlight per day. Planting them where they receive 8 hours of light or more is best.
Give your petunias a good soaking a few times a week to encourage deep root development. Pots and hanging baskets might require more frequent watering, so monitor them daily. Pruning is also necessary to keep petunias happy and healthy. Every week you must trim back leggy stems to keep bloom production high.
If you live in cooler regions, petunias will die once the first frost hits in the late fall. If you live in warmer regions, you can expect your petunias to bloom continuously all year long. No matter where you grow petunias, they all need the same basic requirements to thrive.