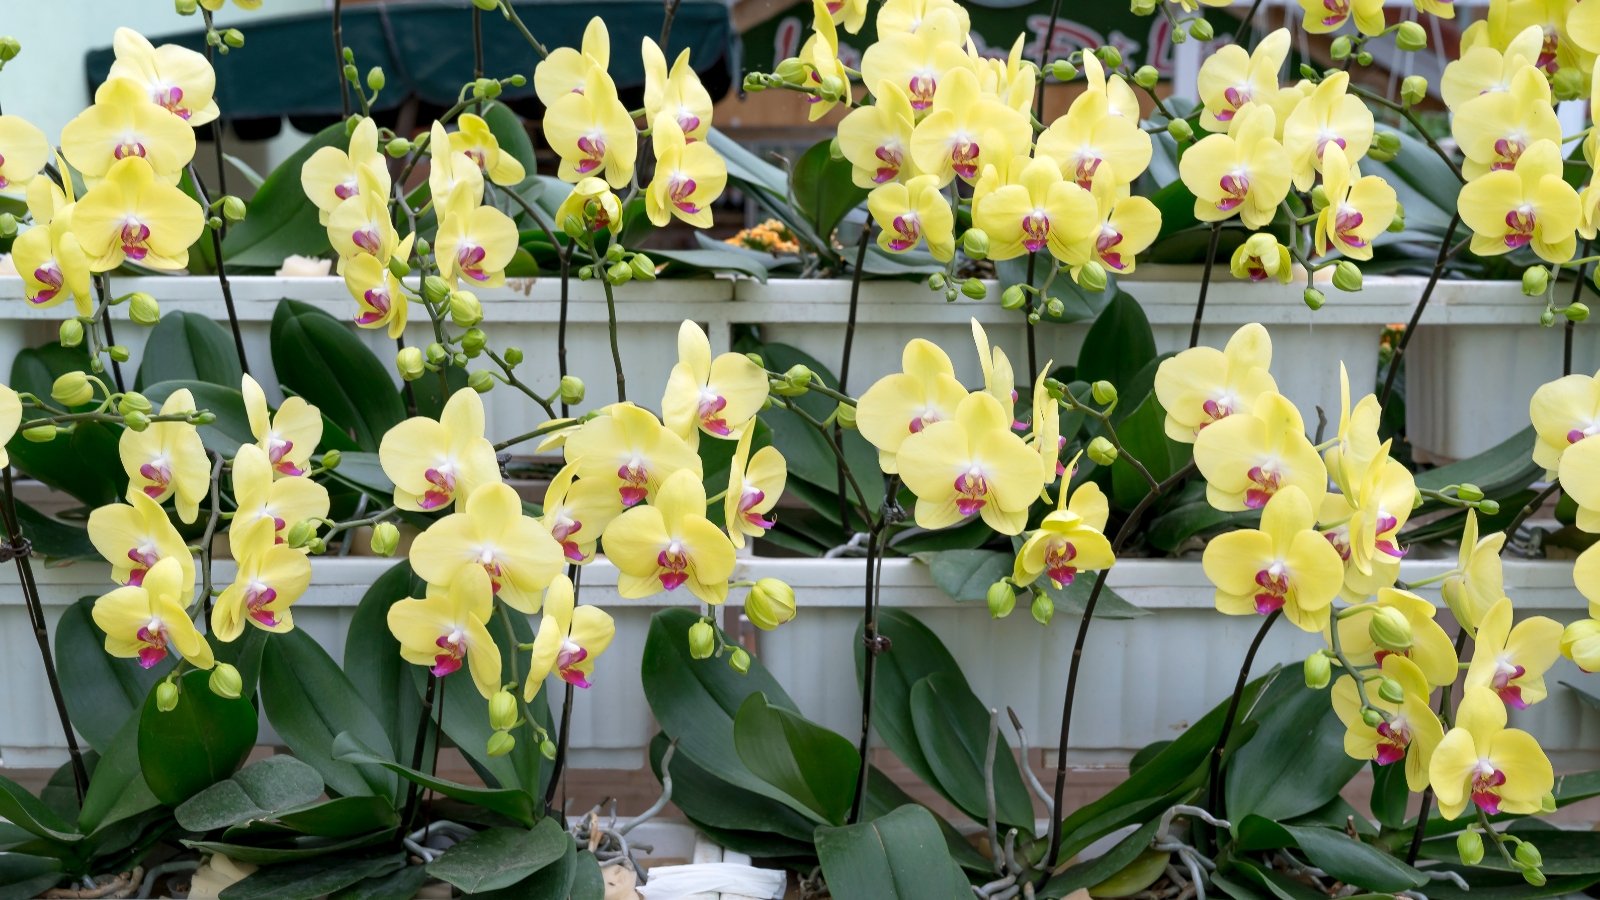
How to Grow Orchids in Water
Orchids and water have a complicated relationship in captivity. But did you know that you can indeed grow your orchids hydroponically? Gardening expert Melissa Strauss walks through ways to do it!

Contents
The idea of growing orchids in liquid stands in contrast to much of what we know about keeping orchid roots happy and healthy. Overwatering is the fastest route to root rot, which is the leading killer of cultivated orchids.
However, hydroponics is becoming an increasingly popular method of growing these tropical epiphytes. If done properly, it just might be a good solution for anyone struggling with the health of their plant, especially if you’ve had a difficult time using traditional potting methods and mediums.
When we talk about hydroponics in orchid cultivation, there are three different methods. Each has its own benefits and drawbacks. Switching over to any of these methods from traditional cultivation can initially be costly and labor-intensive. But, it can also be advantageous in the long run.
There are three methods that fall under the umbrella of orchid hydroponics. They are Semi-hydroponic, semi-hydroponic culture, and full-water culture. Semi-hydroponics involves using a moisture-holding substrate. Semi-and full-water culture involves immersing orchid roots in a cyclical fashion or full-time. Let’s take a look at these three methods and weigh the pros and cons of growing orchids in water.
Semi-Hydroponics
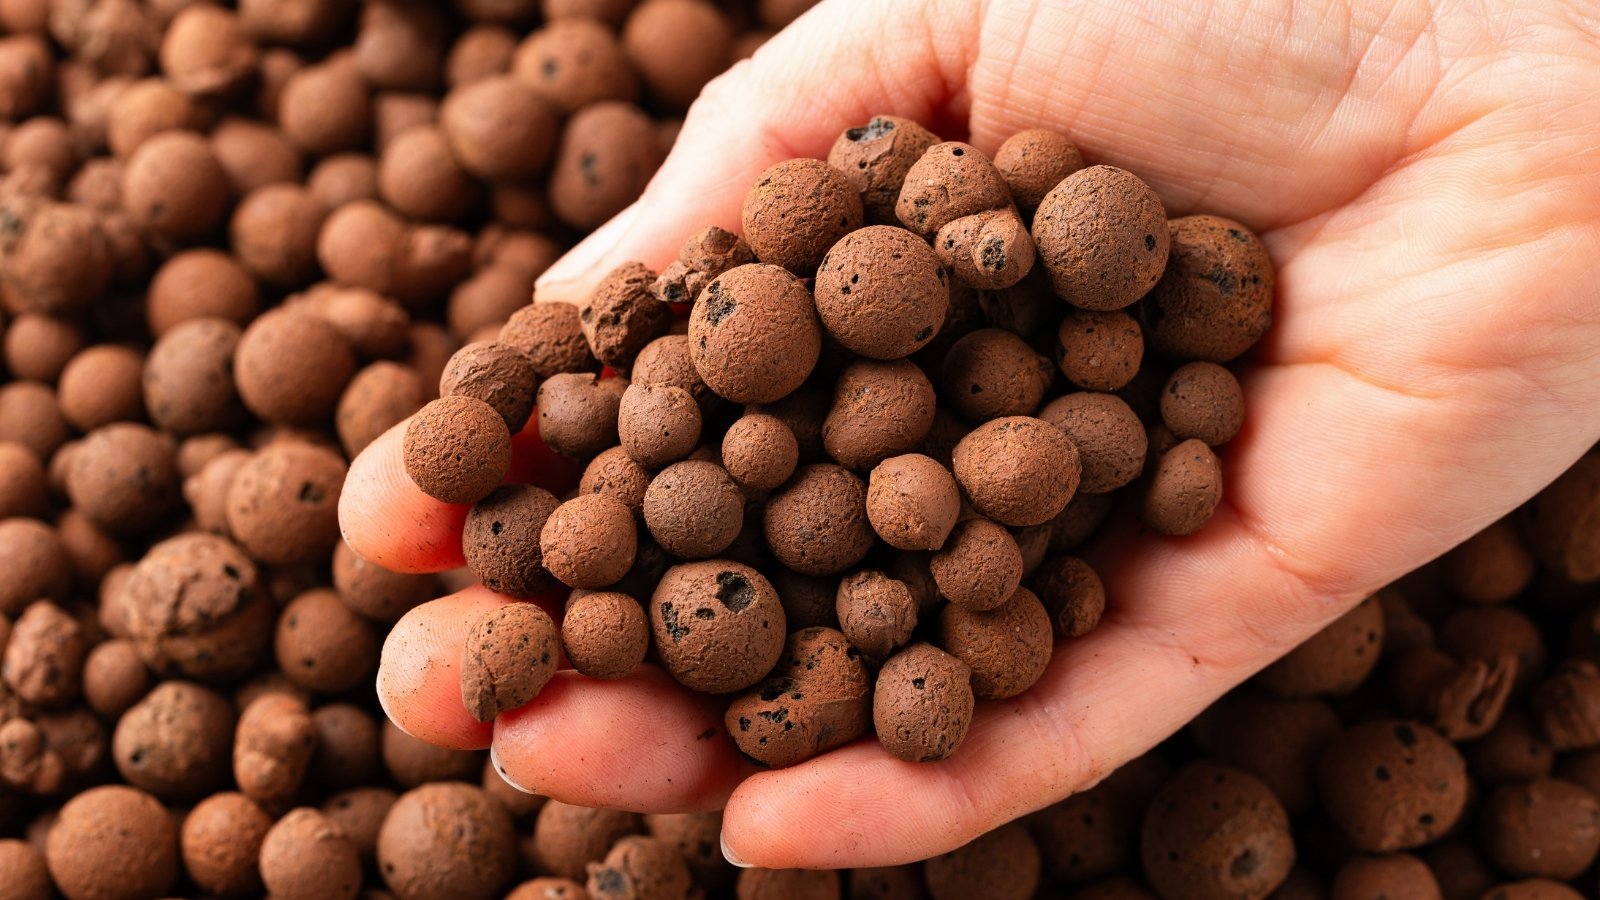
Growing semi-hydroponically involves using a potting medium that holds a lot of liquid but won’t compact over time or break down. The most popular material to use is LECA (Lightweight expanded clay aggregate) pellets. These pellets hold moisture, which hydrates the plant’s roots. Since they are non-compacting, they still allow for plenty of air circulation inside the container.
Most of what we know about orchid care tells us that it is vital to the health of the plant to keep its roots from remaining wet. The idea that they can sit on a substrate that holds a lot of moisture probably doesn’t make much sense. However, the science behind it is surprisingly logical. It just might be one of the best ways to prevent root rot in orchids.
LECA pellets do not decay. For that reason, they are superior to bark mix or other soil types in preventing fungus and root rot. Let’s look at how to carry out this process at home and then discuss the pros and cons of using this method. I highly recommend starting with a phalaenopsis, as they are very resilient and have nice strong roots.

How to Do It
There are a few different methods used for keeping the LECA moist. You also want to keep the roots from sitting in liquid. One method is by using a self-irrigating pot, which may give more options in terms of design.
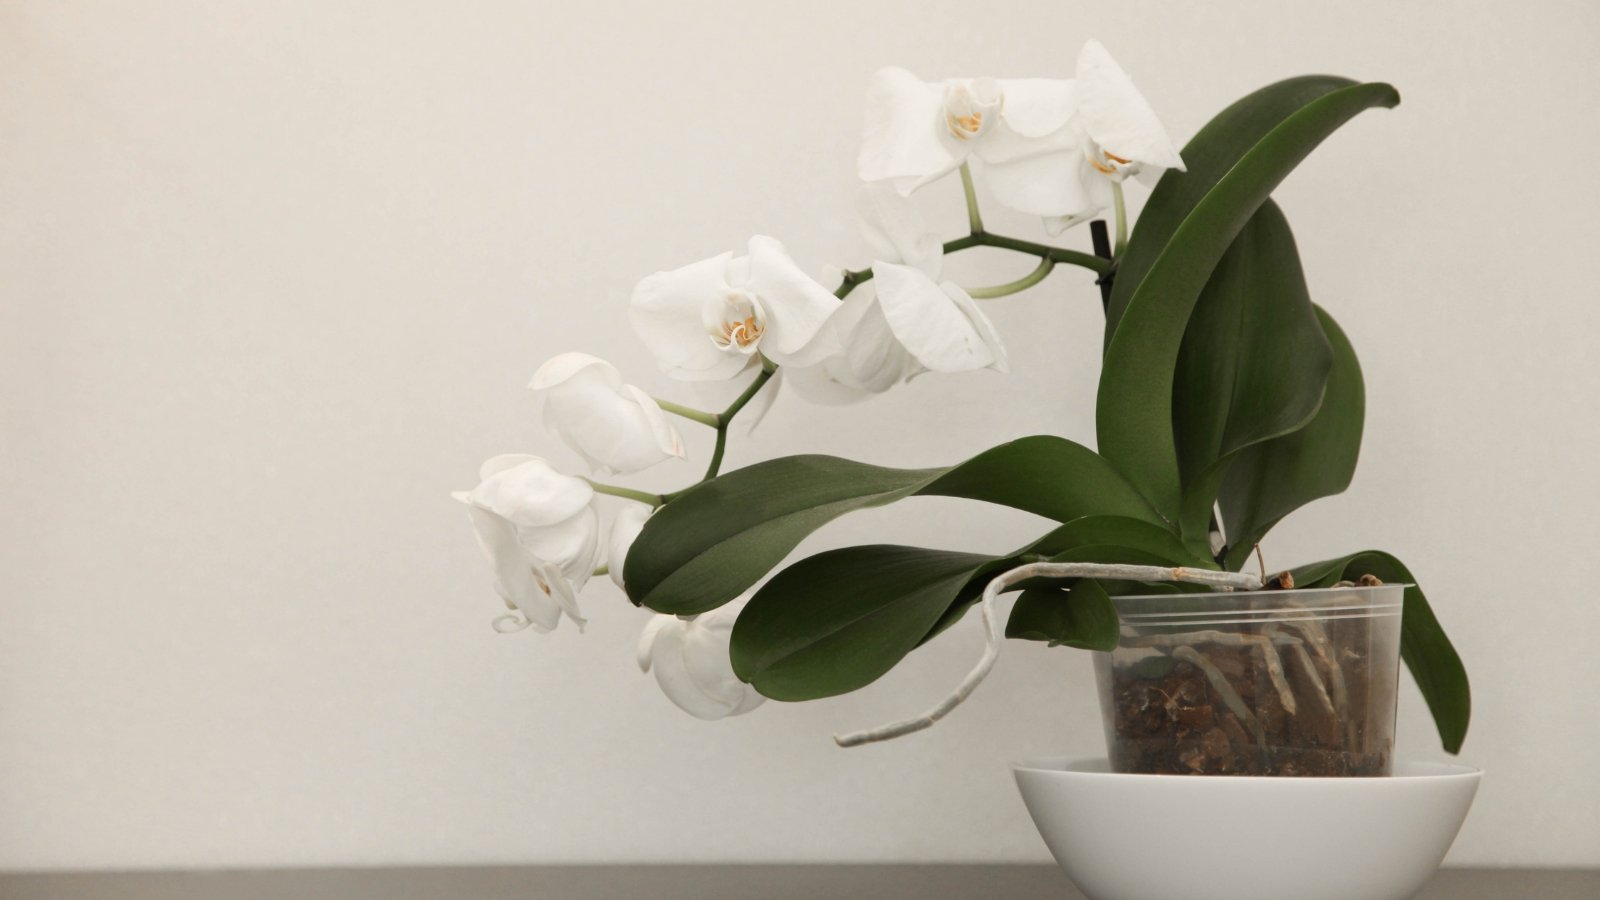
However, one of the advantages of potting with LECA is being able to see the entire plant. A clear plastic nursery pot and an outer pot or dish without drainage holes are very convenient for this purpose. A glass container works as well.
Some gardeners use synthetic wicks to bring the liquid up into the LECA without allowing the roots to touch the standing water. This is also an effective method. When choosing your container, consider the accessibility of a clear pot. You can place it in a more decorative container for appearance purposes. This makes it much easier to monitor the health of your orchids.
Materials:
- LECA pellets
- Clean tepid water
- Root stimulator
- Clear plastic pot with holes
- Drainage-free pot or bowl
- Hydroponic fertilizer
- Clean tool for cutting damaged roots
- Prepare your LECA pellets by rinsing them thoroughly with fresh, clean water. Then, fill a container and allow the pellets to soak for 24-48 hours. This cleans the pellets and maximizes their moisture-holding capacity. Add a tablespoon of root stimulator. The LECA will absorb it, and it will help your plant adapt to its new environment.
- Prepare your orchid by soaking the container in water for 20 minutes. This makes it easier to remove the potting medium without damaging the roots.
- Remove the root ball from the container and clean all the old potting mix out by hand so that there is no other organic matter in the pot. Leaving bits of potting mix attached can cause fungal disease and rot.
- Rinse the roots in room temperature water and inspect for any damage. If there are rotten or damaged portions, use a clean, sharp tool to remove them.
- Pour a small amount of LECA pellets into the bottom of the clear pot. Then, place the orchid’s roots into the pot and fill in. They should not touch the bottom of the pot, or they will sit in liquid, which can lead to rot.
- Place the clear pot into the drainage-free container and water so that the bottom layer of LECA pellets is touching the liquid. Make sure the roots of the orchid are not touching the liquid. They will grow down into the liquid over time, but initially, they should not touch it.
- When you water your plant going forward, be sure to use fertilizer made for hydroponics. These nutrients are available to the plant without breaking down in potting soil. Only water your orchid every 2-3 weeks, depending on the humidity of the surrounding air. They are heavy feeders, so you can use fertilizer every time you add liquid.
- Place your plant in a spot that gets filtered sunlight for most of the day. The amount of sun an orchid needs varies by genus and species. Some orchids prefer a few hours of direct sunlight in the morning, while others tolerate no direct sun at all.
- Every few months, remove the inner pot and flush the LECA pellets with clean water to remove any fertilizer buildup. Too much fertilizer can cause root burn, which is bad for the plant.
Benefits
There are some valuable benefits to this type of growing that minimize many of the issues we run into with orchid care.
Less Repotting
This method of potting means less repotting, which means less damage to the roots over time. Orchids do not like frequent re-potting as it damages their velamen. The velamen is a delicate protective coating on the roots. When damaged, it creates a vulnerability to fungus and bacteria.
Repotting will inevitably damage some velamen. You have to pry the roots away from the pot and potting media in order to exchange them for new ones. With semi-hydroponic potting, you don’t have to re-pot, ever. You can use a larger container than needed, and the orchid can grow in the same substrate, indefinitely.
Easy to Monitor Root Health
In semi-hydroponic potting, you use a clear plastic or glass container. This makes it much easier to monitor the health of your orchid’s roots. Being able to see them means that there is no wondering whether your roots are healthy!
Potting in conventional bark mix conceals the roots from view. If there is an issue with rot, it’s common to have no idea until the rot reaches the rhizome and crown. By this time, rot almost inevitably means whole plant death.
Better Air Circulation
In their native habitat, orchid roots are fully exposed to the air. This drastically reduces the growth of negative pathogens. Maintaining proper air circulation around them is one of the most vital elements to growing healthy orchids.
An issue with traditional potting methods is the decaying of the potting medium. If you water the bark mix too frequently, moisture will break down the material and create a perfect host for fungus. As the potting mix breaks down, it stays wet, which leads to overwatering. Decayed bark mix compacts, creating a damp environment and a lack of proper air circulation. LECA pellets do not decay, so they do not compact. These pellets maintain their shape and allow the roots to breathe.
Less Frequent Watering
Because of their need for air circulation, orchids need weekly watering to absorb enough moisture. LECA takes the guesswork out of this.
LECA absorbs moisture and nutrients and delivers them as needed. It’s easy to tell when the LECA pellets have absorbed all the moisture in the pot, so it’s easier to know when to add more.
Keeps Pests to a Minimum
Because LECA does not decompose, pests are not as attracted to it. LECA is sterile, so it contains no nutrients for pests to feed on. In general, the porosity and lack of nutrients make LECA an inhospitable environment for pests.
Drawbacks
While there are some great reasons to give this method a try, it’s not without its own issues.
Specialty Fertilizer
LECA contains no nutrients of its own. Regular fertilizers are not efficient in meeting the nutritional needs of orchids when used in this manner.
These plants need a fair amount of fertilizer, regardless of how you pot them. Using standard fertilizer is effective when they are in bark mix, but in semi-hydroponic potting, they need fertilizers formulated for hydroponics.
Increased Initial Cost and Effort
LECA is more expensive than other potting mixes. If you are looking to pot multiple plants, the expense can add up quickly. With LECA costing up to 3 and 4 times more than standard orchid bark, it needs to last 3 to 4 times as long to make up for the cost.
Fortunately, unlike orchid bark, you can reuse LECA. Over time, the cost of LECA is offset. Plants potted this way do not need regular re-potting with new media.
LECA requires more effort initially, as well. With standard potting mixes, there is very little preparation involved in potting. You’ll need to rinse your pellets thoroughly before use. In order to be most effective, you should soak them overnight.
Less Variation in Potting Design
Standard orchid pots have a lot of drainage holes in them. They also come in many sizes, shapes, and colors. These pots will not work for use with LECA as a potting medium. LECA needs a container that holds liquid in the bottom. There is, however, a wide range of options for an outer container. By using an inner and outer container is easy to change the look of the plant without actually repotting.
Our Conclusion
I find this method a healthy and valuable way to grow orchids. However, I don’t recommend experimenting with alternative care methods for the first time using your favorite orchid. Phalaenopsis orchids tend to be less expensive than most types of orchids, and their sturdy roots adapt better to change. This makes them an excellent choice for experimenting with new care methods.
Growing orchids using the semi-hydroponic method enables you to view the plant’s roots more easily. It also makes it easier to avoid pests and eliminates organic matter in the potting mix. This can decay and lead to root rot. In the long term, Semi-hydroponic planting also means less repotting. That can save money by eliminating the need to purchase a new potting mix.
On the downside, the start-up cost is higher than using traditional methods. There is some additional time and effort initially, as well. Whether the benefits outweigh the drawbacks is a personal choice. But, this method is intriguing and shows merit, particularly for orchid growers who tend to overwater and struggle with root rot.

Semi-Water Culture
Semi-water culture involves the cyclical immersion and removal of orchid roots from the liquid. The roots of the orchid stay submerged for a period of time, usually between two to five days. Then, they’re removed and allowed to be fully exposed to the air for a similar window.
The main advantage of semi-water culture is the drastic reduction in pathogens that can be present in the soil. This is what causes rot. The pros are very similar to those of semi-hydroponics. The cons are slightly different.
How to Do It
This method requires a bit more time on a week-to-week basis. However, it’s simpler than semi-hydroponic cultivation in a general sense. The most complicated element of semi-water culture is deciding how long your intervals should be.
Materials:
- Glass jar
- Hydroponic fertilizer
- Clean tepid water
- Root Stimulator
- Clean tool for cutting damaged roots
- Please see how to remove your orchid from its pot above in the section on semi-hydroponics. It is important to soak the pot for a few minutes before attempting to remove the potting mix, especially if it’s intertwined with the orchid’s roots. Soaking makes them makes them more pliable.
- Trim away any rotted or damaged root tissue. This helps to avoid leaving fungus to spread.
- Place the orchid’s roots into the glass jar or bowl that you have selected. Fill around the orchid with your root stimulator and liquid solution. Do not fill higher than the roots or submerge the leaves or crown, or you could end up with crown rot. Always avoid letting moisture pool in the crown and leaves of the plant.
- After your predetermined amount of time, empty the liquid from the container. You can let the roots stay in the empty container for your drying period.
- Repeat.
That’s basically it. Add fertilizer to the liquid instead of a root stimulator during subsequent soaking periods.
Benefits
The benefits of semi-water culture are similar to those afforded by semi-hydroponics with the exception of expense. This method will require less start-up cost.
Easy to Monitor Root Health
Even more so than in semi-hydroponics, the roots of your orchid will be very easy to monitor using semi-water culture. Regular removal from the liquid allows for up-close and personal inspection of the entire plant.
Reduces Pathogens
The complete absence of potting media means less opportunity to introduce pathogens, which cause root rot. This fungal infection typically begins with the potting medium breaking down and decaying in the potting mix. Without the presence of potting media, there is no material to cause this decay and infect the roots.
Low Cost
There are no major expenses in switching to semi-water culture. All you need is a glass jar and hydroponic fertilizer. Over time, this saves the expense of repotting the orchid. It also avoids the expense of LECA pellets used in semi-hydroponic cultivation.
Increased Humidity
The moisture surrounding the roots acts similarly to a pebble tray. As it evaporates, it raises the humidity around the foliage of the plant. Orchids need humidity to thrive, and this simplifies the process.
Drawbacks
When it comes to semi-hydroponics, the downsides are usually related to the amount of effort you’ll need to put in.
High Maintenance
This is the most high-maintenance of the hydroponic options. This is due to cycling the plant back and forth into and out of the liquid. With semi-hydroponics, maintenance is reduced to once every 2-3 weeks. Semi-water culture requires tending to your orchid at least twice weekly. However, automatic waterers are commercially available. This will solve this issue if you don’t mind the investment.
Root Burn
One disadvantage of a completely exposed root system is that it can burn if given too much sun. Roots that have the shelter of orchid bark or LECA pellets have some added protection from the sun. The flip side of this is that the roots of most orchids participate in photosynthesis. The increased exposure can mean more and healthier growth.
Specialty Fertilizing
As with semi-hydroponics, regular fertilizer will not work with this method. Standard fertilizers require soil, specifically the right pH, to break down and become available for the plant. Because there is no soil used in semi-water culture, hydroponic fertilizer is necessary.
Difficult to Support Plants
Orchids grown in this way are at a distinct disadvantage as they grow larger and heavier. The lack of substrate means that there is nothing to anchor a support to. It is, however, easy enough to move to a larger container without damaging the plant, as repotting often does.
Our Conclusion
This method is simple and straightforward. If you’re good at keeping to a schedule and not prone to missing a watering, semi-water culture is mostly inexpensive. It’s a simple way to cultivate orchids. Just make sure to keep your plant out of direct sunlight. This helps to avoid damaging vulnerable, exposed roots.
Full Water Culture

Full-water culture is similar to semi-water culture, with one main difference. In this culture, the plant doesn’t go through the cycle of soaking and drying out. Rather, it remains in the liquid all the time.
The key factor in this method is that the roots are never fully immersed in the liquid. The bottom ¼ is in the water, and the remainder stays in the glass container. There, they are exposed to the humidity produced by evaporation, but they are not submerged. This essentially allows the orchid to take in the moisture it needs but lowers the risk of molding roots.
This method works best with phalaenopsis orchids. Some other types of orchids may not tolerate the method as well. I recommend that if you’re going to try any of these methods, a phalaenopsis orchid is a great and cost-effective place to start.
How to Do It
Materials:
- Glass jar
- Hydroponic fertilizer
- Clean tepid water
- Root Stimulator
- Clean tool for cutting damaged roots
- Soak the orchid pot for several minutes. This makes the roots flexible and pliable.
- Remove the orchid from its pot and gently loosen and remove all potting medium from the root system.
- Use a clean, sharp tool to remove any damaged or rotted tissue, as these can cause fungus to grow in the liquid.
- Place the orchid’s roots into the glass jar and fill the jar with water and root stimulator solution. Only fill so that ¼ of the roots are in the liquid. Leave the rest of the root system above the liquid level.
- As the liquid evaporates, refill the container with the hydroponic fertilizer solution.
Benefits
As with both prior methods, if you’re able to make it work for you, full-water culture offers some great advantages.
Low Maintenance
This method is very low maintenance. The orchid remains in its container, and the liquid evaporates. This creates the humidity that orchids thrive in. You simply refill the container, submerging about ¼ of the root system.
Inexpensive
As with semi-, with full-water culture, you save money immediately on potting media. There is no need for it. All you need is a glass jar and some room-temperature water. With all methods, distilled or rainwater is best, as many municipalities add chemicals.
Easy to Monitor Root Health
The use of a glass container, once again, makes it easy to keep an eye on the roots of your orchid. Since these are the most vulnerable parts of the plant, this means you will be able to catch any issues early on.
Reduced Pathogens and Pests
The lack of potting mix means less opportunity for decay. Many common pests also take up residence in an orchid bark mix. These methods drastically reduce the occurrence of pests and diseases.
Increased Humidity
With all three methods, there is the added benefit of humidity as a result of evaporation.
Drawbacks
Of course, none of these methods is without difficulties, it’s important to weigh them wisely and then make an educated decision.
Root Burn
As with semi-water culture, the added exposure of the roots can be a negative factor. This is easy to solve by making sure to place your orchid in a spot with lots of indirect sunlight.
Specialty Fertilizer
There is no soil to break down standard fertilizer making it available for the orchid’s use. Hydroponic fertilizers are necessary with this method as well.
Difficult to Support Plants
No potting media means nothing to secure support to. As your orchid gets larger and heavier, it may be difficult to keep it from falling over. A solution to this is to add stones to the bottom of the glass container. Just make sure you sterilize well beforehand, or you risk introducing pathogens.
Our Conclusion
Full-water culture operates on the idea that the orchid will take in the moisture it needs through the bottom ¼ of its root system. The rest of the roots get proper air circulation. They also benefit from the added humidity as the liquid evaporates around them.
As with semi-water culture, be careful about direct sun exposure on exposed roots. Full-water culture takes some work out of the equation. It necessitates only watering every few weeks or when the liquid level appears to need refilling. Using a glass jar takes the guesswork out of watering, as you will be able to see when the level drops.
Key Takeaways
With all three methods, we recommend starting out using a phalaenopsis orchid. These tend to take to growing in water more naturally than other types of orchids. Be sure to thoroughly clean containers and tools to avoid introducing contaminants. For the best results, distilled or rainwater is preferable to tap.
All three methods of hydroponic orchid cultivation have their merits. All should, ostensibly, help to prevent some of the main issues that orchids face when cultivated indoors. These methods remove the potting mix which can decay and play host to pests and harmful pathogens. They also provide the plant with a cleaner environment and plenty of humidity. But they all have drawbacks too.


