A Comprehensive Guide to Growing Mushrooms in Raised Beds
Astonishingly, you can grow mushrooms and vegetables in the same raised garden bed! Join garden expert and former organic farmer Logan Hailey to learn how to grow edible mushrooms in raised beds.


Contents
You don’t need a green thumb to grow fungal fruits—mushrooms can thrive in decomposing mulch in nearly any part of your garden, including raised beds. In contrast to complex indoor cultivation, outdoor mushroom beds only require simple, readily available supplies, including spawn, wood chips or straw, and consistent moisture.
Pre-inoculated grain spawn or sawdust spawn make “planting” a fungal bed a quick and easy task. Spawn is a fancy word for a living mushroom culture, sort of like a bread yeast or kombucha SCOBY, except it is growing on grain or sawdust.
Depending on the species, you can expect spawn-inoculated beds to fruit in as little as two months under the right conditions. As long as there is organic matter to decompose, these edible fungi will continue yielding for years to come.
Let’s dig into exactly how you can grow your very own edible mushrooms in raised garden beds!
Epic Organic Garden Straw
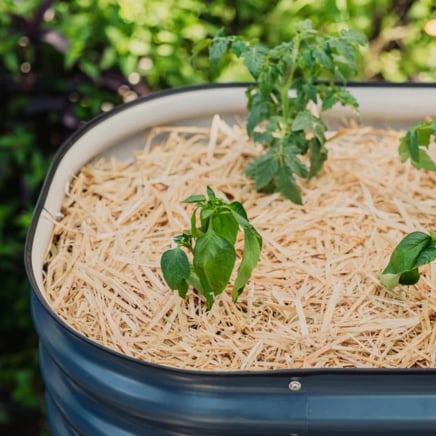
Epic Organic Garden Straw is a weed seed-free mulch that helps create a healthier, more resilient garden. It locks in moisture, blocks weeds, and regulates soil temperature, giving your plants the stable environment they need to thrive, without introducing unwanted seeds or chemicals.
Buy at Epic Gardening Shop
Can You Grow Mushrooms in Raised Beds?
Mushrooms are an excellent addition to outdoor raised bed gardens, offering delightful culinary treats and soil enrichment for nearby plants. Wine caps, oysters, and Agaricus are popular species for outdoor inoculation, readily colonizing straw or wood chip mulch and yielding for months or years to come.
8 Steps to Grow Mushrooms in Raised Beds
Cultivating edible fungi isn’t as intimidating as it sounds. In some cases, it’s even easier than vegetables and flowers! Here’s all you need to know to get started with outdoor mushroom cultivation in new or existing raised beds.
Choose Your Species

Fast-growing, cold-tolerant fungi are generally the best species for outdoor growing. The fungus must have a strong mycelium that can spread over decomposing organic matter quickly and withstand cooler nights if you live in a northern climate.
The most popular beginner-friendly species include:
Wine Caps
Stropharia rugosoannulata is by far the easiest variety to grow outside, and it is unavailable in grocery stores! The tasty treat is sometimes nicknamed “Garden Giant” because the caps can grow as large as dinner plates! The robust fungus tolerates many types of woody materials and outdoor conditions, fruiting as quickly as two months after inoculation.
Oysters
Pleurotus spp. come in many varieties, including pink, blue, and golden oyster mushrooms. Most types have competitive growth habits and adapt to a wide range of temperatures. They can grow on invasive species like knotweed or standard decomposing material like coffee grounds.
Almond Agaricus
This warm-weather species grows rapidly and works well in beds or containers as a companion to heat-loving vegetables like peppers, tomatoes, and squash. It requires loamy, rich garden soil and daytime temperatures around 70°F (21°C).
Both sawdust and grain spawn are suitable methods for inoculating your beds with these fungi.
Prep the Area

Before you get started, be sure to clear the soil of weeds, plants, and debris. It’s best to start with bare ground so you can easily layer on the organic material and spawn. Wine caps actually prefer direct contact with the soil, so if you are using an existing raised bed, be sure that mulch is also cleared.
If you are building a new bed, fill it with a blend of garden soil and compost, or follow the directions below for sheet mulching.
Build a “Lasagna” Bed

Lasagna gardening is a common method used in vegetable production. It involves stacking or “sheet mulching” different layers of organic materials like a garden lasagna. The process for fungi is similar, but it focuses on alternating mushroom spawn with substrate (the biodegradable material that the fungus grows on and “eats”).
Substrates can include:
- Straw (ensure it’s weed-free and herbicide-free; don’t use hay)
- Wood chips (freshly cut is ideal to ensure other fungi aren’t growing on them)
- Peat moss
- Coco coir
- Cardboard
First, lay the cardboard down to suppress weeds, then spread the first layer of substrate about one inch deep.
Inoculate With Mushroom Spawn

Next, use a bucket or tarp to break up your mushroom spawn block into small chunks. Crumbling between your palms is perfect as long as you break down any large pieces. Sprinkle the spawn over the first layer of substrate.
Add a second layer of material two inches thick. Wood chips and straw are the easiest.
Sprinkle more spawn and repeat the layering process until you run out of inoculant and fill your raised bed height. Add a final layer of decomposed material on the top to protect the spawn from blowing away or drying out.
Maintain Moisture

Mushrooms love moisture and outdoor raised beds are particularly vulnerable to drying out when exposed to the elements. You must ensure consistent moisture to allow the mycelium (mushroom roots) to colonize the substrate.
Water generously on the first day and check the moisture every day after. Never let the bed dry out! It is particularly important to irrigate regularly during the first few weeks while the spawn is inoculating and spreading. In hot climates, you may spread a tarp over the bed to keep it from drying out in the sun.
Still, the area should never be soaking wet or soggy. Too much water can promote the growth of unwanted fungi and bacteria that may compete with your desired edible species.
Check for Mycelium

After a few weeks, raised mushroom beds won’t require much maintenance aside from occasional watering during drought. You can examine the deeper layers to see if white, thread-like mycelium has colonized the material and started growing throughout the substrate. This is a positive sign that your fungus will begin fruiting soon!
Harvest Regularly

Wait about two to three months before your first mushroom harvest. Wine caps and Agaricus may poke caps above the ground around this time. They begin as tiny little “pins,” or mini mushrooms that poke up from the wood chips or straw. As these mature, they can grow to large caps for harvesting.
If you don’t see any fruits yet, remember that oysters require temperatures above 50°F (10°C) and Agaricus require temperatures above 70°F (21°C) to fruit properly. Wine caps are much more cold-tolerant.
Once caps reach a desired size, cut them off at the base of their stems and enjoy in your kitchen! Mushrooms are excellent in sautes and roasts, or tossed on the grill for a yummy burger topping. They can also be dried for later use in soups and stocks.
Add Woody Material Annually

Ensure continuous fruiting by adding an annual dose of wood chips to keep “feeding” fungal growth. Fungi are decomposers that rely on organic material as their food source. Once they have inoculated and fully colonized a bed, they need more woody material to break down.
Add a few inches of new wood chips to the top of the bed at least once per year to prolong harvests and maintain a layer of moisture-sealing mulch.


