How to Grow the Ultimate Survival Garden
Do you want to grow the ultimate survival garden to prepare for tough times? Having a flourishing edible garden in your home is one of the best ways to stay prepared for turmoil. In this article, horticulture expert Matt Dursum shows you the steps to creating a sustainable food system built for hard times.


Contents
Gardens give us beauty, a boost in mental health, and peace of mind. They also give us plenty of fresh, nutritionally dense food. We’ll especially appreciate these gardening benefits during hard times.
You can design a survival garden to get you through anything, whether financial hardships, personal tragedies, pandemics, or a zombie apocalypse. Having a thriving ecosystem of edible plants, flowers, and hedge protection will help you sleep better at night.
Survival gardens combine various plants that work together to produce food and medicine while keeping pests and diseases at bay. No matter how much space you have, you can create one easily.
Let’s dive into the steps below to grow the perfect survival garden for your home. You’ll learn about the best crops and how to get the most out of them.


Step 1: Find the Perfect Space

The first step is finding the right growing space for your survival garden. Areas with bright natural light are ideal. You also want a space that doesn’t flood or become waterlogged when it rains.
Look for an area with partial shade on one side and bright, direct sun on the other. You can also get a soil test to know your soil type and quality.
With vertical planters, garden beds, and hanging gardens, you don’t need a lot of space. Almost any area with sun can grow plants, so get creative.
Step 2: Understand Your Climate

Survival gardens rely on perennials as much as possible. Planting annuals takes a lot of work and you want accessible food as long as possible. To understand what will grow year-round and the ideal times to plant annuals, you have to know your climate.
For growing plants, the most important pieces of information are your USDA Hardiness Zone and your frost dates. The USDA developed zones to tell farmers and gardeners what can grow in their area. They organized the U.S. based on average annual minimum temperatures and assigned these areas a number between 1 and 13. Your first and last frost dates give you a good idea of how long your growing season is, which informs what you can grow.
If you live in tropical and subtropical areas between 9 and 13, you can grow almost anything throughout the year. Areas in zones 3 to 7, such as the Midwest, have to rely on hardy perennials and annuals.
Step 3: Meet Other Gardeners in Your Area

During hard times in my area, many communities worked together to grow food. Experienced gardeners gave tips and helped other people prepare for the worst. We exchanged produce, seeds, and knowledge throughout the ordeal. We also formed bonds over gardening that are still going strong.
Having a community looking after each other is key to survival. Talk to other gardeners and learn as much as you can. Experienced locals will know which plants thrive in your area. You’ll also learn new preservation methods, gardening tricks, and recipes. You’ll also help others create impressive food systems in their homes.
Step 4: Draw Up Your Ideal Setup

Draw your ideal setup on a piece of paper. Consider how many people you’re planning to feed. Are you growing food for yourself, your family, or the entire neighborhood?
Decide which layout works best for your space. You want to utilize as much space as possible. Leave room for walkways and mark the areas that get the most sun. Record areas with afternoon shade and parts of your garden with little to no sun exposure for growing mushrooms.
Once you have your ideal setup planned, it’s time to choose your survival crops. Prioritize crops that maximize nutrition, calories, and practicality. Grow foods that don’t perish quickly. You’ll also want plenty of flowers, ground cover, and disease-resistant hedges for protection.
Step 5: Choose Your Fruits and Vegetables

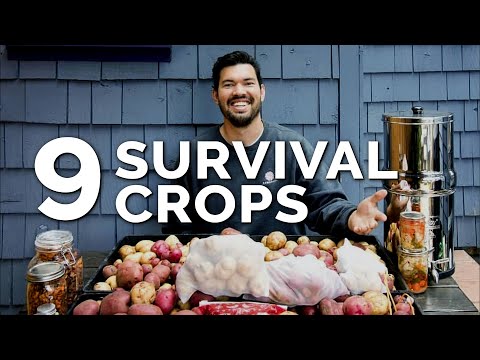
Prioritize foods that are full of sugars, starches, and calories. Survival gardens are there for survival, not growing gourmet ingredients. Foods such as potatoes, sunchokes, berries, and sunflowers are packed with carbs and healthy fats. If it’s a survival situation, you’ll need all the energy you can get out of your crops.
Use time-tested techniques such as three sisters gardening. This ancient form of horticulture uses corn, squash, and beans together to create the perfect setup. The squash provides natural mulch and improves moisture retention in the soil. The beans use the corn as a trellis and infuse nitrogen in the soil with the help of good bacteria.
Don’t grow anything that’s considered fussy. You also want to leave out species that won’t thrive in your area. Choose pest and disease-resistant varieties whenever possible.

Step 6: Select Medicinal Varieties

In a survival situation, you’ll need access to medicine. While it takes a PhD-level education to be an expert in botanical medicine, there are easy things we can grow and use.
Plant tons of herbs, such as mint, cilantro, oregano, and fennel. These nutritious plants are packed with antioxidants, vitamins, and minerals and make cold-fighting teas. Flowers such as echinacea, lavender, and borage offer wide-ranging healing properties.
Plant aloe vera for your skin and wild edible weeds like stinging nettle. Prioritize weeds, such as dandelions, for their antioxidant and anti-inflammatory properties.
Step 7: Don’t Forget Flowers!

Your sustainable ecosystem needs pollinators to flourish. The best way to attract them is by planting as many flowers as you can.
In a survival garden, you want to grow plants with multiple uses. Fortunately, some of the best pollinator-attracting flower species are edible. Nasturtiums, sweet peas, and roses are attractive to bees and hummingbirds and taste amazing. They are full of antioxidants, flavor, and nutritional value, making them indispensable for any survival garden.
Besides attracting pollinators and being sources of food and medicine, flowers improve our mood. In a survival situation, flowers can help keep morale up.
Step 8: Add Hedges

Hedges work as natural barriers between you and your garden and the outside world. They keep critters such as deer from ravaging your crops. They also help organize your space and give you peace of mind.
Plant species with thorns and natural defenses, such as rose bushes. Prioritize disease-resistant native species such as spruces. These plants won’t attract pests, and many produce pollinator-attracting flowers.
Some plants work as hedges and food sources. Blackberries, roses, blueberries, and elderberries are all great examples.
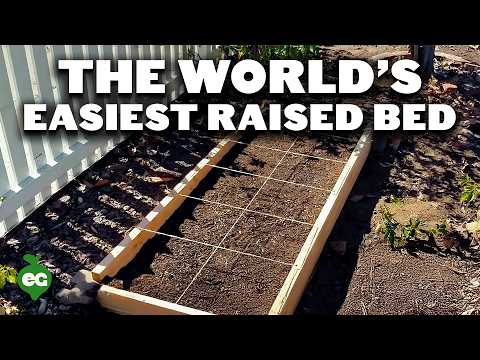
Step 9: Start Building Your Beds

Instead of digging directly into your soil, consider buying or building garden beds. Beds keep your plants in an organized space. They provide natural walkways and bring your crops closer to eye level. They also help keep pests and weeds away.
Align your beds facing south so sun-loving plants get the most direct sunshine. Fill them with well-drained soil and add a layer of mulch to seal in moisture. Introduce helpful critters such as earthworms to break down dead organic matter into healthy soil.
If you live in colder regions, consider designing row covers or garden hoops to protect your crops from frosts. You can even build or buy a greenhouse if you have the space and budget.
Step 10: Add Containers and Vertical Planters

Besides beds, try adding containers and vertical planters like this one. This helps save space and organizes your plants. Containers are great for growing larger plants, such as blackberries, that can grow out of control. They also help protect species that suffer from soil diseases or are picky with their growing mediums.
Try using grow bags for potatoes and hanging pots for nasturtiums and peas. Vertical planters are ideal for leafy greens and small herbs.
Containers give you the freedom to grow plants anywhere, even on your roof! In a survival situation, having the ability to use all available space is key.
Step 11: Use Taller Plants as Trellises

Taller plants such as sunflowers, corn, and fruit trees make great trellises for species that climb, creating more growing space in your survival garden. Peas, beans, passionfruit, raspberries, and cucumber all love to climb. They will wrap themselves around the trunks, stalks, and branches of taller species.
Taller plants also provide shade to shade-loving ground cover. They give pest-eating birds a home and also work as hedges.
Try growing edible fruits such as stonefruits, mulberries, pomegranates, and walnuts around your property. They’ll give you tons of nutritious food and provide shade.

Step 12: Add Edible Ground Cover

Edible ground covers such as strawberries, purslane, and dandelions are arguably the most important ingredients to making the ultimate survival garden. They lock in moisture in the soil by creating a natural mulch. This saves water and creates a protected habitat for soil-building critters such as earthworms.
Just because they’re small doesn’t mean they’re insignificant sources of food. These species are some of the most nutrition-packed food sources on the planet. Purslane, for example, is full of anti-inflammatory, antioxidant, and anti-hyperglycemic properties. It’s also full of vitamins and minerals.
Step 13: Compost

Composting is essential for a sustainable food system. It works by providing an enclosed habitat for microbes that convert food and plant waste into organic soil. Compost bins, composting piles, or tumblers work great.
For healthy compost, you want to get the right balance of nitrogen, carbon, and microbes. To do this, add a blend of green waste—vegetable scraps, grass trimmings, etc., and brown waste—dead leaves, pine needles, etc.. Mix your compost well once or twice a week.
After a few months to a year, your pile will break down, creating nutritious food for your plants. Collect kitchen scraps and dead plant material from your yard and add them to the pile. Try vermicomposting by cultivating tons of earthworms in your compost.
Step 14: Have Methods for Preserving Your Food

Whether it’s freezing, drying, canning, or fermenting, food storage is one of the first issues you’ll run into. If you produce a bounty, have a good system in place to store and preserve your food for future use.
Freezing works for leafy greens and fruit. Dry your herbs, beans, tomatoes, and citrus. Try canning peas and pickle your cucumbers and peppers. Try fermenting crops like napa cabbage, radishes, and bell peppers.
Crops such as potatoes, sunchokes, and sunflower seeds will last for ages. Set aside plenty of space inside your home to store your food. Cool, dark areas work the best.
Step 15: Save Your Seeds

Growing a resilient survival garden depends on a continuous supply of seeds. After your crops flower, collect their seeds, especially your annuals. Many garden staples are easy to grow from seed.
You’ll save money and time, and ensure backups if supply chains were to fail. You’ll also be able to gift them to other gardeners who may need them.
Store them in a cool, dry, dark space in paper bags or sealed jars. Mark the containers with the seed type to keep everything organized.
Step 16: Rotate Your Crops

Crop rotation involves planting new species in a particular area every season. Rotating keeps your soil healthy and prevents harmful pests from making their homes in the soil.
The goal is to keep something living in the soil at all times of the year. Rotating keeps your soil healthy and gives you a large variety of food options throughout the year.
Alternate between root crops like carrots, nightshades like tomatoes and potatoes, legumes like peas, and brassicas like broccoli. The general rule is to plant heavy feeders like tomatoes and corn after nitrogen-fixing crops like beans. The possibilities are endless and depend on your climate.
Step 17: Keep Mulching

As your garden grows, it’s important to keep adding mulch. This can be in the form of compost, wood chips, or straw. For a survival garden, use whatever is in your area and costs you the least amount of time and money.
Mulch traps moisture in your soil and keeps it from drying out. It protects helpful critters such as earthworms and protects your plants from mild frosts.
Keep mulching throughout the season. After rotating your crops, add another layer, usually about an inch or two will do. For hedges and fruit trees, once a year or two in spring works the best.
Step 18: Collect Rainwater

Water is crucial for our survival and for our plants. Without it, our plants would die, and we would be in trouble.
One of the best ways to have water security for your garden is by collecting rainwater. Check your state’s laws to see what protocols you have to go through.
There are several methods, each with pros and cons. In most situations, rain barrels or dry and wet systems work the best.
Step 19: Create a Natural Pest Control

Natural pest control involves creating a pest-free ecosystem. This takes time, but once you do it, the benefits are endless.
Start with high-quality, well-drained soil in your beds and containers. Plant disease-resistant hedges and crops. Practice crop rotation and monitor your plants frequently.
Most importantly, grow as many flowers as you can. Flowers attract beneficial insects and predators that feed on pests. If you see lady beetles, some species of wasps, and birds in your garden, you’re cultivating a pest-fighting ecosystem.
Step 20: Consider Growing Mushrooms

Mushrooms are easy to grow and can add a ton of value to your survival garden. They are full of nutrients and help keep your garden healthy.
There are many options for cultivating edible fungi at home. Use grow kits, sawdust spawn, or innoculate spawn in logs. Set aside spaces inside your home or in shady areas of your yard and garden.
Each species has its preferred growing medium, environment, and season. Do your research and consider adding fungi to your survival garden’s arsenal.
Step 21: Share Your Success

Once you made your ultimate survival garden, tell people about it! We all can learn and improve from each other. Post photos and share your stories.
Tell your friends, fellow gardeners, and people on social media—if you use it, about your successes and failures. Sharing information about plants is not only useful in survival preparation, it’s also really fun.
Besides sharing your findings, record what worked for you and what you had trouble with. Keep a record for yourself and come up with a strategy for next year. Or, think of ways you could expand.
Key Takeaways
Survival gardens are practical ways to grow as much calorie-rich food as possible. Planning your garden with survival in mind is also great practice. You’ll think of clever ways to maximize yields, improve your garden’s health, and preserve your food. You’ll also inspire others to become self-sufficient.


