How to Build Outdoor Mushroom Beds in 11 Steps
Have you always wanted to grow mushrooms outdoors? It’s easy if you have the right supplies. In this article, horticulture expert Matt Dursum shows you how to build outdoor mushroom beds.


Contents
Mushrooms can be intimidating to even the most experienced gardeners. For starters, there are over 14,000 species on the planet. Only 2,200 of them are known to be edible. Of these edible varieties, 650 are commonly cultivated and foraged around the world.
Another reason mushrooms are intimidating is how different they appear from plants. They lack chlorophyll and don’t produce their energy like plants do. They feed off living and dead plants, animals, and organic matter and propagate from spores produced in their alien-like fruiting bodies.
As daunting and alien as they are, some of the best-tasting mushrooms are incredibly easy and inexpensive to grow outside. They’re so easy to grow that they make growing plants seem like organic chemistry.
For newbie mushroom growers, starting a mushroom bed outdoors is the best way to get into growing edible mushrooms. It’s safe and cost-effective, and you’ll harvest in the same season. All you need are a few materials and a consistent water supply to keep your mushroom bed moist. Keep reading to learn how to build outdoor mushroom beds in 11 steps.
Epic Organic Garden Straw
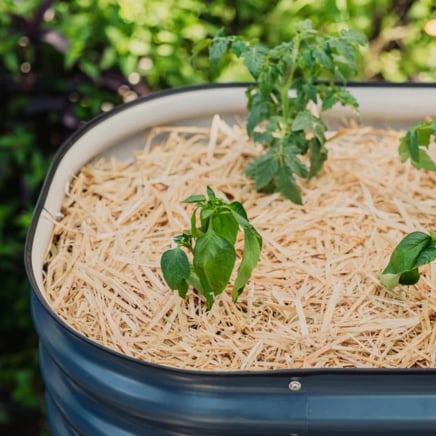
Epic Organic Garden Straw
Epic Organic Garden Straw is a weed seed-free mulch that helps create a healthier, more resilient garden. It locks in moisture, blocks weeds, and regulates soil temperature, giving your plants the stable environment they need to thrive, without introducing unwanted seeds or chemicals.
Buy at Epic Gardening ShopStep 1: Choose Which Species You Want to Grow

The first step is choosing the species you want to grow. Are you interested in common mushrooms such as oysters or wine caps? Or do you want to try rare edibles such as blewits? If you love cooking with mushrooms, you have several delicious species to choose from.
Species such as oysters are incredibly easy and produce an abundance of fruiting bodies. They grow on a huge variety of materials such as coffee grounds, agricultural byproducts, and dead garden weeds. Other species can be pickier on their growing mediums and produce unpredictable yields.
Step 2: Order Your Spawn

Once you figure out which species you want to grow, it’s time to order your spawn. These starter packs are made by cultivating mycelium on growing mediums such as sawdust or grain. This material acts as a seed for inoculating your bed.
Sawdust spawns are the easiest to use. They are less susceptible to contamination and cost less to produce. One bag will inoculate a 16-square-foot patch of ground.
If you want a diverse collection of edible fungi, you can order different spawns and build several beds outdoors. However, if you’re just beginning, there’s no harm in starting with one species at a time.
Step 3: Choose Your Site

After deciding what species you want to grow and ordering your spawn, it’s time to build your site. But before you start building, you need to select your site. Most mushrooms require partial shade and some, such as wine caps, can handle a little direct sunlight.
Find a site you can get to easily. You’ll need to keep the bed moist, so make sure it’s close to a water source. Another great location is on the edge of a forest. Tall trees will provide shade.
Garden beds are other great locations. You can grow mushrooms in mulched areas near your garden plants. You can choose areas of your garden too shady for your perennials, vegetables, and herbs. Your mushrooms will mature alongside your favorite garden plants.
Step 4: Find Your Materials

You’ll need inexpensive and easy-to-find materials for your beds. Fungi decompose organic materials and each species has its preferred medium.
Wine caps thrive off of hardwood chips and straw. Hardwoods such as aspens and poplars work the best. Although they can tolerate them, avoid using entirely pine chips. Avoid using big pieces of wood which are harder for the fungi to decompose.
Oyster mushrooms thrive in straw. Almond Agaricus mushrooms grow in nutrient-dense garden soil along with your favorite heavy-feeders like broccoli, tomatoes, and artichokes. Namekos love freshly cut hardwood chips.
Step 5: Build Your Bed

Once you’ve selected your site, it’s time to start your project. All you’ll need are a few simple materials that are probably already lying around your garden.
Each species has its preferred bed design, although they’re all very similar and simple. Make sure to follow your specific mushroom’s bed design. Below are the easiest steps to build outdoor mushroom beds.
Clear Your Site

Clear a 4’ by 4’ section of your garden. Choose a site without tree roots or heavy weed growth. Rake away leaves, garden debris, branches, and twigs.
Place a Sheet of Cardboard Down

Take a big piece of cardboard and place it on the ground. Add several sheets of cardboard until the space is completely covered. Although it’s not essential to growing mushrooms in beds, cardboard helps control weed growth and adds a helpful barrier between the soil and your fungi.
Add Your Substrate

Spread about an inch of substrates such as woodchips, straw, sawdust, or mulch evenly over the cardboard. Make sure to use the substrate that your spawn prefers. Check for any sticks, branches, or garden debris and remove them.
Add Your Spawn

Once your substrate is evenly spread out over your cardboard, sprinkle your spawn on top. Spread it evenly across the surface.
Add More Substrate and Repeat

On top of your spawn, add another layer of substrate about 2 inches thick. Once you evenly spread the second layer, crumble more of your spawn on top. Repeat this process until the substrate and spawn layers are between 8 to 16 inches deep.
Each species has its preferred layering depth. Follow the bed instructions carefully to get the correct layers.
Add a Top Layer of Substrate

On top, add an extra layer of substrate to keep the bed from drying out. Keeping your bed moist is the most important maintenance task when growing beds outdoors.
Step 6: Keep Your Bed Moist

After making your bed, you’ll have to keep it moist. This is especially important during the first two weeks. Mycelium thrives in a moist environment, similar to the ground floor of a forest covered in leaves and decaying brush.
As much as they love water, don’t over-saturate the bed. Give it an even watering to keep it moist but not soggy, as if you’re watering a new houseplant.
After the first two weeks when the spawn has matured, limit your watering to dry or extra hot periods when the medium dries out. Check it regularly to make sure it’s still somewhat moist.
Step 7: Protect Your Beds From the Elements

Consider adding another layer of mulch or even a tarp. This will help trap the moisture inside the bed. You’ll have to remove the tarp once you see the tiny mushrooms forming.
Check your beds regularly and remove any debris or pieces of trees that land in them. Sometimes wind will blow plant material on your beds. Remove them and try keeping your bed open.
Step 8: Watch Your Mushrooms Appear

It can take a month or several months, depending on the species, before you see your first mushrooms appear. When they do, it’s one of the most exciting experiences you can have as a gardener.
Step 9: Identification

Even though you grew your mushrooms from a certified spawn, it’s important to always triple-check their species. This is because there’s always a chance that wild mushroom species can get to your bed. Although rare, it can happen, and staying vigilant is key to safety.
There are several forms of identification to look at. First, take a cutting of a fruiting body and examine its physical traits. Does it have the same features as the mushroom you’re growing? Your spawn kit should have detailed instructions on size, shape, color, and cap structure.
The next best method of ID is the spore print. Every mushroom has a unique spore print which is the color and distribution of its spores. To take a spore print, follow the guidelines below:
- Take off the stem
- Place the cap facing gill or pore side down on half-white and half-black paper
- Cover it with a container
- Wait several hours until the mushroom releases its spores on the paper
- Spores come in many colors. Each species has its own color.
I recommend making a checklist with all the steps. If your mushrooms pass the checks, including size, shape, color, spore print, and season, you’re in the clear. NEVER consume a mushroom without being 100% sure you know its species.
Step 10: Harvest

Now the fun part! After your first batch of mushrooms appears and you’ve identified them, it’s time to harvest them.
Harvest them with a sterile harvesting knife. For some species, all you have to do is grab the stem and twist.
If you get a big harvest, you can dry your mushrooms or use them in big-batch recipes. They are fun presents to give to foodie friends and loved ones.
Step 11: Prepare for Winter

If you live in colder climates, you’ll have to protect your fungi from the cold weather. While most edible species can handle the cold, you can give them a hand by following a few steps.
In the late fall, add another layer of substrate on top of your bed. Leaves, straws, and wood chips work great. Try using the same substrate that you grew your spawn in.
Be aware that some mushrooms, such as almond Agaricus and pink oysters, are annuals in cold areas. They will only produce for one season.
Key Takeaways

As you see, it’s easy to build outdoor mushroom beds on your own. All you need are a few common materials and a small space in your garden.
These edible fungi are nutritious and easy to grow. They grow abundantly, giving you tons of delicious stems and caps to add to your dishes.


