How to Germinate Seeds on Paper Towels in 7 Steps
Why wait weeks for sprouts to appear when you can watch them grow? The paper towel seed-starting method is easy for beginner and advanced gardeners alike. Learn how to reuse common household items to sprout all sorts of seedlings, from lettuce to chili peppers.


Contents
Some tricks are unnecessary when growing plants, as they add additional steps involving extra materials and work. Other methods, like germinating seeds in a paper towel, are superb ways to cheat traditional growing methods!
When you plant seeds under the dirt, it’s difficult to know when they’re sprouting and how healthy they are. With cloth, towels, or similar materials, you can watch them sprout and pot them up when they’re most ready. This saves you valuable space in your propagation area, where you may grow more plants than usual!
Not only does this method save you space—it doesn’t need soil! Though you’ll need potting soil or garden dirt for transplanting the mature seedlings, you won’t need soil for the germination process—all you’ll need is a towel or cloth, a container, seeds, and water.
Low-cost, quick, and easy, it’s a no-brainer to sprout tender crops using towels! Follow these seven simple steps to germinate veggie, flower, and fruit seeds in paper towels with ease.


Step 1: Choose Seeds Wisely

Not all seeds work well with this method; some wildflowers and root crops dislike root disturbance. It’s best to sow them directly outdoors instead. Plants like sunflowers, beets, squashes, radishes, and carrots benefit from direct sowing.
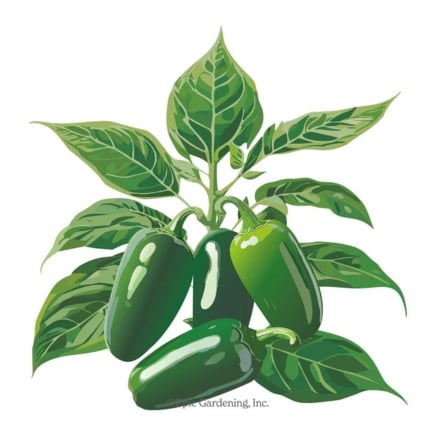
So, what crops work well with this technique? Any vegetable, wildflower, or fruit crop that transplants easily is a great candidate for germinating with towels. Chili peppers, tomatoes, and eggplants are easy ones to begin with. Species like these require high humidity levels for germination; they sprout quickly inside the moist towels.
Aside from vegetables, native plants and heirloom flowers appreciate the extra humidity. Ensure they receive proper cold stratification before sprouting; many require winter chill to germinate successfully. After a proper chilling period, they’ll be ripe and ready for sprouting with a few moist towels.
Step 2: Gather Materials

Though the typical method involves a paper towel and a plastic bag, there are infinitely more options to choose from that are more sustainable! Cloth, coffee filters, and cardboard can work in a pinch. Instead of plastic bags, use old jars and plastic containers.
Aside from the seed starting vessels, you’ll also need some other materials. Here’s a complete list of all the things you should gather for sprouting success:
- Paper towel, cloth, or coffee filter
- Seeds
- Plastic bags, glass jars, or containers
- Tweezers
Tweezers are optional, but they’re incredibly helpful! You’ll use them to transfer germinated seedlings from the bags to their pots. Gentle, steady hands are necessary in the absence of tweezers.
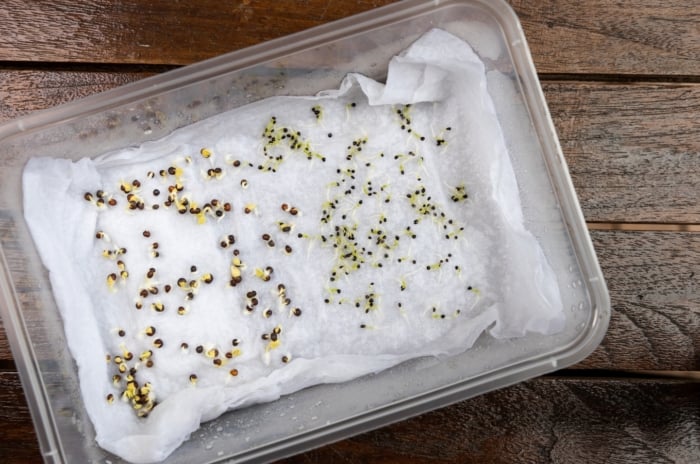
Step 3: Moisten Paper Towels

Now that we’ve got everything together, it’s time to get sprouting! Moisten the towels, cloth, or whatever materials you’re using. They should be moist like a wrung-out sponge. Avoid making them soggy to ward off rot and low germination rates.
Run the materials under the tap, or use a spray bottle to wet them. A spray bottle is perfect, as you can use it throughout the process to keep the towels moist. The tap is difficult to use after you start, though it’s not impossible. We’ll touch on an easy hack to try for watering with the tap under step six.
Step 4: Plant Seeds

Here comes the best part! Let’s gather the packets and prepare seeds for sprouting. On your open paper towel or cloth, place seeds with an inch or two of space between each other to give them space to germinate. Overcrowding leads to intermingling roots that are hard to separate later on.
Grant large-rooting crops more space if they need it; an easy way to know is to look at the spacing guidelines on the packets. Plants that like ample space at planting will need the same treatment when germinating inside a moist cloth.
After planting, wrap the seeds with the cloth so a single layer covers each side. You want them surrounded with moistness, but not with too many layers that prevent sunlight from penetrating. Think of how they grow underground—there’s a thin covering of soil above them letting some light through. You’re simply emulating this process with the towel layers.
Step 5: Enclose the Paper Towels

Though the cloth traps moisture for the seeds, an additional protection layer simulates greenhouse conditions. You’re essentially making mini-greenhouses! Like with winter sowing, an enclosement creates the perfect environment for germination.
You’ll need plastic bags, glass jars, or similar see-through containers for this step. Start by gently transferring the wrapped plants into the containers. If you’re using plastic bags, try to trap some air in the bag. A full one works better than a slack one, as it has more air space for the budding plants.
Close the bag, place the lid on the jar, or snap the top closed on the container. Then, place your vessels in a bright room near a windowsill. Consider using grow lights if natural light is absent or hard to find in your home. They’ll help you cultivate strong, squat seedlings rather than weak, leggy ones.
Step 6: Continuously Monitor the Seeds

You’re almost done! Most plants germinate within a week or two, though wildflowers and native plants may take longer. Check on them once a day to ensure their towel is moist and to see if they have roots. This is where the spray bottle comes in handy—you can spray them easily before they dry out.
If you lack a spray bottle, try my simple trick. Simply wet your hands and wring them onto the cloth. This helps you avoid disrupting the budding plants while ensuring they receive sufficient moisture. Though a few wrings are often necessary for adequate wetting, this trick works great in a pinch!
Aside from tracking moisture levels, you’re also watching the plants to see how far they’ve sprouted. They’re ready for transplanting once they have a short stem, two leaves, and a root.
Step 7: Move Sprouting Seedlings to Pots

This is where the tweezers come in handy. You’ll use them to transfer the sprouted seedlings into containers. Most crops require some time indoors before they’re ready for the garden. Late frosts challenge tender seedlings; your heat-loving plants will only grow outside after the chilly temperatures dissipate.
Which container size to try depends on the plant and you’re growing needs. If you plan on keeping chili peppers indoors for some time before moving them into the garden, you should consider using larger pots with ample space for roots. Others, like lettuce, have relatively shallow roots and thrive in smaller pots.
Two other optional tools that boost seedling success rates are humidity domes and heat mats. The domes trap ambient moisture, while the mats ensure the soil stays warm for crops like peppers and eggplants. Though not necessary, they’re ideal if you plan on starting seeds in the future.
After setting up the space, ensure your seedlings receive bright light, gentle airflow, and consistent moisture. Watching them grow is the best way to dream of your emerging garden—think of how big they’ll get and how nice your yard will look with them growing in it!