Moving Hydrangeas: When and How to Transplant
Are you thinking of moving your hydrangeas around this season? Perhaps you are thinking of taking them out of containers and relocating them to somewhere in the ground? In this article, gardening expert and hydrangea enthusiast Jill Drago walks through her top tips for transplanting hydrangeas!

Contents
Has your hydrangea grown too large for its current space? Maybe it needs a little more or a little less sun, depending on the type of hydrangea that you have growing. Either way, it looks like you might be ready to transplant your hydrangea to a new location in your yard or garden.
Transplanting these popular flowering shrubs can be done easily and only requires a few steps to do so successfully. As always with hydrangeas, keeping the plants moist and planted in the correct light is of utmost importance to the overall health of the plant.
While most of the time this is a straightforward process, there are a few tips you can use to help ensure your hydrangea relocation is successful. Follow along for 15 important tips for transplanting hydrangeas this season!
When to Transplant Hydrangeas
The truth here is that you can transplant a hydrangea at any time, with the exception of the heat of the summer. But the best time to do it is in the fall or winter if you live in warm climates once the plant has gone dormant.
The temperatures will be cooler, the ground will not yet be frozen, and most of the leaves will have dropped from the plant.
How to Transplant Hydrangeas

When you are searching for the perfect place to plant your hydrangea you will want to keep a few things in mind.
Hydrangeas, with the exception of panicle hydrangeas, do best when planted in partial shade. When you are transplanting a hydrangea it is best to have that sunlight in the morning to allow the hydrangea time to recover in the afternoon.
This is especially important when you are transplanting because too much hot summer sunlight can really dry them out. Typically, the east side of your home or garden is a great location for transplanting.
You’ll want to make sure that the sight you are going to be planting in has enough room for the root ball. Depending on how old the plant is, the root ball is likely very large, much larger than it was when you planted it.
Hydrangeas will need room to grow and the area in which you will be transplanting your shrub should have ample space for the plant to stretch its roots.
Dig a Properly Sized Hole

This hole you will need to dig should be about twice the size of the root ball of your plant. This may be tricky to know since you have not dug the hydrangea out yet, but give it a good guess, you can always dig a bit more later if you need to.
The reason for digging the hole first is because it will limit the amount of time that the plant will be out of the soil. Save the dirt you remove from this area to help you backfill the other hole if you are not planting something new.
A good way to ensure that your soil is in good shape before you begin planting is by filling the hole you have dug with water. Watch how long it takes for the water to drain.
This will give you some good information on how well the soil drains. If it’s needed, you can then work on amending the soil from here.
Water Before Moving

Before you you start digging your hydrangea out of the ground give it one last watering, and let it soak up. This final watering should be done the day before you plan to dig up the plant.
This will give the plant plenty of time to reap the benefits. This watering will help avoid any transplant shock, especially if you are transplanting in the warmer months.
Prune Gently

If you have a large hydrangea it’s often a good idea to give it a little trim before you move the plant. This is not a big prune, it would just be pruning it back a little bit to ease the transport and limit the potential breakage of the branches.
If you are moving the shrub when it has gone dormant, it has likely already formed new flower buds. Keep in mind that if you prune your hydrangea back, you will lose those flowers for the next season, but this is expected. This will allow the plant to focus on getting comfortable and established in its new home.
If you don’t want or need to prune, you can use some garden twine to very loosely wrap the shrub’s branches. You should only keep the branches tied up while you are moving the plant, and should remove the twine once the hydrangea is safely planted in the ground.
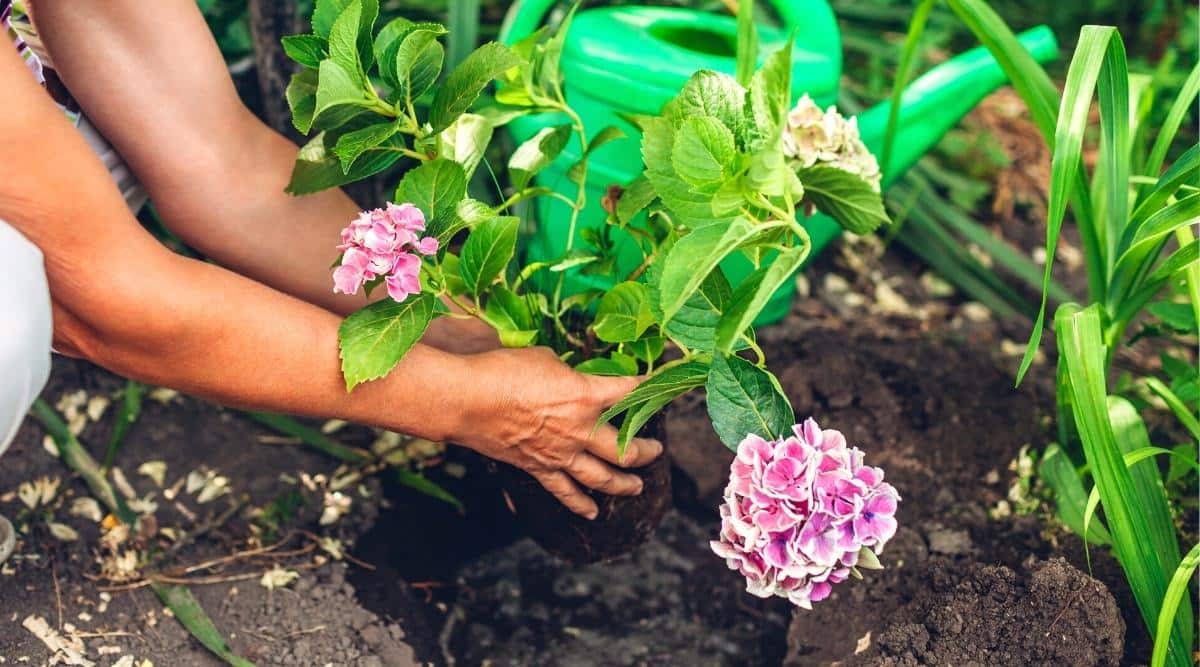
Start Digging Carefully

You will want to take some caution when you are getting ready to pull the hydrangea out of the ground. Begin by making cuts into the soil with a shovel just outside of the drip line. This will give you some insight into how big the root ball actually is.
When you have a better idea of how large the root ball is, start digging around the plant and wiggle the plant a bit each time. Try not to slice through any of the larger roots, taking it one slice at a time. You will know when your plant has come loose and is ready to be removed from the ground.
Prep the Soil in New Location

If the area where you plan on transplanting needs some work, this is the time to do so. Hydrangeas love well-draining soil.
Adding compost can aid in achieving these results whether you have sandy or clay soil. Compost also gives your plants a nutrient boost as a bonus.
This is also a great time to pull any weeds that may be growing in the area. Weeds suck up a surprising amount of water, and we don’t want them competing for water with a fresh transplant.
While we are talking about soil, this is also a great time to grab a soil sample for a soil test! Through this test you will learn the pH of your soil and you can prepare to amend your soil if you are desiring a particular color of hydrangea flowers.
Transplanting can involve some heavy lifting. Having a partner to help you carry your plant to its new home can save your back as well as keeping the branches safe from breakage.
If there is no one around to help, I would suggest using a wheelbarrow or wagon to help you move the hydrangea from one spot to the next.
Plant Carefully

The hole will need to be about twice as wide as the size of the root ball. For dense or clay soils, you’ll need to amend with a compost to help with water drainage. This will help to prevent root rot from occurring.
You want to be sure not to plant too deep. Keep the base of the plant close to the same depth as the root ball. Then, backfill with your garden soil.
After Transplanting Hydrangeas

Over the next year or two you will want to baby your hydrangea. Do not overwater, or over fertilize, but be attentive. Be sure that the plant is receiving one inch of water per week from spring through fall.
Make sure to watch for insect or disease damage. If you see any signs of pests or diseases, you’ll need to treat early and quickly.
Water… Again, and Again

If you have transplanted while the plant is dormant, give it one good soaking and leave it alone until the spring. At this point you will want to water regularly throughout the growing season, beginning in the spring.
If you have transplanted at any other point, keep the plant watered regularly. You should expect some drying of the leaves, but know that this will pass as long as you keep the plant watered.
Always Add Mulch

Once your hydrangea is situated in your garden, mulch around the base of the plant. Mulch helps the soil and roots to retain moisture. Mulch will also help keep weeds away.
There are many different types of mulch that you can use, but the most commonly used is pine mulch, or some types of tree bark.
Fertilize When Appropriate

The first spring that your transplant is in its new home, begin spring fertilizations. Using an acidic hydrangea-friendly fertilizer, such as holly tone, in the spring will help get your hydrangea all of the nutrients it needs to have a good growing season.
Be sure to follow the package directions for whichever product you choose. Do not add extra fertilizer to the application. This will not aid your plant, in fact, it could cause fertilizer burn which will damage the plants root system as well as the leaves.
Transplanting Hydrangeas in Spring

If you missed the boat in the fall and did not get around to transplanting your hydrangea, don’t worry. The spring is also a good time to transplant. Depending on where you live this can be done anywhere between March and May. The ground should be well thawed.
Spring transplanting sometimes can be easier when it comes to follow up care. You will likely be in the garden more frequently in the spring than you are in the fall, making it easier to keep your eye on your newly planted shrubs.


