Fall Hosta Care: 5 Expert Tips
By the time mid-fall rolls around, your hosta plants probably look worn and ragged. Now is the perfect time to give them some extra care and prepare them for winter and the new year ahead. Join gardening enthusiast Liessa Bowen for some simple pro tips on end-of-year hosta care.


Contents
Hostas are herbaceous perennials that are typically grown for their showy foliage. They are easy to grow, low-maintenance, and the perfect plant for your moist shade garden. You can find jumbo-sized hostas and dwarf varieties with petite leaves. The foliage comes in various shades of green, bluish green, and attractive patterns variegated with white.
Hostas reach their peak between late spring and late summer, depending on your location and climate. These robust and vibrant shade-loving perennials grace your garden with their broad, showy leaves and tall stalks lined with delicate trumpet-like flowers. These beautiful foliage plants attract hummingbirds and pollinators when blooming and deserve full respect for their lush foliage throughout the growing season.
Then fall moves in, your hostas have long finished blooming, and the foliage declines, requiring care to remain attractive. When they are hit by first frost, these herbaceous perennials die back completely. Now you’re left with the soggy, brown remnants of your once thriving hostas. At this point, your plants are ready for their final fall cleanup so the roots can safely overwinter.
Fortunately, fall is the ideal season to get out in the garden, enjoy the cool, crisp air, and tackle all your late-season gardening tasks. Take care of your hosta beds, and they’ll reward you with vibrant fresh growth when the weather warms again next spring.
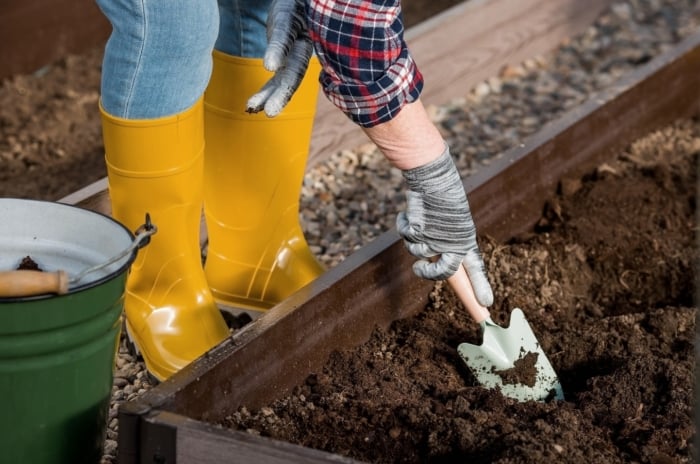
Grab a pair of comfortable gardening gloves and let’s now dig into fall hosta care with five expert tips to get your hosta plants ready for the winter.
Felco 701 Garden Gloves

Lightweight and comfortable, these gloves made of knitted HPPE fiber guarantee high resistance to cutting. The fingers and palm are coated with nitrile rubber to provide excellent grip and greater strength.
Cut Back Foliage

It’s fall, you haven’t yet experienced the first frost of the year, and your plants are still mostly green. There’s a good chance that, by now, some of the leaves have been chewed, mildewed, or browned. Renew and refresh the foliage by doing a bit of late-season pruning.
Cut off any dead, damaged, or diseased leaves and remove them from your garden. Slugs love these plants and lay their eggs in and around leafy debris, so you don’t want to leave dead and wilting vegetation lying around your beds.
Don’t cut off healthy-looking leaves. As long as the leaves still look fresh and green, they’re still performing photosynthesis and making energy. Right now, you should remove only the most tattered, brown, yellowed, or diseased-looking leaves.
Remove Dead Foliage

After the first frost or two, your perennials wilt to the ground and become entirely mushy. This dead plant matter not only looks unattractive, but it can harbor pests and diseases. Don’t leave these mushy leaves lying on the ground in your hosta bed. The best thing you can do now is remove all the dead above-ground foliage, including leaves, stems, and any remaining flower stalks.
Snails, slugs, and other insect pests lay their eggs in vegetation debris and overwinter here. If you wait until the leaves and stems are completely soft, you can usually just pull them off with your gloved hands. If they are still somewhat firm and resist tugging, cut them at the base with garden scissors or clippers.
Divide Overgrown Plants

Hostas typically don’t need to be divided, but it can be a beneficial step of fall care. They will, however, slow their growth as they fill up their available space, becoming an ever-increasing cluster. You may wish to keep them looking neat and trim, while encouraging them to stay within a limited area, growing nicely alongside your other shade-garden perennials.
Have your hosta clusters grown larger than you wish? Are they crowding out their neighbors? If so, it’s time to divide those larger clumps. Fortunately, dividing hostas is easy, and fall is a good time to do it.
Dig out the entire clump that you want to divide. Shake out excess soil so you can see where the roots are. Use a sharp spade to carefully cut apart the clump into a few separate smaller bunches. Try not to cut up the roots too much but don’t worry if you cut some of the roots; they are quite sturdy. Each bunch should have several shoots with attached roots.
You can now replant one of these smaller clumps in the original location and transplant the others, or give them away to your gardening friends and neighbors!
Transplant

Fall is the perfect time for transplanting perennials in your yard, including this pretty shade-loving species. You may have hostas growing in pots or freshly dug divisions that someone gave to you. The first step is to decide where to put them.
Once you’ve identified where you’d like to grow some new ones, prepare the site by removing weeds and digging a hole. Place the roots in the hole so the crown of the plant is just below the soil surface.
Spread out the roots enough so they aren’t bunched or twisted before backfilling the hole with fresh, loose soil. Water your new transplants well, thoroughly moistening the soil so the roots won’t dry out.
Mulch For the Winter

Whether your hostas are well-established or freshly transplanted, take care to provide them with fall mulch for winter insulation. Mulching around your perennial beds helps regulate the soil temperature, protect the plant root system, and prevent frost heave. Mulching any time of the year keeps the soil moist and suppresses weedy growth. Mulch also looks nice and adds an attractive even layer across the surface of your garden during a season when things tend to look shabby and dead.
Use a three or four-inch layer of mulch to insulate your perennials for the winter. Shredded leaf mulch works well and is free if you have a lot of trees in your yard. Use any type of biodegradable mulch, such as pine straw, wheat straw, pine bark, or shredded hardwood mulch. These will all function well in your hosta beds, last through the winter, and insulate your plants from temperature extremes. As they break down, they add organic matter to the soil.
Frequently Asked Questions
How should I overwinter my container-grown hostas?
Hostas grow well in containers and you can overwinter your container-grown hostas but it may take a little extra work. In mild winter climates, your hostas should do fine in their containers. Move them to a protected location, such as next to your house or garage, and add a layer of mulch.
In cold climates, you have a few options to help your potted hostas get through a harsh winter. These plants need a period of winter dormancy, so don’t try to bring them indoors and nurture them as houseplants.
You can try planting your hostas in the ground for the winter because the ground provides better insulation than a more exposed pot. You can try mulching your pots well and wrapping them in an insulating layer, or surrounding them with more mulch. You can also bring them into a protected garage or shed for the winter. Water them lightly a few times, just enough to keep them slightly moist, and bring them back out again in early spring.
When is the best time to prepare my hostas for winter?
Anytime during the fall, you have opportunities to perform different maintenance tasks. When the weather cools and your plants start looking ragged, start with some basic pruning. As your plants are winding down, you can do any dividing and transplanting that you want to do. You can do your mulching anytime in the fall, you’ll just want to clear away plant debris before spreading mulch. And of course, you’ll want to wait until after the frost has killed the leaves to finish clearing up dead plant matter for the year.
What are the growing zones for hostas?
Hostas are hardy plants that tolerate a wide range of temperatures. They grow best in USDA Plant Hardiness Zones 3 – 9.
Should I fertilize my hostas in the fall?
No. There’s no need to add any fertilizer to your hosta plants right before they go dormant for the winter. Wait until your hostas start to send up new spring leaves and offer them a slow-release fertilizer when the leaves have emerged.
Do I need to divide my hostas every year?
Hostas grow relatively slowly and their ever-expanding clusters. At some point, your hostas may seem to slow down and stop expanding. This is a sign they would benefit from division. You definitely don’t need to divide them every year. Consider dividing them every three to five years instead.