15 Common Problems With Garden Cabbage Plants
Are you having some issues with your garden grown cabbage this season? Unfortunately, cabbage is one of the many veggies that can succumb to a variety of different garden problems. In this article, organic gardening expert Logan Hailey walks through the most common problems you might come across when growing cabbage.


Contents
For true coleslaw lovers or sauerkraut cravers, cabbage is more than just a bland green ball of leaves. Garden grown cabbage is a rewarding and versatile cool-weather crop that can be cultivated throughout spring, fall, and even winter in some regions. It can be stored for months and requires very little maintenance in the garden.
While cabbage is fairly easygoing, it is still prone to a range of common brassica problems. This crisp cole crop doesn’t mind cold temperatures, but it demands consistent water, moderate fertility, and loamy well-drained soil.
Without its basic needs, pests and diseases can quickly take hold of your cabbage and ruin the crop. Let’s dig into the 15 most common problems gardeners face when growing cabbage and how to fix them!
Cabbage Won’t Form a Head

The biggest complaint cabbage growers have is plants that won’t “head up”. The plants seem to keep putting out leaves without a central ball of cabbage. The main cause of this problem is improper watering.
Just like carrots or radishes, cabbage can’t handle big fluctuations in soil moisture. The crop itself is over 90% water and requires consistent irrigation to properly grow and produce a head. Dry soil causes drought stress and soggy soil can lead to disease.
Both overwatering and underwatering can lead to “headless” cabbages, so it is essential to strike a balance between the two and pay attention to your garden beds.
How to Fix It
Use drip irrigation or soaker hoses to deliver water right to the root zone of the plant. Then, mulch on top of your garden beds with compost or chipped dry leaves to help conserve moisture.
However, avoid excess mulch near the base of they plants if you have a slug problem. You should check the beds every other day to ensure that the soil is neither soggy nor dry.
Temperature fluctuations can also prevent from heading up. Cabbage is particularly temperamental in the summer heat. Try to start growing in the spring or fall when temperatures are between 50° and 75°F. It can handle colder temperatures but tends to form the best heads in a moderate chill.
Fluffy Gray Growth on Pale Leaves

Downy mildew is a nasty fungus-like organism that overwinters in infected plant residues and spreads via seeds or spores in the wind. It begins as light yellow-green lesions on the leaf surfaces, which later enlarge and take over whole leaves.
In high humidity, the fungus produces a fluffy white-grayish mycelium on the underside of the leaf spots. This disease is particularly problematic in areas with wet, mild winters such as the Pacific Northwest and the Southeast.
How to Fix It
Any time you’re growing cole crops like cabbage, it’s best to clear away any old plant debris at the end of every season. The Brassica family is very prone to foliar diseases like that overwinter on the dead leaves just like downy mildew.
The next preventative step would be sourcing disease-resistant varieties like ‘Famosa’, ‘Deadon’, and ‘Melissa’. Widen the spacing between the plants to 16-18” to maintain adequate airflow.
If you already notice an infestation on your cabbage crop, remove infected leaves or whole plants as necessary. Apply a diluted neem spray or natural copper fungicide to prevent further spread.
Stunted Plants With Rotten Roots

If a random patch of cabbage plants looks unusually stunted or mangled, they may be getting attacked at the root. Club root (Plasmodiophora brassicae) is an aggressive and persistent soilborne disease that causes their roots to swell and mutate into “club” shapes. Above ground, small patches of plants will suddenly look wilted, yellow, and stunted.
Another possible cause could be plain old soil compaction. Like most of the brassica family, cabbage resents having “wet feet”, or roots sitting in compacted or heavy clay soil.
How to Fix It
If you pull up a plant and notice the characteristic club-shaped roots, discard it immediately and pull out any nearby affected plants. Dig around in the soil to remove the entire root zone so that no parts of the infected plant are left in the soil. Avoid putting in crop debris in your compost pile— it is usually best to throw it away or burn it.
Once it takes hold, club root, unfortunately, has no cure. To make matters worse, it can live in the soil for 7-10 years. According to Oregon State University, the best preventative methods include:
Crop Rotation
Gardeners with club roots in their soil should practice a dedicated crop rotation that keeps cabbage and its cousins (like kale, broccoli, and cauliflower) out of the same bed for at least five years.
Soil Alkalinity
Acidic soil also creates conditions for this pathogen to thrive. Maintain a pH between above 7.0 by incorporating plenty of organic compost, bone meal, or crushed eggshells.
Resistant Cultivars
Napa varieties have been bred to be the most resistant to club root. Choose seeds like ‘Bilko’, ‘Pacifico’, or ‘Panda’ that can withstand infected soil.
Sanitization
Thoroughly sanitize your gardening gear, including your gloves, tools, and boots with a diluted bleach solution. Always remove brassica crops and weed residues from the garden.
Tiny Irregular Holes in Leaves

A bunch of itty bitty irregularly-shaped holes in your cabbage leaves is a sure sign of flea beetles. The holes can also turn into shallow pits with rounded edges that might start yellowing. These common brassica pests also attack arugula, radishes, kale, and turnips.
The adult beetles are 1/16 to ⅛ inch long and usually black or bronze. They jump when disturbed and are especially active in the spring.
How to Fix It
Row fabric is the easiest way to keep flea beetles away because it physically excludes them from the crop. You can lay it directly over your plants or create low tunnels with bent PVC or metal hoops.
Take care to secure the fabric with sandbags every 3-4 feet to ensure no flea beetles sneak in. This technique is particularly beneficial in cold climates where the row cover buffers against temperature extremes (which also helps your cabbage “head up” better!)
Cabbage companion plants like catnip, sweet alyssum, yarrow, and Queen Anne’s lace are like a double whammy for flea beetles: They repel them with their strong scent while simultaneously attracting braconid wasps (a flea beetle predator) to your garden. Plant these flowers within a few feet of your beds.
In extreme infestations, you can spray cabbage with neem oil or pyrethrum to knock back the populations.
Blistered, Bronzed Leaves

If the smooth green leaves or heads start turning a brownish-bronze color and appearing blistered, there are likely thrips feeding on the plant. The blister areas result from the insect puncturing the leaf tissue and sucking out its sap like a cabbage vampire!
These very tiny (less than 2mm) bugs are pale yellow to brown and have narrow wings. They tend to start emerging in late spring and attacking full force during the warm, dry days of summer.
How to Fix It
Like flea beetles, can be prevented with row fabric. If they have already started feeding, you can blast them with a strong jet of water. Horticultural oil, insecticidal soap, neem oil, or natural pyrethrins are highly effective chemical controls to kill larger infestations.
However, the best means of dealing with thrips is to prevent them in the first place. According to Pennsylvania State Extension, thrips overwinter in alfalfa, clover, wheat, and weedy areas. Avoid these plants and take care to surround your cabbage with repellant companion plants like garlic, basil, and oregano.
Collapsed Seedlings

Seedlings that die just after emergence can be pretty alarming and a huge waste of seeds. These collapsed baby cabbages usually have a rotten, string-like area at the base of their tiny stems right near the soil surface.
It may appear water-soaked or girdled. This is caused by damping off—a plant disease that attacks seedlings of all types and can be particularly problematic in humid areas.
How to Fix It
Once damping off attacks your seedlings, there is no way to revive them. Throw away the soil and sanitize the containers before you start over again. To prevent damping off in future plantings, remember to:
- Sow seeds in extra well-drained soil
- Avoid overwatering
- Ensure plenty of airflow (add a fan if growing indoors)
- Use wider spacing between seedlings
- Remove nearby plant debris
Thankfully, if your cabbage plants make it past the seedling stage you don’t have to worry about damping off (but sudden collapse of adult plants may be linked to club root or severe drought).
Worms in the Center of the Plant

Anyone who has grown cabbage has probably seen white butterflies with 1-2 black spots on their wings flying around their garden. These are actually major pests of cabbage whose larvae is better known as the cabbage worm.
These velvety green worms tend to feed toward the center of the plants and leave behind skeletonized leaves and green pellets of poop (called “frass”). Though they do not kill the plant, they do some serious damage.
How to Fix It
Cabbage worms can be hand-picked or cut away from the heads, but their wake of rotten damage can get pretty nasty. If you notice them soon enough, you can make use of a biocontrol bacteria called Bacillus thuringiensis or Bt. Purchase a Bt spray and apply it to your plants every 1-2 weeks, taking care to cover the underside of the leaves.
Floating row covers are the perfect form of exclusion and prevention of pests. I always cover my seedlings from the time of transplanting in early spring until the heads have started developing. If the weather is cool enough, I’ll keep the cover on until the crop is ready to harvest!
For another layer of protection, keep nature on your side. There are lots of natural predators of cabbage worms that can keep populations in check. Plant wormwood, thyme, marigolds, yarrow, or buckwheat as companion plants near your cabbage.
Slimy, Rotten Stems

Cabbage with slimy rotten bases or soft, watery tissue are usually victims of Sclerotinia stem rot or white mold. This moisture-loving fungus thrives in cool weather and also attacks weeds like dandelion, wild clover, and ragweed.
It typically goes after cabbage in the fall and begins infecting the plant at the base near the soil line.
Mature plants can also have water-soaked circular lesions on the surface. As the disease progresses, you will notice a cotton-like white fungal growth that softens the cabbage tissues until they are slimy and weak. Sclerotinia is particularly problematic in humid areas like Florida and the Northeast region.
How to Fix It
This aggressive pathogen requires an integrated approach to keep it under control. Like the club root pathogen, this fungus can overwinter in tough, black, seed-like structures called sclerotia. They can stay dormant in the soil for 3 to 5 years.
Begin by removing any plants with signs of infection and sanitizing your tools immediately. Next, take steps to protect your nearby cabbages by spraying a neem oil or compost tea on their leaves. You should remove all nearby weeds and ensure proper disposal of crop debris.
Practice a five-year crop rotation in your beds, taking care to avoid planting collards, brussels sprouts, cauliflower, lettuce, or cucurbits in the same area. Alternating with cover crops like oats and rye can also help. Avoid overhead irrigation that might cause more moisture on the cabbage leaves.
Inner Leaves Look Brown or Burnt

Many gardeners forget that micronutrients are just as important as the classic NPK. A calcium deficiency in cabbage causes a very obvious symptom often referred to as “tip burn”. The necrosis or browning of leaf tips and edges usually affects the inner leaves.
Acidic or sandy soils are the most prone to calcium issues. Even though some gardens have plenty of calcium, your cabbage plants may not be able to uptake it if there is a high amount of ammonium (nitrogen), potassium, or magnesium in the soil. Water stress can also cause calcium deficiency.
How to Fix It
Alkalize your soil with dolomite lime, aged compost, bone meal, eggshells, or ground clamshells. Ensure that your cabbage receives consistent moisture without under or overwatering. The soil should never dry out, nor should it be soggy.
Lastly, avoid over-fertilizing with synthetic nitrogen. Organic nitrogen fertilizers are better because they are slow-release and won’t “lock up” calcium as ammonium does.
Cabbage Starts Flowering

Cabbage is supposed to form a rounded, crisp head, not tall whorls of flower stalks. If your cabbage has started to grow upwards and send up yellow flowers, it has likely bolted.
Bolting is directly caused by temperature fluctuations, such as extended periods of cold followed by a sudden heat wave. This can cause the cabbage to have a bitter taste, as well as stunted growth.
How to Fix It
If your cabbage has just started to bolt, you can try cutting off the central flower stalk to see if it will channel its energy back downwards. But it’s likely that the plant is too far gone. Fortunately, you can harvest and enjoy the fresh flower stalks as if they are sprouting broccoli.
To prevent bolting, use temperature-buffering strategies like mulch or row cover. You can’t control the weather, but you can try to keep your crop as insulated (against heat and cold) as possible.
Avoid growing cabbage in the summer— it just isn’t worth it! Cabbage hates the heat and even bolt-resistant varieties will often protest hot weather. Instead, strategically choose spring, fall, or overwintering cabbage cultivars and plant them at the correct time for your region.
Woody Plants
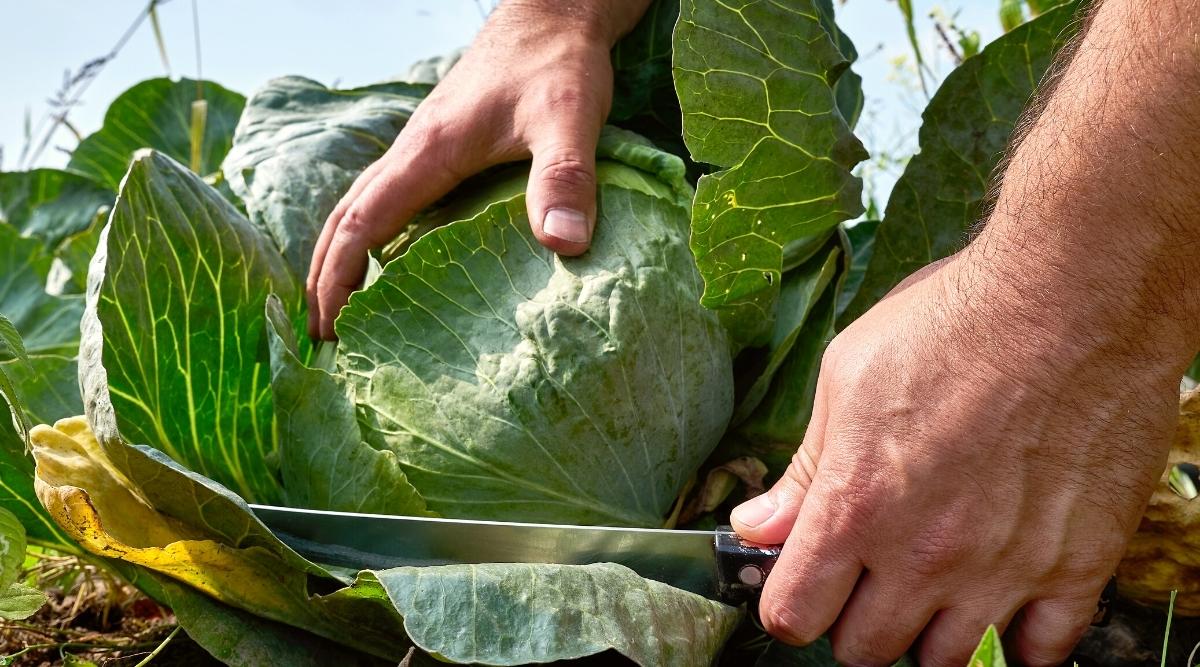
Most of us crave the soft, juicy leaves of cabbage for coleslaw or cabbage rolls. If you go to harvest cabbage and it feels overly hard or woody, you probably waited too long to pick it. Woody cabbage has been left in the ground for too long and developed hardened tissues.
How to Fix It
You can’t do anything to save woody cabbage, but you can take special care to harvest your heads sooner next time. To catch cabbage at the proper time, wait until a head starts forming in the center, then start checking on a weekly basis.
Grasp the center of the plant and feel if the head is firm and dense. As soon as it feels hard like a grocery-store cabbage, cut it right away. You don’t want the cabbage to grow too large or hard for eating. Most medium-sized varieties are tender when they are about the dimensions of a softball.
Split Heads

Cabbage heads that split down the middle are a clear sign of overwatering. The cells become over-hydrated and burst through the head.
This is most common in the late season after heavy rain, but it can also be caused by excessive irrigation during maturation. Fortunately, split cabbage is purely aesthetic and you can easily cut off the split section and enjoy the rest.
How to Fix It
Fortunately, split cabbage is purely aesthetic and you can easily cut off the split section and enjoy the rest. This crop resents soggy conditions and should always be planted in well-drained soil that is rich and loamy. This drainage will allow heavy rains to pass through the soil profile very easily without pooling up.
Use drip irrigation or soaker hoses to deliver water straight to the root of the cabbage. Allow the soil to moderately dry out (but never bone dry) before watering again.
You can also find some split-resistant varieties like ‘Tendersweet’ or ‘Farao’.
Dead Lower Leaves With V-shaped Lesions

Black rot is an aggressive brassica disease that initially causes yellowing around the cabbage’s leaf edges. As it progresses, these areas turn to V-shaped lesions with brown, dead parts of the lower leaves. In extreme infections, the whole plant will turn brown and die.
A bacteria called Xanthomonas campestris is the cause of black rot. It can affect any Brassica-family crop and tends to enter your garden via infected seeds. Like many plant diseases, it overwinters in plant residues. It can affect cabbage at any stage.
How to Fix It
As soon as symptoms appear, remove infected leaves or whole plants and sanitize your hands as well as tools after touching them. There are no known sprays or chemicals approved for garden use.
In the future, it’s very important to source reputable disease-free seeds. Resistant varieties like ‘Tropic Giant’ or ‘Drago’ are great choices. You should also ensure that all crop residues are cleaned up after harvest.
Lastly, avoid injuring or wounding the plant if possible. The bacteria like to enter the cabbage through open pores. It helps to control flea beetles and other pests that may transmit the pathogen.
Leaves Turning Purple

While there are some awesome red and purple varieties of cabbage, it can be problematic to see your green cabbage turning purple. According to Texas A&M University extension, this is most commonly a sign of a nutrient deficiency. The specific nutrient can be determined based on the age and appearance of the affected leaves:
- Nitrogen deficiency: Older leaves turn purple and young leaves may turn pale green.
- Magnesium deficiency: Older leaves turn red, orange, or purple, then brown or die over time.
- Phosphorus deficiency: An overall purple or reddish hue to all leaves and stunted growth.
How to Fix It
Growing cabbage in loamy soil that is rich in organic matter helps prevent nutrient problems. If you notice purpling, you can amend with specific fertilizers based on the symptoms:
- Nitrogen deficiency: Add liquid fish emulsion (quickly absorbable), feather meal, or manure-rich compost. However, avoid fertilizing with nitrogen if the heads have already started forming (this can cause splitting and other problems).
- Magnesium deficiency: Magnesium sulfate or epsom salts can be useful for fixing a magnesium deficiency. Some gardeners also add poultry manure or soybean meal.
- Phosphorus deficiency: Use a slow-release phosphorus-rich fertilizer like rock dust, bone meal, or fish bone meal. These are best added in the early season.
Leaves Turning Yellow on One Side

Yellowing leaves is a generic symptom that can be linked to nutrient deficiencies, water fluctuations, or a range of diseases. But when the yellowing is concentrated on one half of the plant, it’s usually a sure sign of Fusarium wilt or “Fusarium yellows”.
This fungus attacks in hot temperatures from 75° to 85°F. In extreme infections, leaves turn brown and die, eventually leading to the whole plant wilting and collapsing.
How to Fix It
Fusarium wilt, unfortunately, cannot be fixed. Once it’s present, it can live indefinitely in the soil. Because of its affinity for warm weather, it’s vital to only plant cold-weather cabbage in these areas. You can practice crop rotation and plant resistant varieties such as ‘Deadon’, ‘Tropic Giant’, or ‘Bilko’.
Final Thoughts
Most cabbage problems are caused by cultural problems, pests, or diseases. The easiest way to prevent them is to prepare rich, well-drained soil and use row cover at the time of planting.
Below ground, quality soil that is amended with biologically-diverse compost will help cabbage stay properly drained and fertilized. The improved water holding capacity from loamy soil simultaneously prevents water stress and soilborne diseases. Broadforking or loosening the soil helps to aerate it.
Above ground, the use of row fabric prevents pests from wreaking havoc on your Brassica plants. We always recommend covering cabbage seedlings with row cover (with or without low tunnel hoops) from the time of planting until harvest, if the weather permits.


