How to Prepare Your Garden Bed for Growing Asparagus: 11 Pro Tips
Do you want to harvest bountiful asparagus spears in the spring? In this article, plant expert Matt Dursum offers pro tips to prepare your bed for growing asparagus.


Contents
Asparagus is one of the earliest vegetables you can harvest. Once established, asparagus sends up delicious spears every spring. These tender greens are packed with nutrients like iron, zinc, calcium, and vitamin K. They’re also incredibly versatile and fit in many recipes, from traditional French roasts to fresh salads.
If you’re new to growing asparagus, all you need is a little patience. It can take a couple of years before your first harvest. However, once your plant gets going, you’ll enjoy bountiful spears for over a decade.
The first step to growing healthy asparagus plants in your garden is getting your garden bed ready. Below are 11 pro tips to prepare your garden bed for growing asparagus.
Epic Organic Garden Straw
Epic Organic Garden Straw
Epic Organic Garden Straw is a weed seed-free mulch that helps create a healthier, more resilient garden. It locks in moisture, blocks weeds, and regulates soil temperature, giving your plants the stable environment they need to thrive, without introducing unwanted seeds or chemicals.
Buy at Epic Gardening ShopSelect the Perfect Spot

The first trick to growing fantastic asparagus is finding the right location for your beds. The first thing to consider is how much sunlight you get.
This perennial vegetable needs at least 6 to 8 hours of full sun to flourish. This means you’ll have to find a location away from shade. If your bed is near tall trees, buildings, or tall crops like corn, consider building or buying a new bed somewhere else.
Also consider the possibilities of future construction nearby. Imagine getting healthy asparagus plants going, only to watch an apartment building go up next door. The sudden shade will most likely hurt your harvests. You’re going to be growing this vegetable for a long time, so do your best to find the right location.
Choose the Perfect Bed

Now that you have the right location selected, it’s time to build your bed. Asparagus doesn’t enjoy competition from weeds and other plants. That’s why it’s a good idea to create a raised bed just for it.
Raised beds are easy to maintain. You can control weed growth and amend the soil easier. By adding the right combination of topsoil, compost, and organic matter, you’ll develop a mini ecosystem for your plants.
Raised beds give you space to install pest protections like raised bed covers. They also make it easier to install a soaker hose system or drip irrigation for easy watering.
Build your bed from scratch or order a metal bed like this one. Make sure it’s bottomless and deep so your plant’s roots can reach the groundwater easily.
Prepare Your Soil Mixture

Prepare a suitable soil to fill your bed with before planting asparagus. These perennials prefer well-drained soil with a pH of between 6.5 and 7.0. The plant won’t thrive in acidic ground or anything that becomes too soggy.
Because it’s a heavy feeder, try boosting the belowground nutrients before planting. Start with a well-drained mixture of sand, garden soil, and organic compost. Load up the phosphorous by amending with manure and natural amendments like seabird guano.
The more organic material you add, the healthier your plants will be. This will also save you time amending it later.
Test Your Soil

After creating your soil, you can test it with a soil testing kit. This extra step shows you the pH, amount of organic matter, and its ability to retain nutrients. You’ll also get a list of important macro-and micro-nutrients like phosphorus, calcium, potassium, and magnesium.
With these easy-to-read numbers, you’ll know exactly what your soil is missing. As time-consuming as this step may seem, it will save you a lot of time down the road. Think of asparagus as a long-term food investment. The first steps are always the most important.
Fill Your Bed

Once you’ve created and tested your soil mixture, it’s time to fill your bed. Make sure it’s at least 18” deep. Although some asparagus varieties can thrive in shallower beds, give them a little extra room to grow.
Don’t compact the ground. Keep it nice and loose. Compacted soil will be more of a barrier for the roots to grow in.
Make sure there are no weeds in the mixture. As mentioned before, this perennial doesn’t handle competition.
Prepare Your Bed for Asparagus Planting
Once your bed is full, it’s time to prepare it for planting asparagus. Most gardeners choose to plant crowns. They’re easier than seeds and take less time to establish.
Whether growing from crowns or seed, have fun choosing the varieties. There are novelty purple, heirloom varieties, and the traditional green varieties you see in markets.
Planting Crowns

Crowns are the roots and buds of new asparagus plants. You can find them at your local nursery, online, or from fellow gardeners.
Prepare for planting asparagus crowns by digging a trench in your bed around 12” deep by 12” wide. Add an extra layer of organic compost and manure to the top. Make small hills, a couple inches high, inside the trench. Space them about 18 inches apart from each other.

Before planting, soak your crowns in lukewarm compost tea or water for about 30 minutes to rehydrate them. Then, place the crowns on the small hills inside the trenches. Drape the roots over the hills and into the trench. You can also lay your crowns sideways if you prefer.
After planting, cover the crowns so they’re buried at least a few inches deep. Space out your rows of trenches 2 or 3 feet from each other. With enough space, the crowns won’t compete with each other and the spears will be nice and thick.
Planting Seedlings

Seeds are cheaper than crowns, but take longer to grow. Start your seeds indoors in seed cells ahead of planting so you’re working with 3 inch seedlings by spring.
Add extra nutrients in the form of compost or worm castings. Space your asparagus seedlings about 12” apart. Remove them from their containers. At this stage, you can roll them in a mycorrhizal inoculant to help the roots establish more easily.
Unlike the crowns, which go deep into the soil, plant your seedlings at the surface. Gently cover the roots with soil and continue until each plant is planted in your bed.
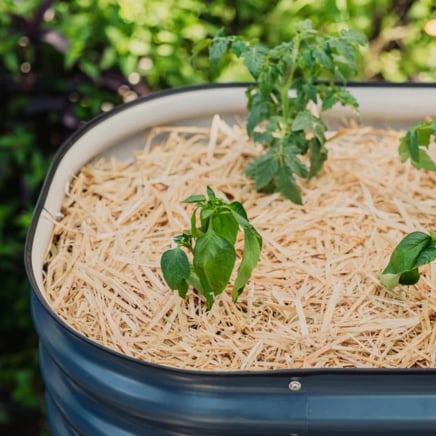
Don’t Forget to Mulch

After planting your crowns or seedlings, add a generous amount of mulch in your bed. Mulch helps protect the plant from temperature changes. It also helps prevent moisture from evaporating away.
There are several types of mulch you can use. For asparagus, straw mulch works great. It’s affordable and light weight. Just make sure it’s seed free, or you may unfortunately have to remove straw seedlings from your bed.
Other forms of mulch that work well include dead leaves and grass clippings. Whatever type of mulch you choose, add about an inch or two over your young asparagus plants.
Give It Enough Water

Water your bed immediately after planting and mulching to prepare the asparagus roots for establishment. The water helps settle the straw and weigh it down in the wind.
You want to soak the mulch and young plants so the soil is evenly moist. During the first year, don’t let up on watering. The plants will need the extra moisture to establish in their roots in your bed.
Aim for an inch a week or a little more. If there’s a drought, you’ll have to increase the amount of water you give your young plants by soaking them deeply every two weeks.
Consider Using a Soaker Hose

As you can see, asparagus plants love water. Instead of taking your hose and water buckets out every day, install a soaker hose inside your bed.
This is essentially a long hose made out of porous material, usually recycled rubber. When you turn the water on, it gently drips out of the hose and evenly waters your garden. A soaker hose avoids spraying and prevents powdery mildew from forming on wet leaves.
The main components include a faucet attachment, pressure regulator, hose, and PVC plumbing pipes. Setting up the soaker hose is easy once you have your parts.
Check for Pests and Diseases

As with every garden plant, check your asparagus for signs of pests and diseases. The most common pests to look for are asparagus beetles. These pests will chew into your spears and destroy an entire crop. Also look out for asparagus miners, thrips, and aphids.
Watch your plant for signs of diseases such as orange spotting on the leaves and spears. This is likely caused by asparagus rust. If left untreated, the spots turn from orange to black.
You can use copper fungicide and neem oil to treat some infections. Fusarium root rot, however, has no treatment. If you suspect your plants are suffering from this soil-borne disease, they’ll have to be thrown out.
Encourage Beneficial Insects

The best way to prevent pest damage is encouraging beneficial insects to live in it. Species such as beneficial nematodes and wasps will eat pests before they consume your spears.
By cultivating a healthy ecosystem, you’re saving time and money on expensive insecticides. It’s also more sustainable for your garden.
Key Takeaways
These perennial plants can last for almost two decades if they’re healthy. That’s why it’s important to take your time and prepare your asparagus garden bed carefully. Create a sustainable ecosystem and you’ll enjoy bountiful harvests year after year.


