Microgreens Supplies: Essentials You Need to Get Started
In this guide, Epic Gardening Founder Kevin Espiritu walks through the essential supplies for growing microgreens at home, from seeds and trays to growing media and pH adjustment. He covers what's worth investing in, what you can skip, and how each component affects your results.


Contents
Microgreens are one of the few crops where you can go from dry seed to fresh harvest in under two weeks. No garden bed, no grow lights (though they help), no waiting months to see if your effort paid off. For anyone who wants to grow something edible indoors without a big commitment, microgreens are a great place to start.
That said, the microgreens supplies matter more than you might expect for something so small. The wrong tray depth, the wrong pH, or a growing medium that holds too much moisture can turn a simple project into a moldy mess before you’ve harvested a single tray. Getting the right materials together upfront saves a lot of frustration later.
Here’s what you need and, just as importantly, what to look for in each item.


Microgreens Seeds

Not all seeds are sold in quantities that make sense for microgreens, so this is where a lot of beginners run into their first surprise. You go through a lot more seed than you’d think. A single tray can use an ounce or more of seed depending on the variety, so buying a small packet meant for garden rows won’t get you far.
Start with at least a four-ounce pack. If you’re not sure where to start, pick one variety you already like eating (radish, sunflower, and pea shoots are all forgiving for first-timers) and stick with that until you’ve got the process down.
Microgreen seed mixes are also an option if you want a more colorful tray. They look beautiful and taste good, but keep in mind that different seeds in a mix can germinate at slightly different rates. For a first grow, a single variety tends to be easier to manage.
Here are some options from Botanical Interests that are great for beginners:
Nutrient Solution and pH Down

Most tap water is too alkaline for microgreens, and even reverse osmosis water tends to run higher than ideal. Microgreens prefer a slightly acidic environment, somewhere around 6.0 on the pH scale, and the easiest way to get there is with a pH down solution.
Of everything on this list, pH down is the one non-negotiable supply. Without it, you’re leaving your germination rate and overall growth quality up to chance. A pH testing kit (or a digital pH meter, if you want to be precise) rounds this out so you’re not guessing.
Nutrient solution is more of a judgment call. Some growers add a light feeding a few days before harvest to boost flavor and color. Others skip nutrients entirely and let the seed’s own energy carry the grow from start to finish. Both approaches work. I use a dilute nutrient solution in this guide, but if you’re keeping things simple for your first tray, plain pH-adjusted water should be enough.
Microgreen Trays

The next thing to add to your microgreens supplies list is a standard 10-by-20 tray without drainage holes. The no-drainage part is important because you’re bottom-watering microgreens, not running water through from the top. A tray with holes will just leak onto whatever surface you’re growing on.
Buy at least two trays. One holds the growing medium and seeds. The second sits inverted on top during the first few days to create a blackout dome that keeps your seeds in complete darkness while they germinate. That dark, humid environment is what triggers strong, even sprouting. Without it, germination tends to be patchy and uneven.
Local garden centers and hydroponic shops usually carry these trays, and they’re inexpensive enough that it’s worth picking up a few extras. They’re reusable, but having spares means you can stagger your grows once you get comfortable with the process.
Growing Media

Your seeds need something to anchor into and hold moisture while they sprout. There are a few main options for microgreens supplies, each with trade-offs worth considering.
Coconut coir is what I use, and it’s a good middle-ground choice. It holds moisture well without getting waterlogged, it’s a sustainable byproduct of coconut processing, and it can be reused for multiple grows with a little cleanup between trays. It does need to be hydrated before use (it usually comes compressed into bricks), but once it’s prepped, it’s easy to work with.
Soil (specifically a fine seed-starting mix) is the most traditional option and the best choice for certain varieties that prefer a soil environment. It can also be amended and reused in a closed-loop system, which makes it the most sustainable long-term. But it’s the messiest to work with, especially at harvest. Bits of soil clinging to delicate microgreen stems aren’t ideal.
If you go this route, look for a seed-starting mix with fine particles rather than a chunky potting mix — something like Espoma’s Seed Starter works well because the finer texture supports better germination.
Spray Bottle
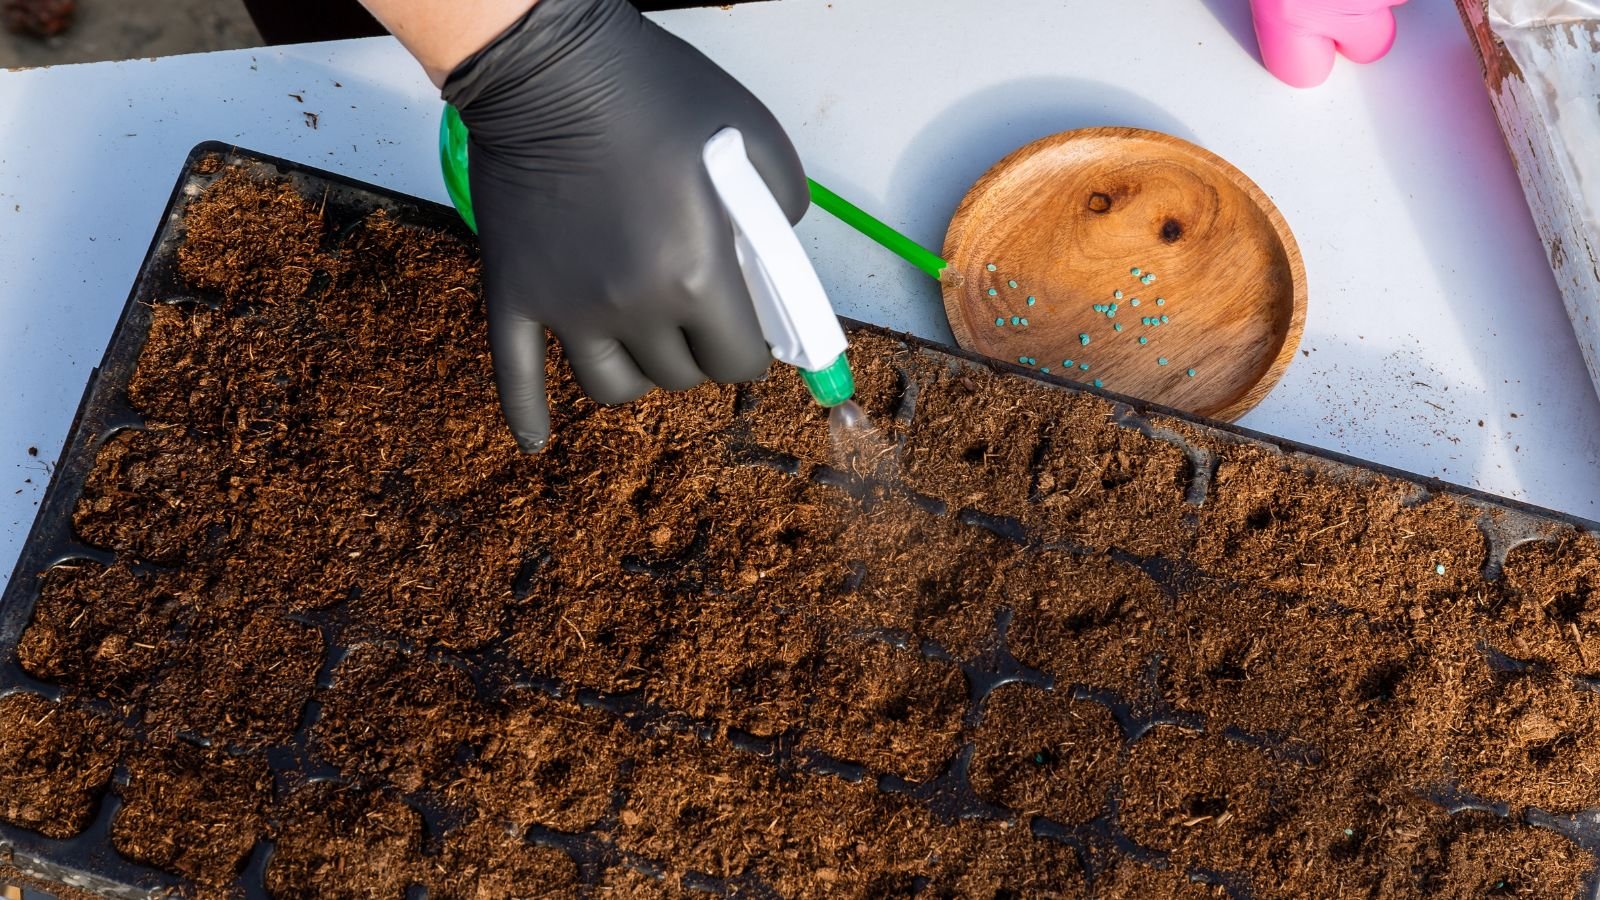
A spray bottle is not as vital in terms of microgreens supplies, but it is useful for the first day or two when your seeds need surface moisture to kickstart germination. Once the seeds have sprouted and you switch to bottom-watering (adding water directly to the tray beneath the growing medium), the spray bottle mostly stays in the drawer. But for those initial stages, a fine mist is the gentlest way to keep seeds damp without disturbing them or washing them into clumps.


