Do these 5 Things Before Planting Garlic
Garlic planting time can sneak up on growers as we’re busy cleaning up our summer gardens and preserving our bounties for fall and winter, but it’s crucial to get ready for garlic to guarantee a successful harvest next season. Join organic farmer Jenna Rich as she discusses five things you must do in preparation for planting garlic.


Contents
If you enjoy cooking with and eating garlic, try growing your own! This famous allium serves as the base of most soups, salad dressings, stir-fries, and sauces. It also offers antimicrobial and antifungal properties and may boost immune systems during cold and flu season.
I used to wonder what all the fuss was about. Then, I dove deep into the nuances of different types and cultivars of garlic! It’s one of the oldest known crops, possibly 5000 years old, which is not an insignificant fact, and it’s a joy to use in the kitchen. It’s hands-off to grow with the proper preparation, planning, and planning and boasts big rewards. Plus, it’s propagation is fool proof.
Let’s get into five things you should do before planting garlic this fall.
Our Favorites


Select The Best Type For Your Region
The world of garlic is broad and complex. Heirlooms like ‘Legacy’ date back to the 1800s, each with a unique origin story. Consider the differences in hardneck and softneck growing requirements before making your selections.
Hardneck

Hardneck varieties have potent, garlicky flavor and bite. They perform well in Zones 3 to 7. Hardnecks require a three to four-month vernalization period with temperatures below 40°F (4°C), making them ideal for northern growers where winters are harsh and frosts are hard. Fewer but larger cloves will form on these types. They last up to six or eight months with ideal storage conditions.
Only hardneck types produce garlic scapes, which are a real summer treat. Scapes are one of the two ways garlic plants produce seeds. If you forget to snap a scape, the bulb won’t fully form beneath the surface, causing a flower and seeds to form at the tip of the curly-que scape.
After you snap the scapes, the plant is encouraged to focus on bulb formation, so don’t forget this crucial step. Enjoy them grilled, in pesto, or roasted for a sweet, less harsh version of your favorite bulbs.
Softneck

Due to its long storability, you’ll most likely see softneck varieties in the grocery store. There are more to choose from, but the flavor isn’t as strong, perfect for raw eating and grated into dressings. Softneck varieties thrive in warm climates, and people commonly braid them before hanging them to cure.
While growers in Zones 7+ can grow hardneck varieties, they must be manually vernalized in a refrigerator to imitate the natural cycle of winter frost and spring thaw. If the garlic doesn’t suspect a winter has occurred, they may not enter or break their dormancy correctly.
Choose Your Varieties and Seed Producer

With so many varieties, it’s important (and fun!) to explore the world of these iconic alliums before selecting the most popular one. Their depth and range in flavor and versatility in the kitchen may surprise you, and you may land on an uncommonly grown heirloom that works well in your garden.
Softneck varieties our community loves:
- ‘Inchelium Red’ loves the heat and adds an interesting texture to your favorite recipes.
- ‘Sicilian Artichoke’ is a long-lasting, spicy heirloom option for dried flower arrangements and braiding.
- ‘Silver White’ performs well in most climates, including coastal regions and under humid conditions.
Popular hardneck varieties include:
- ‘Music’ is a classic choice, with beautiful white bulbs and extreme cold tolerance.
- ‘German White Stiffneck’ is easy to peel, highly productive, and reliable across zones.
- ‘Montana Zemo’ produces giant, spicy bulbs that can store for up to six months. Enjoy it raw or cooked.
When choosing a seed garlic supplier, look for good reviews, seek out local, organic suppliers, and ask about growing methods to ensure a high-quality seed. Locally produced garlic will grow well in your region’s climate and soil type. Plus, you’ll keep your dollar circulating in the local economy while supporting a farmer. It’s a win-win for all.
Seeds should arrive without bruises, mold, or deformities, which signify poor quality and may lead to crop failure. Inspect them upon arrival and select the largest, healthiest ones for planting. Discard any soft, discolored, stinky, or spotted ones. To keep them fresh until it’s time to plant, keep them in a dry, dark place around 50 to 65°F (10 to 18°C) to avoid sprouting.
Avoid using garlic from the grocery store or whose origin cannot be determined. It likely won’t be the best performer if you’re unsure if growers used sprays, how it was grown, or its age. Additionally, don’t risk transmitting the fungus Stromatinia cepivorum Berk, which causes white rot.
The tiny sclerotia are common in commercially grown garlic and can get into your soil, destroying garlic harvests for many years.

Prep Garden Beds

Grow garlic in raised beds, metal beds, or containers. Just be sure to prepare the beds to ensure they have what they need to thrive. Choose a plot that receives full sun daily and is not in the lowest elevation on your property to ensure the soil is well-draining. Garlic doesn’t compete well for water and nutrients, so plan on planting solely garlic in this area.
Loosen the soil with a digging or broad fork before mixing in a slow-release feed high in potassium and phosphorus, critical for root development in early garlic stages. If you’re unsure what your soil needs or if it’s a new bed, opt for soil testing. There are at-home kits, or you can contact your local extension office or university soil testing labs.
Ideally, your plot has been prepped several months before planting your garlic and has gone through one or more rounds of cover crops. Terminated cover crops add biomass and organic matter to the soil, affix nitrogen in their root systems that will be available to the next round of crops, suppress weeds, and break up compaction.
Pro tip: Cover the area with straw or a tarp to limit germinating weed seeds if there will be a significant amount of time between your bed prep and planting.
This crop can’t have enough compost mixed into and placed on top of it before the long winter. It is a great source of organic matter and improves the soil structure and drainage. Remember, garlic is a heavy feeder in the ground for a long time, so don’t skimp on amendments, compost, and mulch!
When the time comes, make a trench for each row using the back of a tool shovel or a rolling gridder to create a dibble for each clove. A 30-inch bed system can tolerate four or five cloves across at four to six-inch spacing.
When to Plant

Keep your eye on the extended fall forecast in your region because getting the timing right is crucial to your garlic’s success. Plant them so they have enough time to establish a robust root system but late enough so they’ll go dormant at the proper time.
Plant about two to four weeks before the first hard frost. It’s better to delay a few days or a week than to allow them to sprout after being planted too early and experience a sudden temperature spike. Sprouting before winter leaves them vulnerable to frost damage or death.
Pop The Cloves and Plant Them

Break the cloves apart from the heads, but allow the skins to remain. The skins protect the garlic in fall and winter’s cold, wet soil. Set any small cloves aside for fresh use; larger cloves will produce large ones next season. Plus, smaller cloves have a longer shelf life, which is perfect to bring into the kitchen.
Some growers sterilize the cloves with a 70% alcohol bath, 1:9 bleach water solution, or a 3% hydrogen peroxide water solution to sterilize them and avoid transferring disease pathogens into their garden. Another optional step is pre-soaking cloves in baking soda, kelp, and water for a few hours to help them sprout and boost their nutrients.
Space your cloves as recommended, which will differ across varieties and types. Place the flattened root end down, pointy side up, and press it into the soil. If the clove is planted upside down, you’ll risk it not performing well after exhausting precious energy to get its roots in the right direction.
Cold region growers can wedge them in four to six inches for additional frost protection, whereas warmer climate growers can keep them at a two-inch planting depth.
Tamp the soil down gently after covering the cloves with soil and compost. Water them thoroughly upon planting and continue into the fall as needed, depending on rainfall or lack thereof. If you’ve sown your cloves deeply and covered them with four to six inches of mulch, the soil will retain moisture well.
Cease watering in the winter months while they’re dormant. Spring rain and snow melt should suffice for irrigation in the spring. Watering may be needed if you’re in a particularly dry region as they break dormancy.
Cover with several inches of straw mulch in cold regions to protect the delicate, shallow root system and keep the soil at a consistent temperature.
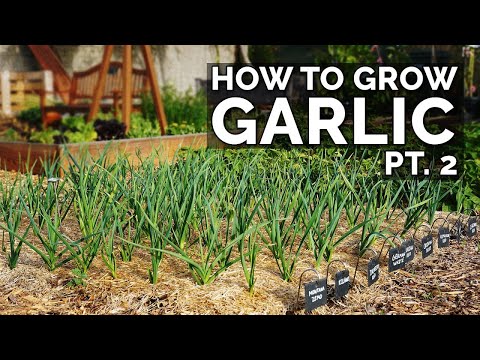
Pro tip: Label each plotting area if you’re growing multiple varieties so you can take note of each’s progress, harvest, and overall performance.
Key Takeaways
- Choose the right type and variety for your region and garden setup for success.
- Prep beds and add lots of compost. Keep them weed-free before planting to limit competition.
- Experiment with both soft and hardneck varieties in the garden and kitchen.
- Choose a fertilizer high in potassium and phosphorus in the fall, saving the high nitrogen feeds for the spring when you want the plant to focus energy on above-ground growth.
- Protect beds from harsh winters by covering them with thick layers of organic compost or mulched leaves.


