How to Plant, Grow, and Care For Chrysanthemums in Your Garden
Are you thinking of adding some flowers to your garden but aren't sure which ones to add this season? The chrysanthemum is one of the most popular flowers in the entire world. In this article, flower expert and farm owner Taylor Sievers walks through how to get the best results when you plant, grow, and care for chrysanthemums in your garden.


Contents
We’ve all felt it. The summer was long and full of beautiful flowers blooming in bright, spicy colors, and yet as August comes to a close it seems that all is dying back in the garden–or at the very least covered in mildews and leaf spots. The garden just isn’t what it was…
Enter the chrysanthemum–or rather, “mum” if you have trouble pronouncing that perplexing name (darn you, Linnaeus). Not only do these plants step it up and put on a show when most other plants are long done blooming, but given the right conditions they can perennialize in your garden OR you can easily root cuttings to have plant starts for next Spring. That’s a win-win for this gardener!
There are more than 40 species of chrysanthemums known today! Grow them in a pot or a flower bed in full sun, pinch them a few times, and you’ll have blooms galore. Mums used as cut flowers usually have excellent vase life, while other chrysanthemums are renowned for their uses in teas or as a natural source of the insect repellent pyrethrum. Let’s take a deeper look at everything you need to know about growing Mums in your garden!
Chrysanthemum Plant Overview

|
Plant Type
Perennial
Native Area
Asia
Hardiness Zone
USDA 4-9
Season
Summer and Fall
Exposure
Full Sun
Maturity Date
Up to 112 days
Growth Rate
Moderate
|
Plant Spacing
18-24 inches
Planting Depth
Surface Sow
Height
1-3 feet
Watering Requirements
Moderate to High
Pests and Diseases
Leaf Spots, Ray Speck, Aphids
Tolerance
Cool to Warm Climates
Maintenance
Low
|
Soil Type
Well-draining Loam
Attracts
Tachinid Flies, Parasitic Wasps
Plant With
Salvias, Sunflowers, Coral Bells
Don’t Plant With
Plants That Require Shade
Family
Asteraceae
Genus
Chrysanthemum
Species
cinerariifolium, x morifolium, indicum
|
History

Chrysanthemums were first documented in China as a flowering herb in the 15th Century B.C. The earliest illustrations of chrysanthemums (around the 17th century A.D.) described them with small yellow flowers, though chrysanthemums were depicted on ancient Chinese pottery hundreds of years prior.
Many parts of the mum were used medicinally or in the kitchen. Boiled roots were said to be used as a remedy for headaches, young shoots and petals were used in salads, and the flowers and leaves were used in teas. The Chinese believed that chrysanthemums held “the power of life.”
Around the 8th Century A.D., the chrysanthemum was introduced to Japan. It made such an impact that this flower would later go on to be on the crest and seal of the Emperor. One of the five ancient festival days that the Japanese celebrate is called the Festival of the Chrysanthemum.
In the 1600s, chrysanthemums were introduced to Europe. They would go on to have quite a different meaning than they did in ancient China. Mums would come to be known as the death flower, as they were used almost exclusively for funerals and memorials.
Nevertheless, it was after mums were introduced to Europe that Carl Linnaeus, the man credited with establishing scientific nomenclature for living organisms, would then give the chrysanthemum its name around 1753.
Chrysos, the Greek word for gold, and anthemon, the Greek word for flower, were combined to name this flowering herb. This gives us a clue that the chrysanthemum was still the little golden flower that it had been depicted as in the 17th century.
Chrysanthemums were introduced into the United States during colonial times. Since then, they have become the “Flower of Fall,” due to their nature of producing flowers exclusively in Autumn.
Many wrist corsages, flower arrangements, and front porches have been adorned with these flowers that now come in shades of red, orange, yellow, bronze, white, pink, and purple. They even flower in different shades of green, too. These delightful new colors and flower shapes are all thanks to breeding efforts by many plant breeders from across the world.
Plant Description

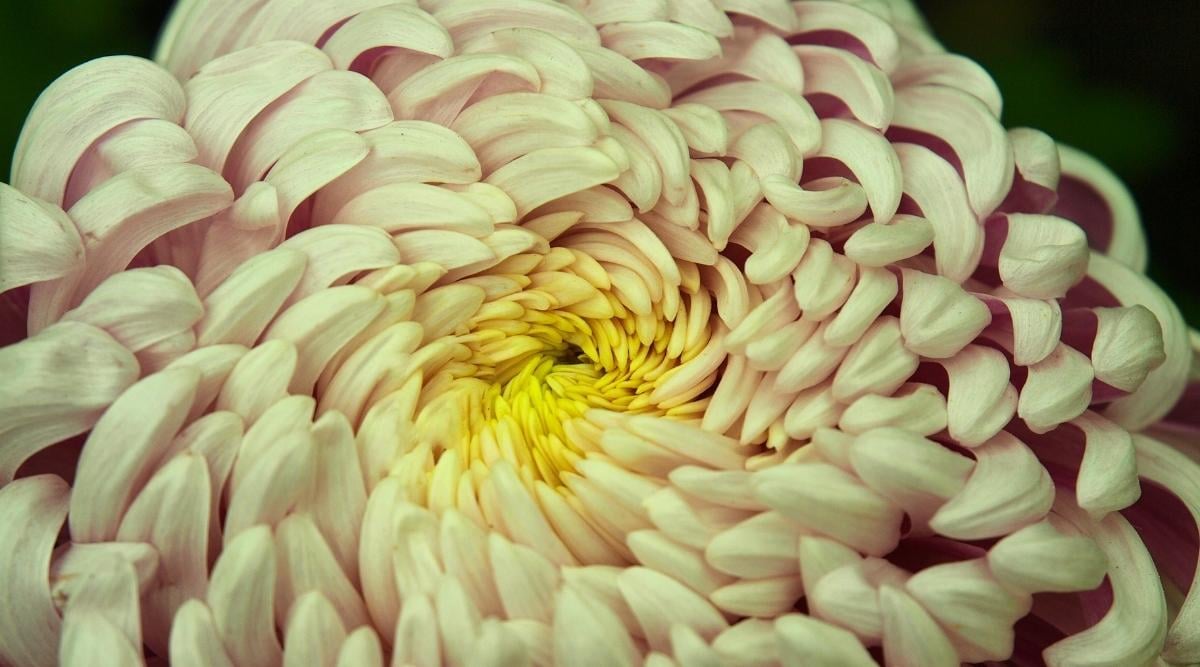
Chrysanthemum plants are considered herbaceous (non-woody) perennials growing in a mounding or clumping habit. They are often grown as annuals in colder climates because of their longer bloom times. The plants will grow between 1 to 3 feet tall with many stems. The leaves are green to dark green and lobed. Sometimes the oils from the leaves can be a skin irritant to humans. The flowers will range in size and shape from 1 to 6 inches in diameter.
Chrysanthemums are members of the Asteraceae family (along with sunflowers, dandelions, black-eyed susans, zinnias, etc.). This means that their flowers are actually composite flowers that are made of many miniature flowers known as florets. There are two types of florets that make up a composite flower, and these are disk florets, which usually make up the “center disk” of the flower, and ray florets, which to our eyes appear to be petals. Depending on the species, sometimes either the ray or disk florets may be sterile.
On chrysanthemums, only the disk florets will produce seed, but oftentimes the disk florets are very inconspicuous. Breeders will usually have to clip back the mum petals to get to the disk florets for hand pollination.
Chrysanthemum Types
Because mums have changed so incredibly much from those daisy-like yellow flowers of ancient China, growers and breeders have classified them into different types based on their flower appearance.
Important Mum Terminology

The terms disbud, spray, and pot mom distinguish the way these mums are commercially produced in the horticultural or floral industry. This information is included for you to have a clue as to how you may want to grow them in your garden!
If the mum is grown as a disbud, then this indicates that one single large flower is grown per stem by removing all of the side buds on that stem when the plant is young. This allows for the plant to put all of its energy into that single bloom, which will make the bloom larger.
If the mum is grown as a spray mum, this would indicate that the goal is for the plant to produce several flowers on any one single stem. Usually mum classes with smaller diameter blooms are grown as spray mums.
Pot mums would be those classes of mums utilized for the horticultural industry, where two to three mum transplants are grown together in one pot. These pot mums are pinched multiple times throughout the season to induce branching and ultimately the quintessential round shape that is typical of the potted mums you may see being sold at big box stores and local nurseries in the Fall (at least in the United States).
Heirloom mums are varieties of chrysanthemums that have been cultivated for greater than 50 years. These plants are not patent protected, so they can be propagated legally by growers and home gardeners alike. Usually these mums have particularly noteworthy characteristics that make them treasured by home gardeners and florists.
Classes of Chrysanthemums and Descriptions
These 13 classes of chrysanthemums are recognized by the National Chrysanthemum Society:
Irregular Incurve
The petals of this mum curve loosely inward, making the centers fully closed. The lower florets have an irregular appearance which may give the bloom a skirted effect. Flowers are typically 6 to 8 inches and the plant is moderately short. These plants are grown as disbuds.
Reflex

The florets curve downward and overlap on this mum bloom, which gives it a similar appearance to the feathers of a bird. The top of the flower is full but flattened. The center disk is not visible. Flowers are typically 4 to 6 inches in size and the plant is of medium height. These plants are grown as disbuds.
Regular Incurve

This bloom is globular in form with the flower being equally wide as it is deep. The florets curve inward to form a ball, so the center disk is not visible. The flower is similar in appearance to a clover bud. Flowers will reach 4 to 6 inches and the plant is moderately short. These plants are grown as disbuds commercially.
Decorative

The blooms of these mums are flattened with short petals. The center disk is not visible. The upper florets incurve slightly, but the lower petals reflex (curve outwards slightly). The flowers will reach 5 inches or greater in width, and this mum is often grown as a pot mum or disbud. The plant is typically short.
Intermediate Incurve

This class of mums typically has smaller blooms than the irregular incurve. The florets are short and they only partially incurve. The flower has an overall more open appearance even though the centers are full. These plants are grown as disbuds. Popular commercial incurve types are in this group.
Pompon

The pompon class has small blooms that are globular in shape. They may be somewhat flattened when young, but will be fully rounded when mature. The flowers range in size from small buttons to large 4 inch diameter blooms. The florets will incurve or reflex, leaving the center fully concealed. These mums are grown as sprays and the plant height is tall.
Single and Semi-Doubles
This class comprises the daisy-like blooms with a visible center disk and only one or a few rows of petals (ray florets). The size of the bloom is typically greater than 4 inches in diameter. These are grown as a disbud or spray, and the plant is of medium height.
Anemone

These mums are similar to the semi-double mums but they have a raised center that is cushion-like in appearance. The blooms resemble the pincushion flower (Scabiosa spp.). The flowers are greater than 4 inches across and are grown as a disbud for commercial purposes. The plant is of medium height.
Spoon

The spoon class is mostly the same as the semi-double class, but the petals have a spoon-like appearance at the tips. The center disk is visible and the flower size is 4 inches or greater. These varieties are grown as a disbud or as a spray. The plant height is usually tall.
Quill

The ray florets or petals in this class are straight and tubular with the tips open. The bloom is considered a double so there is no visible disk. The flowers will be 6 inches across or greater and the stems are cultivated as a disbud. The plant height is medium.
Spider

The spider mums have the spindly appearance of spider legs due to the tubular petals that coil or hook at the ends. The florets may be fine or coarse and the flower is usually 6 inches across or greater. This plant is grown as a disbud and the plant is of medium height.
Brush and Thistle

The ray florets of this class are fine and tubular and they grow parallel to the stem. The petals will resemble either an artist’s paintbrush or a thistle if the florets are flattened, twisted, and dropping. The flower size is usually less than 2 inches across. These mums are grown as spray mums and the plant is of medium height.
Unusual, Unclassified, or Exotic

This class is full of mums that do not fit the criteria of the other classes. The florets are typically twisted or they may have one or more characteristics that fit multiple classes. The flowers are usually 6 inches or greater and are grown as a disbud, with the plant reaching medium height.
Propagation
Chrysanthemums are typically grown from cuttings. The home gardener may find them particularly hard to find at the correct time for planting for this reason, but never fear! There are some great companies out there that offer cuttings that can be ordered online or via a catalog.
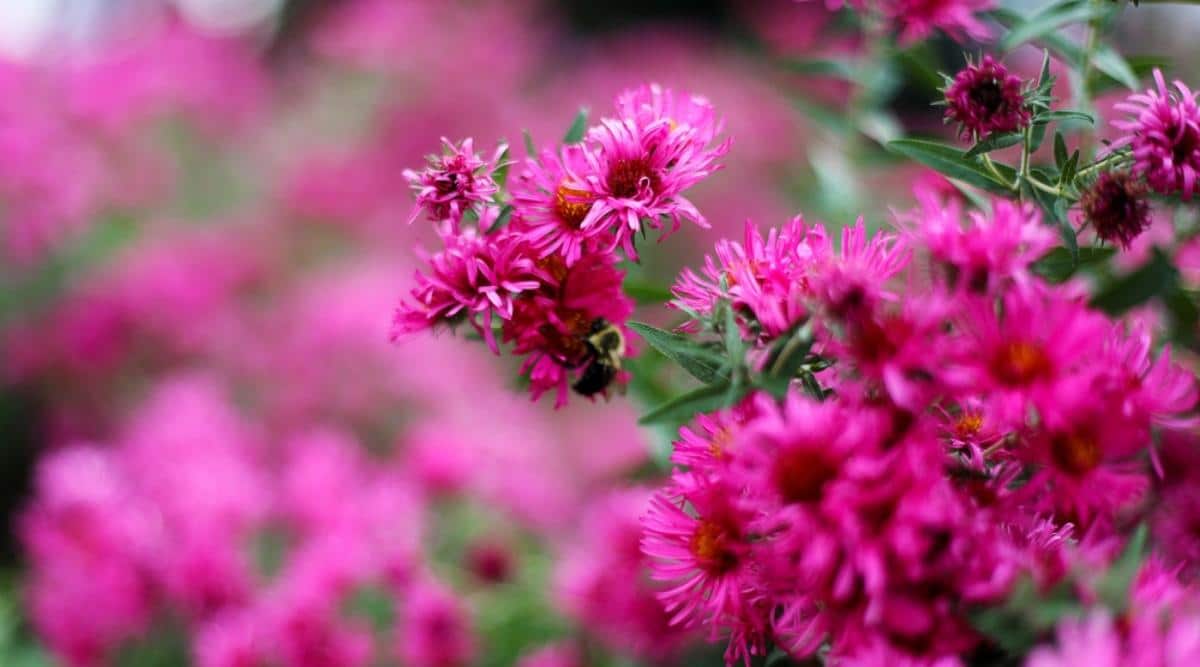
Mums also make great companion plants. Mums bloom in the fall, and pair well with other Fall-blooming plants like salvias, ornamental peppers, sunflowers, and asters, or they can even be staged with an armful of pumpkins, gourds, and squash!
Planting Mum Starts and Potted Mums

If you have been lucky enough to get your hands on chrysanthemum cuttings, then the best time to plant them is in the Spring. When planted in the Spring, the transplants will have all Spring and Summer to establish before they bloom in the Fall. It is important for the plants to establish their root systems during this time so they can survive the freezing Winter temperatures.
You may have some luck planting a potted mum in the Fall, but it is important to make sure your mum is well watered, and planted in the best spot possible for establishment. Rich, well-draining soil and excellent moisture will help the root system to establish before the Winter freezing temperatures set in. Make sure to plant your mums as early as possible in the Fall or even late summer, especially in northern planting zones.
Propagating Mums by Cuttings

To propagate chrysanthemums via cuttings, use a sharp knife or pair of clean clippers. You’ll need about a 3 to 4 inch cutting at least. Cuttings can be taken in the Fall or early Spring when new growth begins to appear.
Snip above a set of leaves (or close to the base of a new shoot) and strip the lower leaves. If there is a flower bud or bloom, then clip off the flower bud just above a set of leaves. We don’t want that flower bud taking up all of the plant’s energy.
Use loose, well-draining media like a seed-starting mix or peat/coconut coir-based mix in pots or cell propagation trays. Plant your mum cuttings in the tray so that the lower nodes (the places where you pulled off the leaves) are below the soil line. New roots will grow from these nodes, so that’s why it is important that these nodes are below the soil line. Rooting hormone will help promote fast root growth but is not necessary.
Keep the pots or tray moist, but not dripping wet. You can cover them with humidity domes, plastic wrap, or even the top of a soda bottle or milk jug to keep the air moist around the cuttings. Remember, these little plant babies don’t have roots yet, so they’re getting all of their moisture from the air as they establish!
After a few weeks, you should notice if you were to tug on a cutting that small roots have begun to form and even some new aboveground stems or leaves have begun to grow as well. Congratulations! You’ve successfully rooted your mum cuttings. Let them establish in their pots or cell tray and plant these little babies out in the garden in the Spring after your last estimated frost.
Propagating Mums by Seeds

This is probably the least common way to propagate chrysanthemums because the seeds do not produce true-to-type. This means that seeds that you collect on your own or seeds you may purchase from a seed company will produce a random array of flower blooms that will not likely resemble the parent plant.
This is how plant breeders produce new varieties of mums, however! Through purposeful cross-pollination, and then taking cuttings from the plants that have desired characteristics, new mum varieties can be bred and released to the world for further propagation.
If you desire to grow mums from seed, it is recommended to start your seeds indoors around 6 to 8 weeks prior to your last estimated frost date. Surface sow the seeds as they prefer light to germinate. Plant the transplants into the garden or landscape after the last spring frost and they’ll be off to the races, usually blooming within the first year.
Propagating Mums by Division

Established mum plants can be divided in order to reinvigorate the plant and also as a means of plant propagation. In fact, division is recommended, especially if the center of the plant emerges very weak or has a dead appearance.
When new growth begins to emerge in the spring, take a shovel or hand trowel and dig out the plant, being careful not to submerge the shovel too close to the plant to shear off roots.
Once the plant is lifted from the ground, split the mother plant in half or into the thirds by plunging the trowel or shovel into the top of the plant and down through the roots. It may seem destructive, but the plants will do just fine. You can now plant your new divisions in their desired spots in the garden, at least 18 to 24 inches apart from each other or other plants.
When to Plant Mums

The best time to plant chrysanthemums is in the late spring after your last estimated frost. This allows the seedlings or transplants to establish well before blooming in the Fall and before freezing temperatures of the Winter.
If you’re like me and find it difficult to locate chrysanthemum cuttings in the spring, then you can find reputable growers online to order from. However, sometimes this is more of a hassle, especially if there are order minimums. Some other options would be to start your chrysanthemums from seed or to purchase potted mums in the Fall.
When starting chrysanthemums from seed, you will want to start them 6 to 8 weeks prior to your estimated last frost for your area. If you’re lucky enough to find mum cuttings in the spring at a local nursery, plant them into your garden in late spring after danger of frosts have passed.
If you wish to plant the potted mum you purchased in the fall into your garden, you will need to make sure that you get your potted mum planted into the ground as soon as possible. Plant in a well-draining site in full sun. Mulch over the top of the plant well with straw, leaves, or evergreen boughs. Make sure to cut your mum plant back to about 2 to 3 inches high once the ground has frozen.
It will depend on your growing season, but in most areas your mums may not survive if planted into the ground after mid-September, so make sure you purchase your potted mums as soon as possible in the Fall!
How to Grow Chrysanthemums
When planting mums, it’s important to get the balance right. You’ll need adequate light, water, and the right type of soil. That’s without even discussing the climate or hardiness zone that you live in. Let’s take a look at the most important aspects you’ll need to understand when growing mums in your garden.
Light

Chrysanthemums require full sun to grow and bloom properly. This means they need at least 6 to 8 hours of direct sunlight per day as they are growing. Make sure to plant them in an open area away from large trees or structures that may block critical sunlight.
Chrysanthemums are also interesting because the amount of time they are exposed to daylight will affect their bloom time. Chrysanthemums are short-day plants, which means that they will flower under short days (less than 12 hours of light per day). In fact, this phenomenon is not actually about light at all, but rather about darkness. If the days are short, then that means the nights are long (12+ hours of night), and this is what induces chrysanthemums to bloom.
Commercial growers of chrysanthemums can manipulate the amount of daylight the plants are exposed to and therefore set up bloom time on a schedule to ensure reliable flower production. Some other examples of short-day plants are soybeans, poinsettias, and Christmas cactus.
This is why you should NOT plant your chrysanthemums near an area that receives supplemental lighting, such as a street lamp or outdoor light that is on all night. This will mess with the bloom cycle of the plant because the plant will not have enough consecutive hours of darkness that are needed to induce blooming.
Water

During the first few weeks after planting, make sure to water your chrysanthemums frequently as they begin to establish. Water slowly and evenly to ensure the water soaks down through the soil instead of running off of the surface.
Mulching around your chrysanthemums will help conserve moisture so you won’t have to water as much. Mulch will also help prevent weed germination, and this is important because weeds compete for both water and sunlight with your garden plants.
In general, chrysanthemums will need 1 inch of water per week during the growing season, and they may need to be watered more frequently during dry periods or flowering to keep up with plant demands.
Soil

Chrysanthemums are not particularly picky about soil type, though a loam is preferential, but they do require a well-draining soil nonetheless. Soggy soils can be especially problematic during the winter months when the excess water held in the soil is prone to freezing, which is detrimental to your chrysanthemum plants that have very shallow root systems.
Chrysanthemums prefer a soil pH of 6.5 to 7.0.
Climate and Temperature

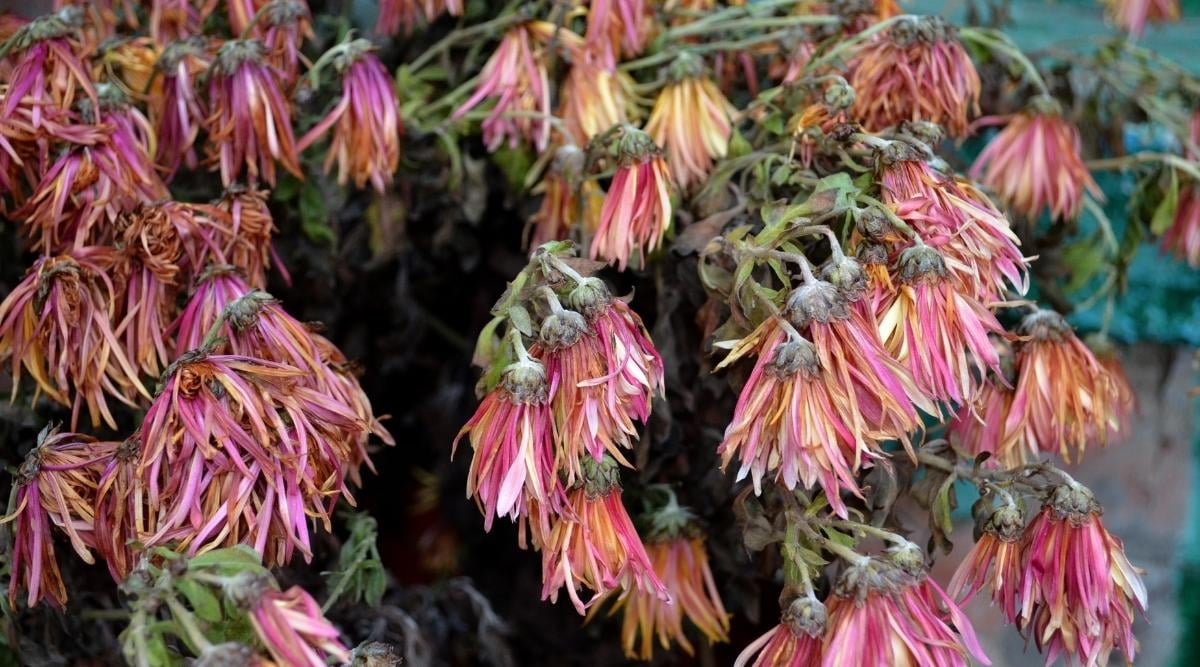
Chrysanthemums will thrive in most climates as long as there is ample moisture, excellent drainage, and if they have full sun exposure. In very warm climates, you may need to water more. Common signs of not enough water include your mums turning brown, and looking a little crispy.
Depending on the species and/or variety, chrysanthemums are hardy to USDA Zones 4 through 9. Make sure to research which species or variety you are planting if you wish for your chrysanthemums to overwinter.
Another option if you live in colder zones or if you are worried about your mums not surviving is to take cuttings from the plant in the Fall. You can overwinter the cuttings in your house or in a warm area and plant the rooted cuttings out the following Spring.
Fertilizer

Use a well-balanced fertilizer applied to the soil when planting your chrysanthemums. A well-balanced fertilizer will have mostly equal parts of the macronutrients nitrogen (N), phosphorus (P), and potassium (K). This will be displayed on the fertilizer label appearing as 3 numbers. For example, 10-10-10 or 1-4-0.
You can purchase manufactured fertilizers or amend the soil with natural alternatives such as compost, blood meal, bone meal, greensand, etc., or a combination of these alternatives.
Midway through the growing season, you can begin fertilizing with a water-soluble fertilizer in the time leading up to blooming to help give your plants an extra boost. You can purchase manufactured fertilizers or use organic alternatives such as a mixture of fish and seaweed emulsion or by making compost tea.
Pinching and Spacing

It is generally recommended to pinch your chrysanthemums at least 1 to 2 times as they are growing to induce branching and thus more blooms. If you don’t pinch your plant, you may end up with a sparse, leggy planting. You can pinch as many times as you like, but make sure to stop pinching by July. The plant will need the time from July onward to establish itself and to induce future flower blooms.
To pinch your mums, you can begin any time after the plant has reached 6 inches tall. Pinch off the top ½ to 1 inch of each stem. Do this every 3 to 4 weeks until July and you’ll likely end up with a very bushy, rounded plant. The more you pinch, the bushier your plant will be.
Space your chrysanthemums at least 18 to 24 inches apart. Mums have shallow root systems and they do not like to compete for water and nutrients with other plants. Also, adequate spacing will also help promote air circulation, which will reduce diseases like leaf spots and mildews.
Harvesting Mums for Cut Flowers

Harvest cut flower chrysanthemums just as the buds are starting to open for maximum vase life. Cut deep into the plant just above a set of leaves. Strip off the lower leaves of the stem and place them in fresh, cool water. Make sure that there are no leaves below the waterline.
Cut flowers should not be placed in direct sunlight as this will reduce their vase life. Replace the water every few days to reduce the growth of bacteria and fungi. Trim the end of your cut flower stems when you replace the water to ensure the stems are free of any bacterial or fungal blockage that could inhibit water uptake.
How to Select Potted Mums

Resist the urge to buy your potted mums in full bloom! This just means you’ll get less time to enjoy your mum flowers at home. Choose mums that are in the bud stage so that you can watch them unfold before your eyes!
Growers select varieties based on bloom times; some varieties will bloom earlier than others. If you’re unsure of the color you are purchasing, most of the time you can look on the nursery tag to see what color and bloom type you are purchasing.
Many gardeners choose to buy them annually, then reuse the plant as composting material after the blooms have faded.
Popular Mum Varieties
There are several varieties of chrysanthemums out there. Some of the most popular cut flower varieties that you might see in a grocery store bouquet are kept tightly within the commercial cut flower production community, so the backyard home gardener may not have access to these varieties. There are still several beautiful heirloom and hybrid varieties out there. It just may take some research to find these beauties!
Popular Cutting Varieties

Cutting varieties of chrysanthemums are usually taller with larger blooms and produce longer stems. There are many cut flower growers that have detailed information on their blogs about their favorite varieties.
- ‘Apricot Alexis’ – Large bloom with a copper gold tone that is very productive. It appears to be difficult to overwinter, so if you get your hands on this variety you may need to take cuttings.
- ‘Lynn Johnson’ – This mum is a large white irregular incurve type with tall stems. This is one of the more productive white varieties and grows well as a spray mum. Aphids can be a problem with this variety.
- ‘Candid’ – This mum is a rich ruby red and is grown as a spray mum.
- ‘Seatons Ruby’ – This mum has a large cushion in the middle and the flowers are a beautiful gold color. The flowers are grown as sprays.
- ‘Mocha’ – This spider mum has a soft toffee color and is very productive. The stems are slender so they should be staked or protected against high winds.
- ‘Moira’ – These flowers are beautiful with dusky purple delicate blooms. The plant is not robust, but the color is romantic.
- ‘Irish Linen’ – These blooms are a lovely vanilla custard color.
- ‘Pilgrim’ – The petal color of this variety is a deep red. The flowers are more compact in form.
Chrysanthemums for the Landscape

Landscape varieties of chrysanthemums are typically more spreading or mounding in growth habit and the blooms are smaller in diameter. They make great border plants in the landscape.
- ‘Patriot’ – This mum is a pure white pompon type. It blooms mid to late season and has a spreading plant habit.
- ‘Tracy’ – This mum blooms very late and has a white double daisy flower. The plant is spreading in growth habit.
- ‘Allure’ – This variety blooms mid-season and has a bright yellow daisy-like flower with green center. The plant has a cushion growth habit and tolerates high temperatures.
- ‘Denise’ – This mum blooms very late and the flowers are large with pastel bronze decorative blooms. The plant is mounding in growth habit.
- ‘Cabernet’ – This late season mum has a lavender decorative-type bloom. The flowers are up to 3 inches in diameter.
- ‘Radiant Lynn’ – This variety is a decorative flower with salmon-pink outer petals that surround raspberry tinged center petals.
- ‘Bravo’ – This variety has dark red decorative flowers. The plant habit is strong and compact.
- ‘Garnet’ – This red pompon variety has bright crimson flowers that mature to bronze.
- ‘Salsa’ – This variety is daisy-like with red petals and a light green center. The plant habit is mounding.
Common Chrysanthemum Problems
Many of the most frequently occurring pests and diseases are those that plague the entire Asteraceae family. As with most pests and diseases, there are fungicides and insecticides available at your local garden center that may be used as treatment.
Follow all instructions on the pesticide label and only use them if it is necessary. If mishandled there can be serious repercussions, whether the pesticide is labeled as organic or not
Here are the most common problems that may occur with your mums and how to treat or prevent these issues:
Leaf Spots

Symptoms of a leaf spot disease like Septoria leaf spot, Alternaria leaf spot, and Cercospora leaf spot usually consist of spots on the leaves that are circular to oval in shape. They are usually yellowish at first and then become dark brown as the leaf tissue dies. The spots increase in diameter as the disease progresses, and eventually, the leaves will dry up and drop. The lower leaves are usually infected first.
Handpicking and destroying leaves by burying or burning is the first step in prevention. Keeping your garden free of old plant debris will also help reduce disease incidence as the spores typically overwinter in dead foliage. Mulch around your chrysanthemum plants to prevent the soil from splashing up onto the foliage during rain events.
Rust

The fungus that causes rust diseases causes powdery orange pustules on the undersides of leaves. If the plant is severely infected it will not properly bloom. If you notice rust pustules, remove the infected leaves immediately.
Spacing plants farther apart will help promote air circulation in the garden which dries the surface of the leaves quicker after a morning dew or rain event. Water on the leaves will spread diseases like rust so it is important to water at the base of the plants rather than overhead.
There are some rust-resistant varieties that you can choose to plant if rust has been an issue in your garden also.
Powdery Mildew

Powdery mildew is caused by a fungus and the symptoms are white, powdery material on the leaves. It is most prevalent in moist or humid conditions, so spacing plants adequately is important. Make sure to water at the base of the plant instead of overhead. You can remove infected leaves to help prevent spread. Remove severely infected plants from the area.
Ascochyta Ray Blight
One side of the flower bud will become stunted in growth if infected with ray blight. The petals will begin to turn brown and eventually the whole flower head will turn black and droop. The leaves will develop black spots.
Purchase cuttings or plants from reputable growers and practice good sanitation in the garden by removing old plant debris which can harbor spores of this organism over the winter. Avoid overhead watering or irrigation as this is one of the most common means of spread with this disease. Water at the base of the plant if you need to water.
Ray Speck

Ray speck can be caused by the Alternaria or Stemphylium organisms. Symptoms will include pinpoint dead spots on the petals. These may or may not enlarge. If the spots are numerous enough they can cause dieback of the entire flower. To keep ray speck at bay, make sure to keep humidity low. This means that you are planting your chrysanthemums in order to encourage good air circulation and also that you are avoiding overhead watering.
Aster Yellows

Aster yellows is a disease caused by a phytoplasma that is spread by insects called leafhoppers. Removing perennial weeds from the area that will harbor these insects is very important. Symptoms of aster yellows include deformed, green, and leaf-like flowers and overall yellowing of the plant. Remove infected plants immediately and either burn or bury the plant debris.
Viruses
Chrysanthemums are susceptible to many different types of viruses like tomato spotted wilt virus, smut virus, and mosaic virus. Infected plants will have stunted plant growth and yellow foliage. The leaves may have ring spots or mottling. Virus-infected plants will form very dense “rosettes” or compact, stunted, and clustered plants that have very small flowers.
Viruses are transmitted by leafhoppers and aphids. Remove suspect plants immediately. There is no cure for virus-infected plants, but you can try to prevent the prevalence of the carrier insects by reducing perennial weeds in the area and by releasing beneficial insects that will feed on aphids.
Aphids

Aphids are pests that can be brown, gray, green, or black in color. They typically reside on the underside of leaves and stems in clusters. Once you’ve seen one aphid, there’s likely a hundred more that you can’t see.
Aphids will feed on plants via piercing-sucking mouthparts and deposit their waste as sticky secretions on the plant in the shape of a small dot. These sticky secretions are called “honeydew” and will often develop sooty mold growth. This is what is seen by the naked eye of humans on the leaf surfaces in the form of small black dots.
If you have an aphid infestation, you can try one of the following options:
- Spray the plant with a forceful stream of water. This should knock off small aphids to help keep the population at bay.
- Use horticultural oil or insecticidal soap to control aphids. Always follow label directions when applying these materials.
- Release predator insects such as ladybugs or lacewings. These insects will feed on aphids and therefore reduce the aphid population.
Uses of Chrysanthemum

Chrysanthemums have uses both in the landscape and in cutting gardens. They provide a beautiful blast of color when most things are fading in the Fall, so they are a welcome addition to any garden. Pair them with Fall-blooming flowers like salvias, sunflowers, asters, and even ornamental peppers.
An interesting fact about chrysanthemums is that some varieties (Tanacetum coccineum, also known as Chrysanthemum coccineum) are a natural source of pyrethrin. Pyrethrins are mixtures of six organic compounds (esters) that are toxic to certain insects. The most common insects controlled with pyrethrins are mosquitoes, fleas, flies, moths, and ants. When an insect comes into contact with a pyrethrin, this excites the insect and ultimately causes paralysis or death.
Pyrethrum powder was made by drying the flowers and crushing them into a powder. This was how pyrethrin was utilized until the 1800s, particularly for control of lice. Later, this powder was mixed with other solvents to make liquid sprays that were deemed more effective.
Some gardeners will make their own spray by soaking dried chrysanthemum flowers in water. The pyrethrins degrade in sunlight within a day or so, which is why many like the thought of using this as a pest preventative in the garden.
Today, this natural product has been concentrated and utilized by the pesticide industry to produce many different insecticides, both organic and not. Pyrethroids, which are longer-lasting man-made chemicals, have been created on the basis of these natural pyrethrins.
These are used more frequently today and were generally deemed safe, but because of their persistence in the environment, they have become more of a concern today. Pyrethroid exposure has been linked to an increase in cardiovascular disease, dizziness, and fatigue.
Frequently Asked Questions
Will chrysanthemums grow in shade?
Chrysanthemums prefer full sun. If grown in full shade, mums will either become spindly or leggy in growth, and they may not flower properly. Light is very important for flower set and bloom.
However, there are instances when it may be beneficial to plant chrysanthemums in a partially shaded area (they still need to receive at least 4 to 6 hours of direct sunlight per day to properly bloom). In fact, some cut flower growers will plant their mums in a partially shaded area so that they can manipulate the bloom time of their mums.
Can you grow chrysanthemums in pots?
Yes! You’ve probably noticed in the Fall how big box stores, grocery stores, and plant nurseries seem to magically fill up with these colorful, floriferous plants in a rounded shape. These are potted chrysanthemums that are grown by various flower growers and wholesale growers.
These mums are grown in their pots from transplanting on up to when they are sold, so you can certainly do the same in your own backyard. The tricky part is sourcing mum starts. Sometimes local nurseries will have mum cuttings in the Spring, but otherwise, you may need to look at various catalog companies or online companies to order from if you are wanting a specific type of mum.
You can certainly start your own seeds as well! To give your pot a more full look, try planting more than one cutting per pot, and make sure to pinch every three to four weeks to induce branching.
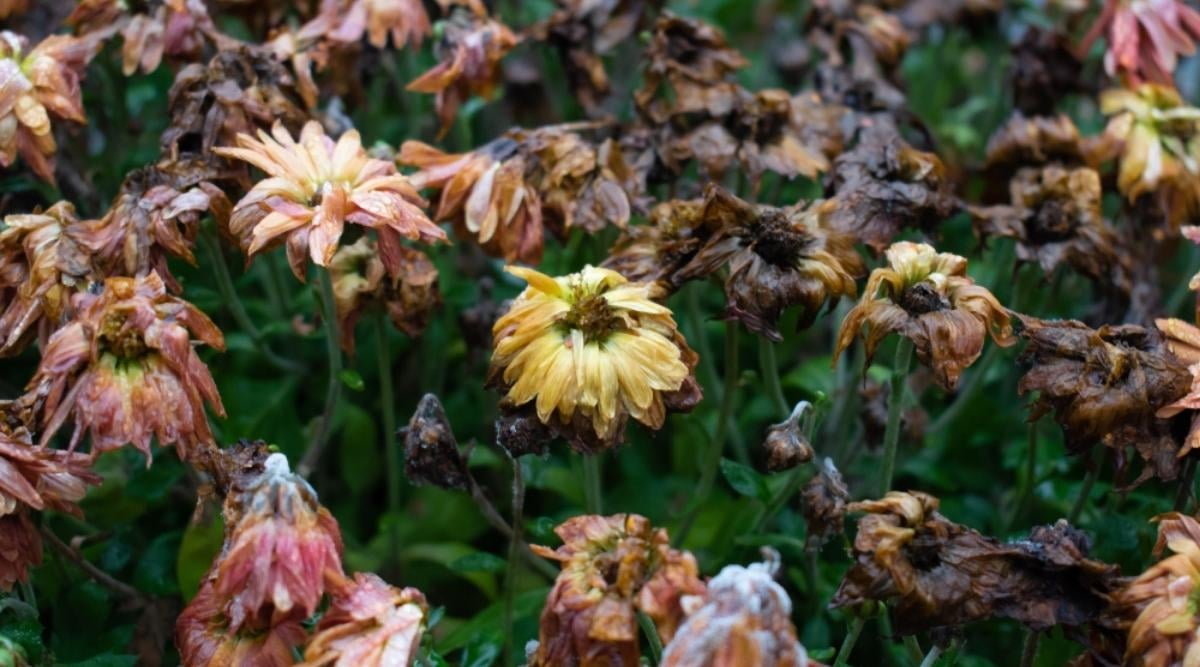
When do you cut back chrysanthemums?
So you’ve grown your mums all Summer and they’ve bloomed beautifully for you in the Fall. Now what? In order to prepare for Winter, it’s important to cut back your chrysanthemums after they’re done blooming in the Fall. You can wait until after the first frost so that the foliage begins to die back naturally on its own. Cut the plant down so that it’s only two to three inches in height, then cover the plant with a layer of straw or leaves to help it overwinter.
Final Thoughts
Anytime I can find a perennial flowering plant that blooms in the Fall, I am a happy camper. Perennial plants help reduce my time seed-starting in the Spring, and the fact that they come back year after year helps reduce my seed costs. Being able to propagate easily by cuttings also reduces my plant costs each year as well.
To top it off, there are some really beautiful varieties of chrysanthemum flowers out there if you’re willing to hunt for them. If you haven’t tried growing hardy mums, then you certainly should give them a shot next year in your garden!


