The Ultimate Beginner Guide to Soil Blocking
Soil blocking is a rewarding, hands-on way to promote healthy seedlings while reducing material use and saving space. If you’re interested in this historic way of seed-starting, we’ve got the essentials covered. Gardening expert Katherine Rowe explores everything you need to start soil blocking this season.


Contents
Seed starting gives seedlings a jumpstart on strong roots and healthy growth before they move to the garden for the growing season. Soil blocking is an innovative way to start seeds that promotes sturdy roots and eases transplanting.
The technique molds the soil into a cube that becomes a self-contained unit, both the media and the pot to house growing seedlings. A simple blocking tool packed with potting mix forms the individual “pots,” eliminating the need for cell trays.
Soil blocking is uncomplicated and a fun experiment in propagation. While it takes practice to get going, the simple technique, supplies, and potting mix needn’t be intimidating. The ecologically-based approach to seeding is a method innovated by the Dutch over the last century and has records of Aztec use as early as 2,000 years ago in Central America. To try your hand, follow along for everything to get started soil blocking this season.
What Is Soil Blocking?

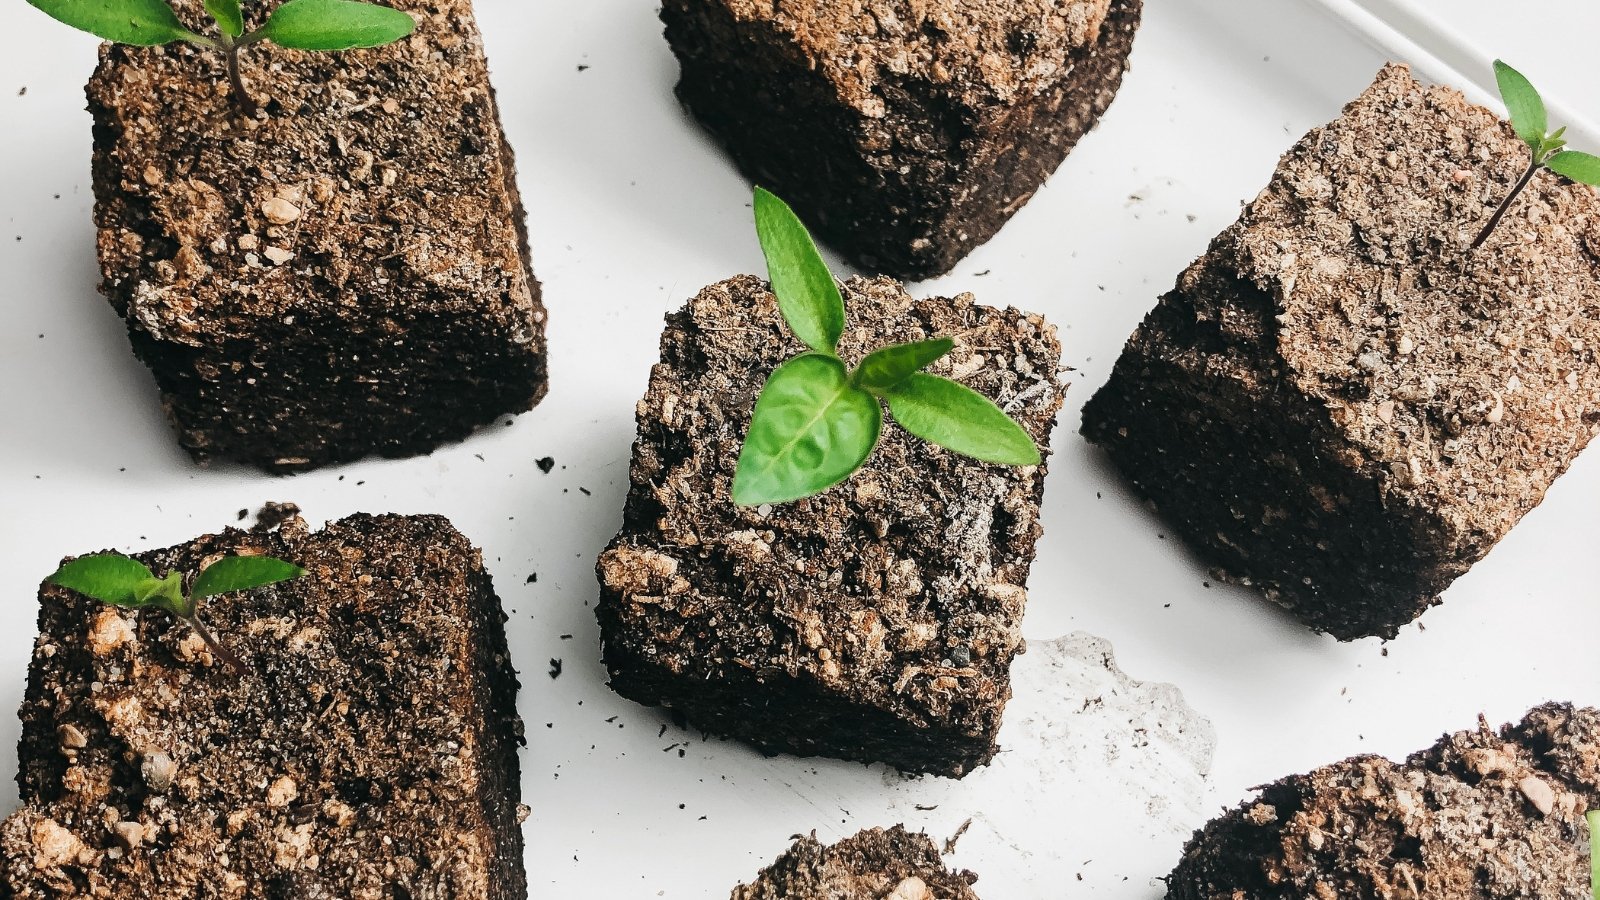
Soil blocking involves a basic tool to compress soil into moist, plantable blocks. With a specialized potting mix and pressure mold of the tool, the soil holds as a mini vessel for root development, like a seed-starting cell without the additional walls or materials for support.
Each cube holds one to two seeds. As they germinate, seedlings develop as they do in other seed-starting methods, rooting in their soil containers to bump up to larger blocks or pots or straight into their garden locations when roots fully form.
Benefits

Seedlings in soil blocks develop strong roots. The cubes allow for air pruning, and as roots reach the edge of the soil, they naturally desiccate. The roots fill out the volume of the cube and hold until transplanted into more soil. This air pruning prevents root circling and the potential to become root-bound, which often happens in plastic pots.
A study by Cornell examined tap root development of woody plants in air pruning situations. Seedlings allowed to air prune showed more robust roots without crooks or circling of the tap root. While soil blocking isn’t the technique for woody trees and shrubs, the results translate to flowering perennials and annuals, herbs, and vegetables.
As the roots are full and holding, they’re ready to take off at planting with little developmental delay, root disturbance, and transplant shock. This is ideal for plants sensitive to root disturbance during transplanting, like poppies, zinnia, larkspur, beebalm, and root vegetables.
Another benefit is space efficiency, producing more seedlings per tray than cell packs. Whether sowing in bulk or a small amount, conserving precious growing space is useful for many of us. If using grow lights and heat mats, they’ll cover more starts.
Supplies

One of the beauties of soil blocking (other than strong seedlings and space-saving) is its resourcefulness. It minimizes the need to use plastic cell packs and pots and also eliminates time spent washing and sanitizing those packs each season.
You can make your own tool or invest in one that will last for decades (we’ll cover the simple tool in the next section). Other than the initial cost, this is a budget-friendly, long-term investment. Use materials you have on hand or purchase a few to use season after season.
Materials to start include:
- The blocking tool
- A formulated potting mix to shape the blocks
- Bottom trays to house the blocks and seedlings and for bottom watering; can be a nursery tray, baking sheet, or even a takeout container or deli lid – the flatter, the better for uniform watering and root development
- Large bowl or pan to mix soil and water (like a cement mixing tub)
- Pitcher or watering can of room temperature or warm water for mixing
- Bowl or bucket of water to rinse the blocker between uses
To keep the cubes evenly moist until transplanting, use a misting bottle, watering can, or pitcher to add water to the base of the tray for absorption.
The Blocker

Blocking tools are available in a variety of sizes, from half-inch all the way up to four inches. The most useful for home growing are the two-inch (large) and half-inch (mini) handheld blockers. The simple tools are molds to fill with potting mix and have a spring or crank handle to release the cubes onto trays.
They often come with a dibble to form a slight indentation on the top for seed placement. With an insert tool, smaller plugs can fit into larger ones to continue development.
Large

The large blocker is versatile for starting most seeds, including quick-growing crops. If you’re starting with one blocker, the two-inch is the way to go. Depending on the tool, they usually make four blocks at a time.
Use the large blocks to start seedlings to transplant directly into their garden locations, especially for quick growers or those sensitive to root disturbance. Or, move them to larger four-inch pots or blocks until ready for planting. Tomatoes, for example, and peppers develop indoors until temperatures warm late in the season.
Mini

Mini blockers make 20 half-inch cubes and are useful for tiny seeds, those with long germination times, or those that rely on warmth to develop. The small cubes allow more heat absorption on a heat mat to promote sprouting. Once seedlings emerge, the mini cubes can go right into a large cube for further root development using a simple plug (a mini insert). If you do a lot of sowing of flowers and herbs, minis may be a good investment.
Seeds to sow in mini blockers include heat lovers like peppers, tomatoes, eggplants, tomatillos, and ground cherries. Start these small to move to larger plugs. Minis are also great for tiny seeds with lengthy germination, like lavender, oregano, thyme, basil, milkweed, rudbeckia, and anise hyssop.
Inserts
Inserts allow smaller blocks to slip into larger ones as roots grow. The half-inch blocks fit into two-inch blocks with mini inserts that snap into your blocker. If you plan to use small blocks and grow them out in larger ones, look for blockers with compatible inserts. These snap into larger blocks to create a place for the small ones to nestle.
You can build these all in the same session, keeping them moist until the small seedlings are ready for the bigger blocks.
Making the Blocks

This method is easy, in a “practice makes perfect” kind of way. The more you get a feel for mix texture and cube filling, the quicker and easier it becomes. Don’t worry if the first round crumbles or is misshapen – just toss them back into the mix and start again. It takes practice with the tool and soil consistency (more on potting mix below).
A key to building strong blocks is to pack densely and to create full, crisp corners. Uniform blocks promote even root growth and moisture.
Assembly
To build the blocks, use the blocker and moistened potting mix formula. To load the tool:
- Press the blocker into the tub of ready potting media, pushing it completely into the mix. Pack additional soil into each block by hand before they’re full, making sure to fill in corners.
- With packed blocks, scrape excess soil off the bottom of the blocker (by hand, with a spatula, or on the tub edge).
- In an even motion, release the blocks onto the bottom tray. Sometimes, it takes a few quick plunges with the handle.
Sowing
With the blocks in place:
- Sow one to two seeds per block. According to seeding guidelines, gently press them for soil contact (often all that’s necessary) or cover them lightly with additional soil or a sprinkling of vermiculite.
- Place the trays in a bright, warm spot for germination and according to seeding guidelines. You may opt to create a mini greenhouse with a tray topper or plastic wrap. Basic seed-starting supplies come into play here, as do heat mats and grow lights for some indoor setups. But getting started, warmth and bright, indirect light (out of direct sun), and regular moisture are the basics for healthy seedlings.
- New blocks hold plenty of moisture and don’t need immediate bottom-watering. As the surface dries slightly (to one millimeter) add water to the tray’s base or mist blocks for even saturation.
Space each group of blocks about ¼ inch apart to promote air circulation and water absorption from the bottom. Blocks maximize the space in a tray and, with one to two seeds per block, house a lot of seedlings.
Potting Mix

Potting media for blocking is a blend of materials that take shape and hold together well. Purchase a ready-to-use mix, adding water to reach the right consistency for dense blocks. Or, build your own mix with nutrient-rich recipes, including your compost. Making your own base goes a long way and uses materials with multiple garden applications.
The aim is to create compact cubes free of air pockets, which cause crumbling. A peat or coir component is necessary for a fibrous base that holds the mix together. Coir is somewhat more sustainable than peat, as ancient peat bogs provide tons of carbon sequestration and take generations to rebuild. To lessen peat usage, coir is useful. Coir is a natural fiber derived from the outer husk of coconuts. Many gardeners are working on eliminating coir, too, from the blocking system to use sustainable materials closer to home.
There are numerous organic recipes for nutrient-rich soil-blocking potting mix. To these you’ll add water at about two parts water for the best consistency. Potting mix should be wet, but should not drip under a squeeze. A blend for making blocks uses more moisture than traditional cell sowing.
Mix Recipe Options
To get started, here are two basic recipes using the foundation of a fibrous material, compost, and minerals to promote nutrition and aeration.
- 4 parts peat-free potting soil, sifted to remove chunky pieces
- 1½ parts coconut coir (often sold in dry blocks; rehydrate with water before measuring)
- ½ part greensand (marine mineral sediment and soil conditioner)
- 1 scoop granular mycorrhizae (improves the relationship between roots and nutrient uptake in the soil)
Basic Mix:
- 1 part coir, peat, or peat alternative
- 1 part sifted compost (plant-based, manure, or worm castings)
- 1 part perlite
- 1 cup blood meal
Key Takeaways
Have fun with this innovative method, and don’t be intimidated by supplies, blocking tools, or techniques. Soil blocking is an accessible way to start seeds, and with a bit of trial and error, becomes a streamline process to sow small quantities or in bulk. Many pros rely on it for efficient production, and it may quickly become your favorite way to get a jumpstart on the season!
- Use a reliable blocking tool or create your own
- Use a potting media tailored to blocking, whether purchased or building your own blend.
- Play with mix consistency. Keep dry soil on hand in case the mix is too wet.
- Sow one to two seeds per block and situate them as you would in other seed-starting methods.
- Enjoy those healthy roots for ease of transplanting!


