How to Repot Spider Plants in 5 Easy Steps
Do you need to repot your spider plants due to plant health, cramped roots, or some other reason? Spider plants are hardy plants and repotting them is fairly straightforward. In this article, gardening expert and houseplant enthusiast Madison Moulton takes you through five simple steps of repotting your Spider Plants.


Contents
Spider plants have been a houseplant staple since the 1970s, loved for their cascading foliage and easygoing nature. To keep yours looking just as lush and vibrant as the day you brought it home, a few basic care tasks are essential, including repotting.
While spider plants don’t mind being a little root-bound (which makes them ideal for containers), they will eventually hit a wall. If the roots completely outgrow the pot or the soil becomes depleted, growth will slow, and the plant’s health will decline.
Luckily, repotting is quick and straightforward. In just five steps (or four, if you’re not dividing the plant) you can have your spider plant back on track, happily stretching into its new space.
Signs Your Plant Needs Repotting
Spider plants grow relatively quickly to fill out their existing containers. They also like being a little pot-bound, as this encourages them to push out more pups. But if they become so overgrown that the roots circle each other, it’s time to consider repotting.
Cramped Roots

The first sign you need to repot your spider plant is roots growing through the drainage holes. If you’ve hung your spider plant up in a hanging basket, these roots should be easy to see. But if they’re planted in a regular pot, check the base of the container for overgrown roots.
Roots growing above the soil line are also a problem. This shows the roots have used up all the available space in the container. They are likely wrapped around each other in circles at the bottom of the pot.
Under these conditions, the roots struggle to draw up moisture and nutrients to deliver to the parts of the plant that need it, leading to stunted growth.
Stunted Growth

Stunted growth in general is another potential sign that your spider plant needs repotting. Although this can be caused by a number of factors, from lack of light to lack of nutrients, an overgrown plant combined with stunted growth typically indicates a potting problem.
When roots stop growing below the soil, the plant slows growth above the soil too. No matter what caused the issue, this can lead to many health problems. Plus, stunted growth means a lack of pups, in case you’re interested in propagating.
Disintegrated Soil

If your spider plant has been in the same container for a while without a soil refresh, you may notice a decline in the quality of the soil. The soil may become compacted, and any water will quickly drain without much retention.
After a few years, even if your plant has not outgrown its current pot, you should still repot your spider plant. This keeps the roots healthy and replenishes nutrients.
When To Repot

Although repotting is a necessary task for all houseplants, it can be quite a traumatic experience for them.
Spider plant’s roots were not designed to be exposed to the air. That’s why leaving them out of the soil for long periods can lead to shock. While they are resilient plants that bounce back quickly, they don’t take kindly to having their roots messed with.
It’s best to repot spider plants when they are actively growing for the quickest possible recovery. That typically means early spring in most areas.
Repotting at this time also allows the roots to spread quickly into the new spaces in their new container. While you can repot in winter in emergencies (such as root rot), this leaves a lot of the soil empty for some time, holding onto moisture that the roots cannot absorb.
As a general rule, stick to repotting in the warmer months. Avoid disturbing the plant as much as possible in the cooler months.
What You’ll Need

To repot spider plants, start by choosing a new container. If you’re keeping the plant as is, choose one around one to two sizes up at most. This provides the right balance between extra space and too much space.
Never choose a pot far larger than the current container. The roots will likely rot from excess moisture, and the plant will have limited growth above the soil line.
If you plan on dividing while repotting, the containers will depend on the size of the plant itself. You can typically replant one of the divisions in the previous container, using similarly sized pots to plant up the rest.
You’ll also need something to fill the containers with. Spider plants need a well-draining and light soil mix to promote airflow and prevent rotting. Search for a houseplant-specific soil mix at your local nursery or online. Or you can combine two parts potting mix with one part perlite and one part coconut coir for the same result.
Lay down some newspaper to make the cleanup of this messy process quicker. If you prefer not to get your hands dirty, also use gardening gloves.
How To Repot a Spider Plant
Now that you’re prepared, it’s time for the fun part: repotting your plant.
Step 1: Remove From The Container

Step one to repot a spider plant is to remove the plant from its current container. This can be easy or difficult, depending on the state of your plant.
If the spider plant appears loose, simply tip the pot on its side and gently pull it out. Never pull from the strappy leaves as this can cause damage.
Overgrown plants may have roots clinging to the drainage holes. Loosen these first before trying to pull the plant out. Run a knife along the edges of the pot if they are still sticking.
For spider plants in plastic pots, the process is much simpler. Squeezing the sides of the container should loosen the roots, allowing you to slide the plant out easily.
Step 2: Tease The Roots

An overgrown spider plant will have roots circling around each other in the shape of the container it was planted in. These roots need to be loosened to allow them to grow outwards in their new container.
With your fingers, gently pull the roots apart at the base and around the edges to free them. At the same time, remove some of the old soil to make space for fresh, nutrient-dense soil around the roots. It’s best to be gentle to limit the damage to the root system, but don’t worry if you pull a few off (they will grow back).
If any of the roots are too long, trim the roots back now. Use a sharp and clean pair of shears, never removing more than one-third of the root mass to prevent shock.
Step 3: Divide (Optional)

For those who want to turn one spider plant into many, repotting is the perfect time to divide. This close look at the roots will help you identify various sections that can be split. All you need to do is pull them apart before replanting as you normally would.
Each section should have several leaves and long enough roots to grow on their own. Grabbing each section separately, shake the roots apart to free them. If some of the roots are tangled, you can also trim them to separate the divisions.
If you want the plant to remain full and bushy, this step is completely optional. But over time, it will improve the health of your plants by limiting overcrowding and increasing the space they have to grow. Plus, you get to double your stock at the same time.
Step 4: Plant In New Pot

Take the new pot (or pots) and fill them with soil mix about halfway up, depending on the size of the container. Then, grab the plant at the base and lower it into the container, holding it at the level it was in the previous container. This should be an inch or two below the rim of the pot to stop the soil from spilling out when watering.
Fill in the gaps around the plant with more soil mix, pressing down gently as you go to remove any air pockets. Once the container is full and the plant can stand on its own, press around the top to secure the plant in place. Don’t push too hard, as this can compact the soil and limit airflow.
Step 5: Water Thoroughly
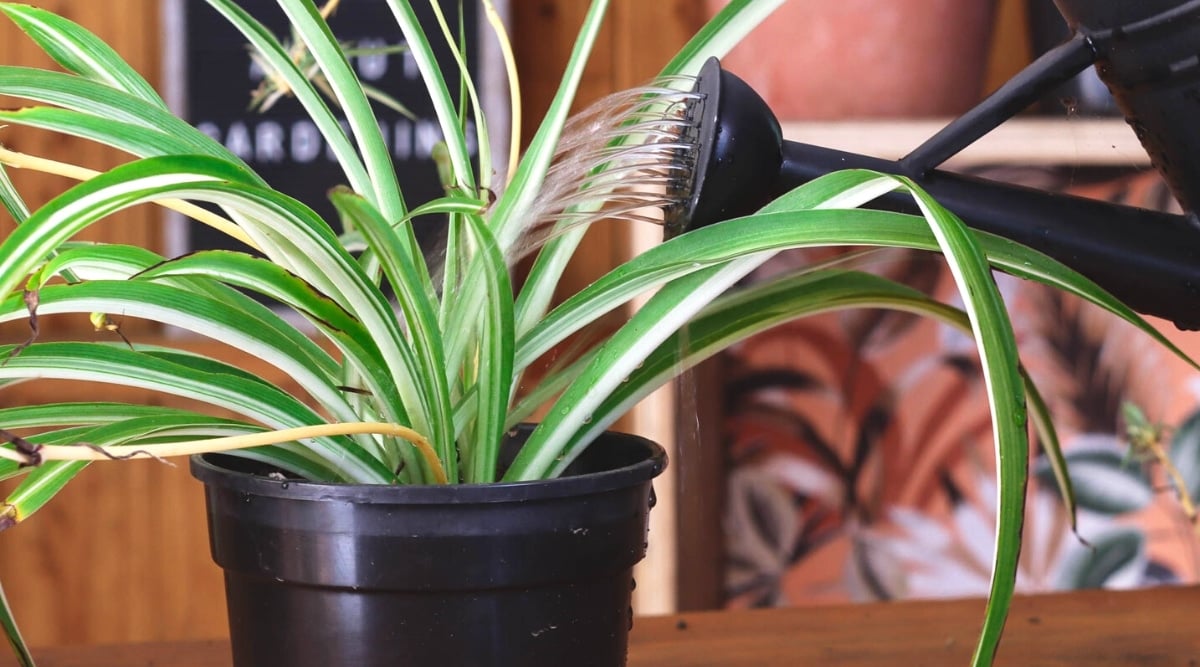
The final step in the process is one you will be familiar with: watering. Watering after repotting is essential as it settles the roots after being exposed to the air and encourages them to grow outwards into new areas in the container. Watering also settles any air pockets in the soil, ensuring moisture reaches all the roots that need it.
After watering, allow the excess to drain from the drainage holes in the container before moving your spider plant back where it was previously. And if you’ve divided, you can choose spots for your new plants too.


