How and When to Harvest Kale For The Best Crop Yields
Not sure when it's time to harvest your kale this season? Harvesting this leafy green is fairly straightforward, and the timing depends on when it was planted. In this article, gardening expert Merideth Cohrs takes you through when it's time to harvest kale, and step by step instructions on how to do it.


Contents
Kale is one of the easiest plants to grow in the home garden. It does well in small spaces and can even be grown in a container or window-box garden. And unlike many veggies that require a lot of careful attention, kale thrives on a bit of neglect. Give it some sunlight and water, and you can enjoy a bounty of kale this season.
But when should you harvest it? And what’s the best way to harvest kale leaves so that the plant continues to grow, and produces leafy greens for you all season long?
When it comes to harvesting, there’s a few important factors to remember. Keep reading to discover the perfect time to harvest your garden grown kale, and step by step instructions on how to do it once your plants are ready.
When to Harvest

Kale is a cool-weather crop, so it’ll grow best when planted in late summer for a fall/winter harvest. You can also plant in early spring (as soon as the ground is workable) for an early-summer harvest. Either way, kale’s flavor gets a little sweet when grown in a light frost, so don’t be afraid of the cold weather.
Kale is a quick-growing member of the brassica family. Most types of kale mature in 50-65 days after sowing seeds. This timeline will be a bit shorter if you transplant seedlings. If you’re more interested in growing baby kale for salads, they’ll be ready to pick in as little as 20-30 days.
If you want an abundant supply of kale this season, be sure to succession plant a new crop every two weeks. Succession planting ensures new plants reach maturity and provide you with a continual harvest.
How to Harvest Kale, so it Keeps Growing
Like many lettuce greens, Kale is a plant you can continually harvest. As long as you leave the growing crown – the top 4-6 leaves of the plant – intact, your kale will continue to grow and produce new leaves.
Here is how to harvest kale for a continental harvest and the best yield.
Step 1: Timing Your Harvest

One of the easiest ways you can tell kale is ready to harvest is by looking at the size of the leaves. Luckily, kale is an easy-going leafy brassica with an incredibly long harvesting window. Once you spend a little time with your plant, knowing when to harvest will become second nature.
Baby kale leaves can be harvested a few weeks after sowing seeds. These smaller leaves are more tender than full-grown leaves and are excellent eaten raw in salads. If you’re looking for more mature leaves for cooking, pick leaves when they’re about the size of your palm.
Once you notice that the lower branches of the plant have reached this size, you can start harvesting as you like.
Step 2: Gather Tools

Growing kale in the home garden is very rewarding. It’s a fast growing crop that functions well in a variety of climates, and seasons. But like every gardening experience, you’ll need the right tools for the job before you start to harvest your crop.
When it comes to harvesting, make sure you have some sharp gardening shears on hand for harvesting mature leaves. You’ll want to ensure they are clean and sterile so you don’t spread disease to the plant.
You’ll also likely want a garden basket, so you have someplace to put your leaves, as well as gloves, and a knee pad so you don’t hurt your knees while bending over to snip off parts of the plant.
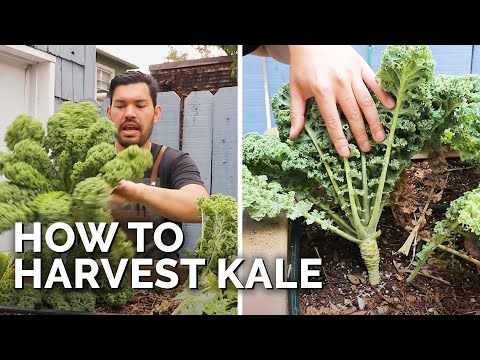
Step 3: Cut Leaves at the Base

If you want to ensure your plant stays healthy and produces new leaves, you must protect it. Cut mature leaves off at the base of the leaf, taking care not to nick the plant stem.
You can pinch baby kale leaves with your fingers, but use sharp shears for large leaves to prevent tearing.
Step 4: Avoid Cutting the Roots

You’ll want to let the plant grow all season long for the best yields. Focus on harvesting individual leaves rather than cutting the entire plant from the ground. I only do this when the plant has reached the end of its growing season.
Step 5: Harvest Large Leaves First

Start with the lowest section of the plant, and pick the oldest leaves first. Start moving up the stem, and take as many leaves as you want. You have to leave at least 4-6 leaves growing at the crown of the plant for it to continue growing successfully.
When harvesting in this manner, the plant will continue to grow and produce fresh leaves for you through the entire growing season.
Step 6: Always Leave the Terminal Bud

The terminal bud or growing crown is made up of the plant’s top 4-6 leaves. As long as this section remains intact, the kale will continue to grow and produce new leaves.
Step 7: Pick One Fist-Full Per Harvest

Depending on the size of your plant, you should be able to harvest a handful of leaves at a time. We recommend growing multiple plants – succession planting is ideal – at a time so you can gather as much as you’d like.
Have a large family gathering? Harvest from three or four plants! Want to make your morning smoothie? Grab a few leaves from a single plant.
Having multiple plants ready for harvest gives you many options and ensures a high yield.
Step 8: Harvest Again Next Week

If you’ve followed these steps, your plant will be ready for another harvest in about a week. Picking leaves off the plant sends a signal to grow more. So, the more you harvest, the more new leaves your kale plant will produce.
Return to each plant every 6-8 days for a continual harvest all season.
Storage

If you grow more kale than you can eat in a week, you’ll need to know how to store it.
Wash all the leaves and dry completely with a paper towel or cloth. Group the kale in to a bunch and wrap it completely with a layer of paper towels. Put this entire package into a resealable plastic bag and place it in the refrigerator.
Kale will last up to 2 weeks in the fridge if stored properly.
If you know you’ll be using kale in soups or smoothies, you can chop it ahead of time. Go through the same steps above, but use a salad spinner to dry all the individual pieces. If you don’t have one, you can let the pieces dry on a paper towel. Line a plastic resealable bag with paper towels and place the chopped leaves inside.
Final Thoughts
Now that you know how and when to harvest kale go out and get some of these nutritious greens! You can start planning your spring and fall vegetable gardens with plenty of these versatile greens. Kale’s flavor and use in the kitchen will reward you for weeks and months to come!


