How to Grow Potatoes in a Bucket
Did you know that growing potatoes in a bucket was an option? This may be the very trick you need for great potato harvests! We reveal how in this complete guide to growing potatoes in buckets.

Contents
Potatoes are a staple crop across many cultures and have been grown for centuries around the world. There are at least one hundred varieties of seed potatoes and countless ways to prepare them. Even better, there are many ways to grow potatoes, including the focus here: growing potatoes in a bucket.
Store-bought potatoes are affordable and widely available, but they may contain trace amounts of pesticides. New potatoes are especially at risk because they are harvested closer to pesticide application times. This is one reason many gardeners choose to grow their own potatoes at home.
‘Yukon Gold’ and ‘Pontiac Red’ are varieties commonly found in grocery stores. Potatoes that have sprouted in storage may be too old to eat, but they are easy to propagate and essentially free to grow. For gardeners with limited outdoor space or without specialized tools, this can be an accessible way to start growing potatoes.
Potatoes can seem intimidating to novice gardeners, but they are easier to grow than they appear. Fortunately, potatoes thrive in containers and can be grown successfully in grow bags, pots, buckets, or directly in the ground.
If you are curious about growing potatoes but unsure where to begin, cultivating them in a five-gallon bucket is an excellent way to experiment. This method requires minimal gardening experience and little effort. As long as the soil is amended with compost, potatoes can grow well in buckets across a variety of settings.


Why Grow Potatoes In A Bucket?

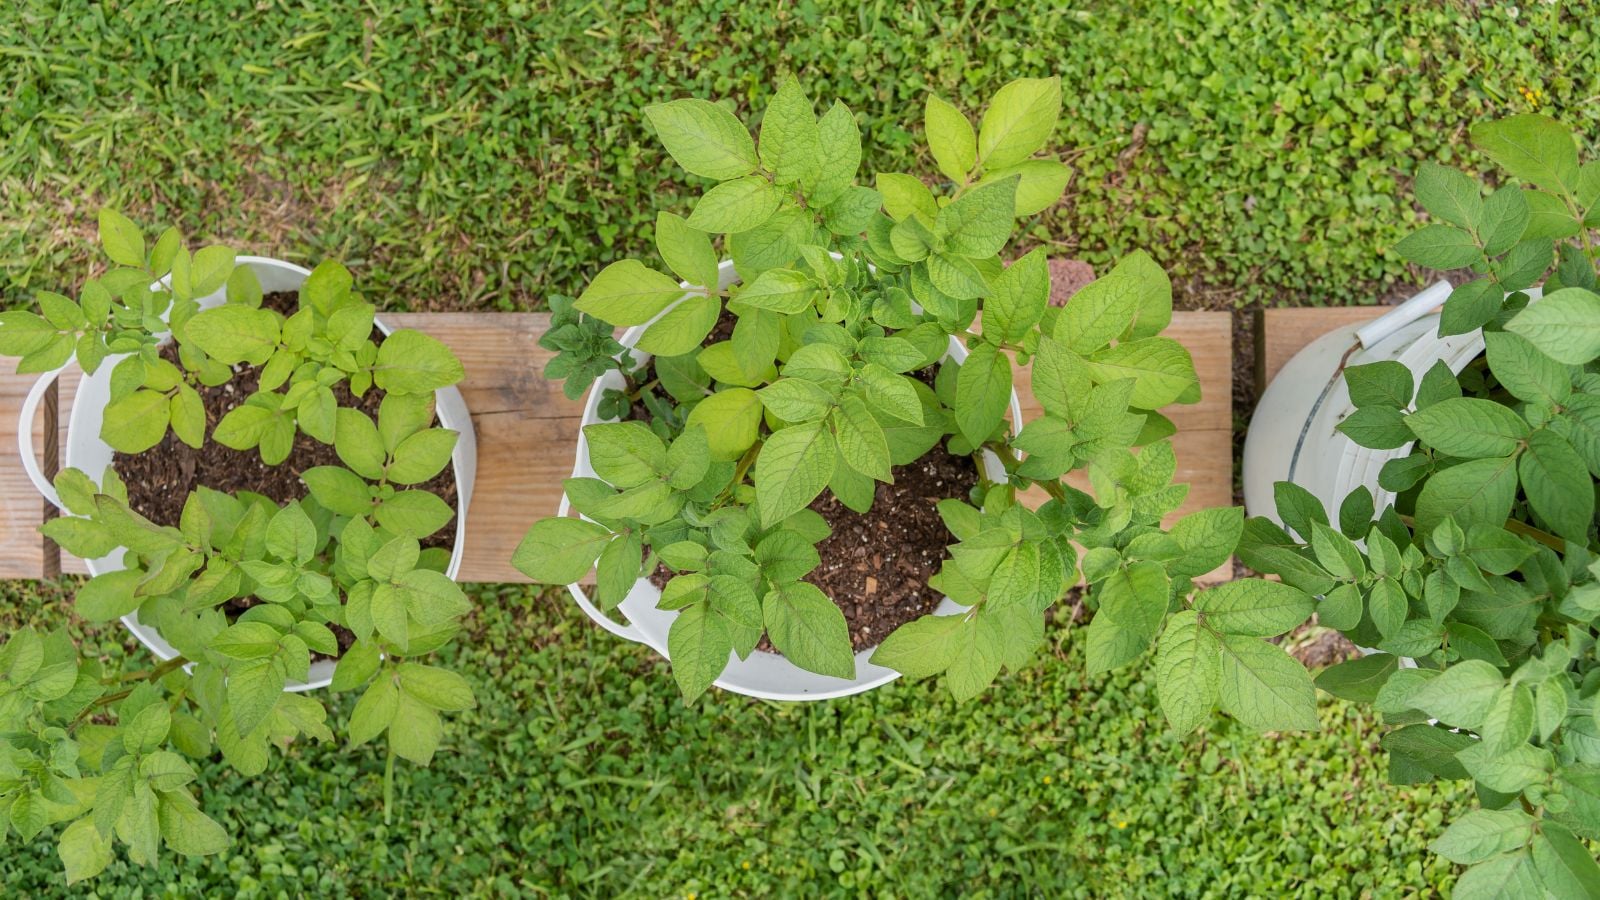
Growing potato plants in five-gallon buckets is ideal for gardeners who do not have space for an in-ground garden, and it also makes potato plants easy to move. If a bucket is placed in an area with inadequate sunlight, it can simply be relocated. This method is a great way to experiment with your first potato crop and better understand how potatoes grow.
Growing potatoes in buckets also makes plant care much easier. By using fresh, disease-free soil mixed with compost, you reduce the risk of fungal, bacterial, and viral infections. Container-grown potatoes also make harvesting more enjoyable. Simply tip the bucket over and search for the potatoes hidden in the soil.
The type of bucket you choose is important. While non-food-grade buckets can work, food-grade buckets are the best option because they reduce the risk of plastic leaching into the soil. Harvesting potatoes from a food-grade five-gallon bucket also helps minimize the chance of ingesting unwanted plastic residue.
What You’ll Need
Here’s what you need to get started with your bucket potato garden.
- Five-gallon food-grade bucket
- Drill with a decent-sized bit (wide enough for drainage)
- Good, well-draining fertile soil mix (topsoil and compost work here)
- Straw or mulch
- A ruler, yardstick, or tape measure
- A permanent marker
- Seed potatoes or store-bought chitted potatoes
- Landscaping fabric, sponges, or an old t-shirt
- A well-draining location, like a concrete porch or wooden deck
Drill at least 10 drainage holes in the bottom of your spud bucket, adding more if it does not compromise the bucket’s structure. Proper drainage is essential when growing potatoes in containers. Most plants that are not grown in aquatic environments dislike consistently wet roots, often referred to as wet feet. Without adequate drainage, potato roots are prone to rot.
Be sure to drill enough holes to allow excess water to escape. If you don’t have a drill, consider borrowing one from a friend or renting one from a hardware store.
Once the drainage holes are in place, use a ruler and permanent marker to mark fill lines on the outside of the bucket. Just like potatoes grown in the ground, potatoes grown in a five-gallon bucket require additional soil as the plant grows taller. This process, known as hilling, creates more underground space for potatoes to form as soil depth increases. Draw the first line at four inches and the second at 10 inches.
Set Up
While some tutorials for growing potatoes in five-gallon buckets suggest layering the bottom of the container with rocks to improve drainage, this is not recommended. Adding rocks creates a perched water table, which can lead to the same issue discussed earlier: rotting potato roots. Instead, cover the drainage holes with landscaping fabric, kitchen sponges, or an old T-shirt, then add soil on top.
Before planting your potatoes, fill the bucket up to the four-inch line with a soil mix amended with compost. This can be as simple as quality topsoil blended with organic compost. Avoid compacting the soil too much so it remains free-draining.
If desired, sprinkle in some bone meal granules, which will slowly break down and fertilize the soil as you water or during rainfall.
Finally, place the buckets on a concrete porch or another surface that allows excess water to drain away easily. You can adjust the placement during the growing season if you find the initial location does not provide adequate drainage.
Care
After planting, your job isn’t completely done. You still need to care for your potatoes in buckets.
Location and Maintenance
You need a full sun location to grow potatoes in a five-gallon container. Ideal temperatures for potatoes range between 60 and 70°F (16 to 21°C), although most varieties perform well in temperatures from 50 to 80°F (10 to 27°C). Because you’re growing in a bucket, you have flexibility. If you plant in early spring and a freeze is predicted, simply move the container indoors to a warmer location. In general, plant potatoes two to three weeks before the last expected frost.
Potatoes require consistent moisture until the foliage begins to die back. Once the foliage starts to yellow and decline, stop watering to prevent tuber rot. During active growth, water your potato container regularly to keep the soil from drying out. Always water at the base of the plant to reduce the risk of mold and mildew on the leaves.
To check whether watering is needed, insert your finger into the top couple of inches of soil. If it feels dry, it’s time to water. Since you’re growing in a container, a watering can is often the easiest way to control moisture levels. If you don’t have one, they are readily available at most hardware stores.
Soil Health
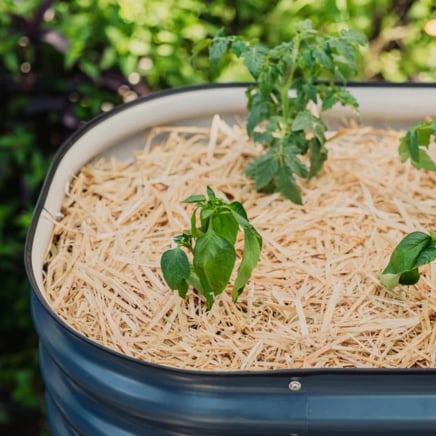
As mentioned above, a basic soil amended with compost works well for potato plants. Your soil should have a pH between 4.2 and 7.0. As the potato plant grows, add a small amount of mulch or straw to the soil surface. Mulch helps reduce moisture loss, meaning you won’t need to water as often.
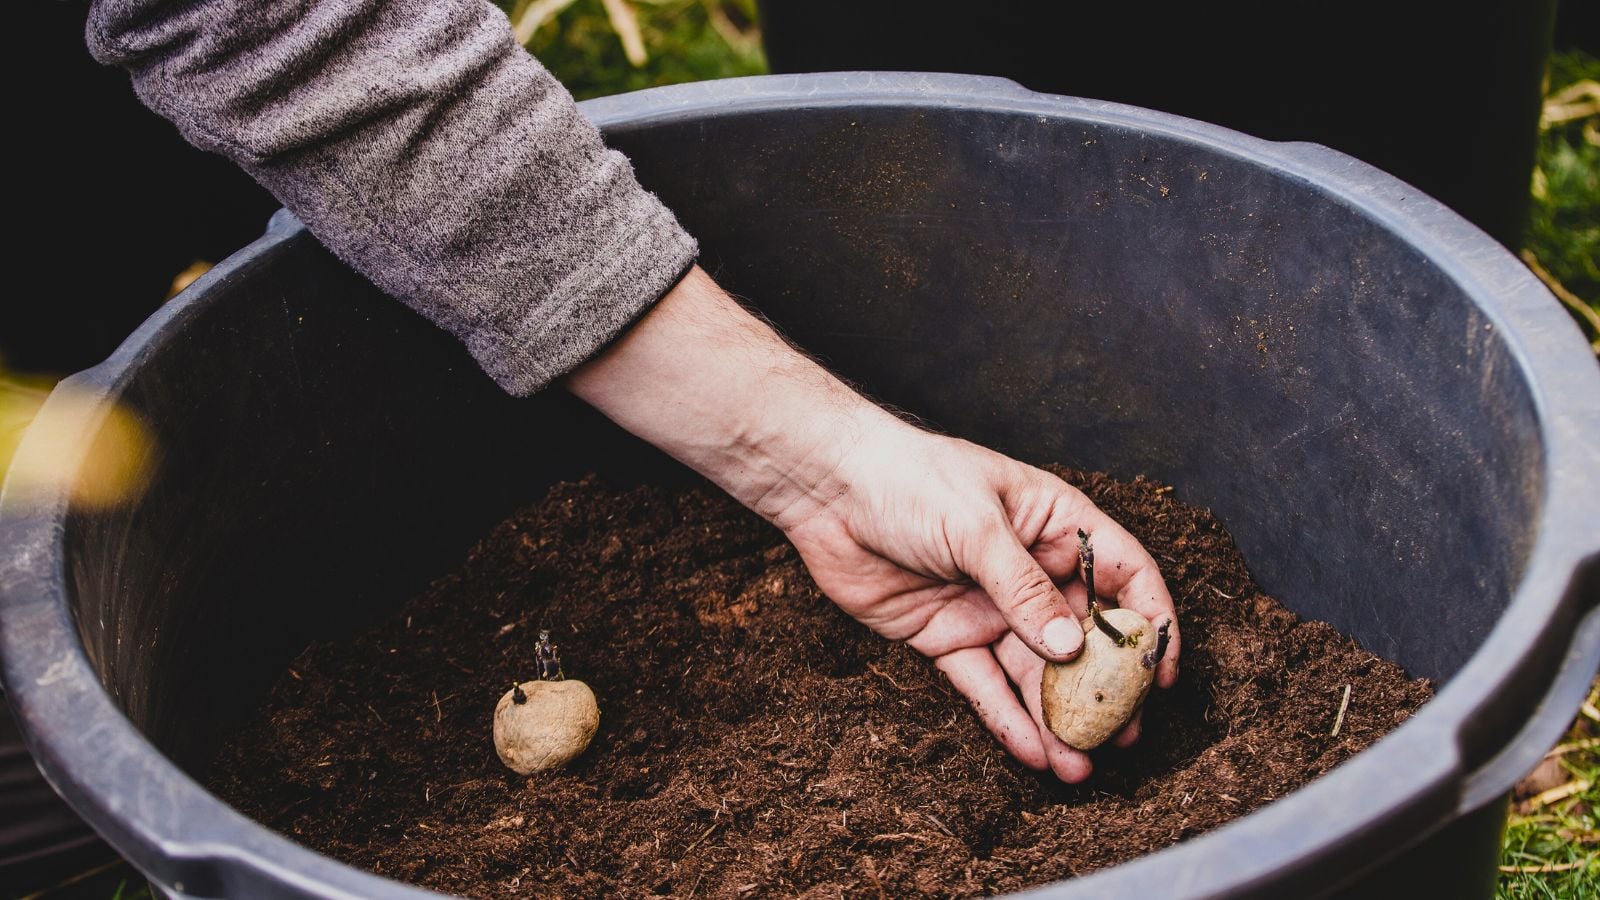
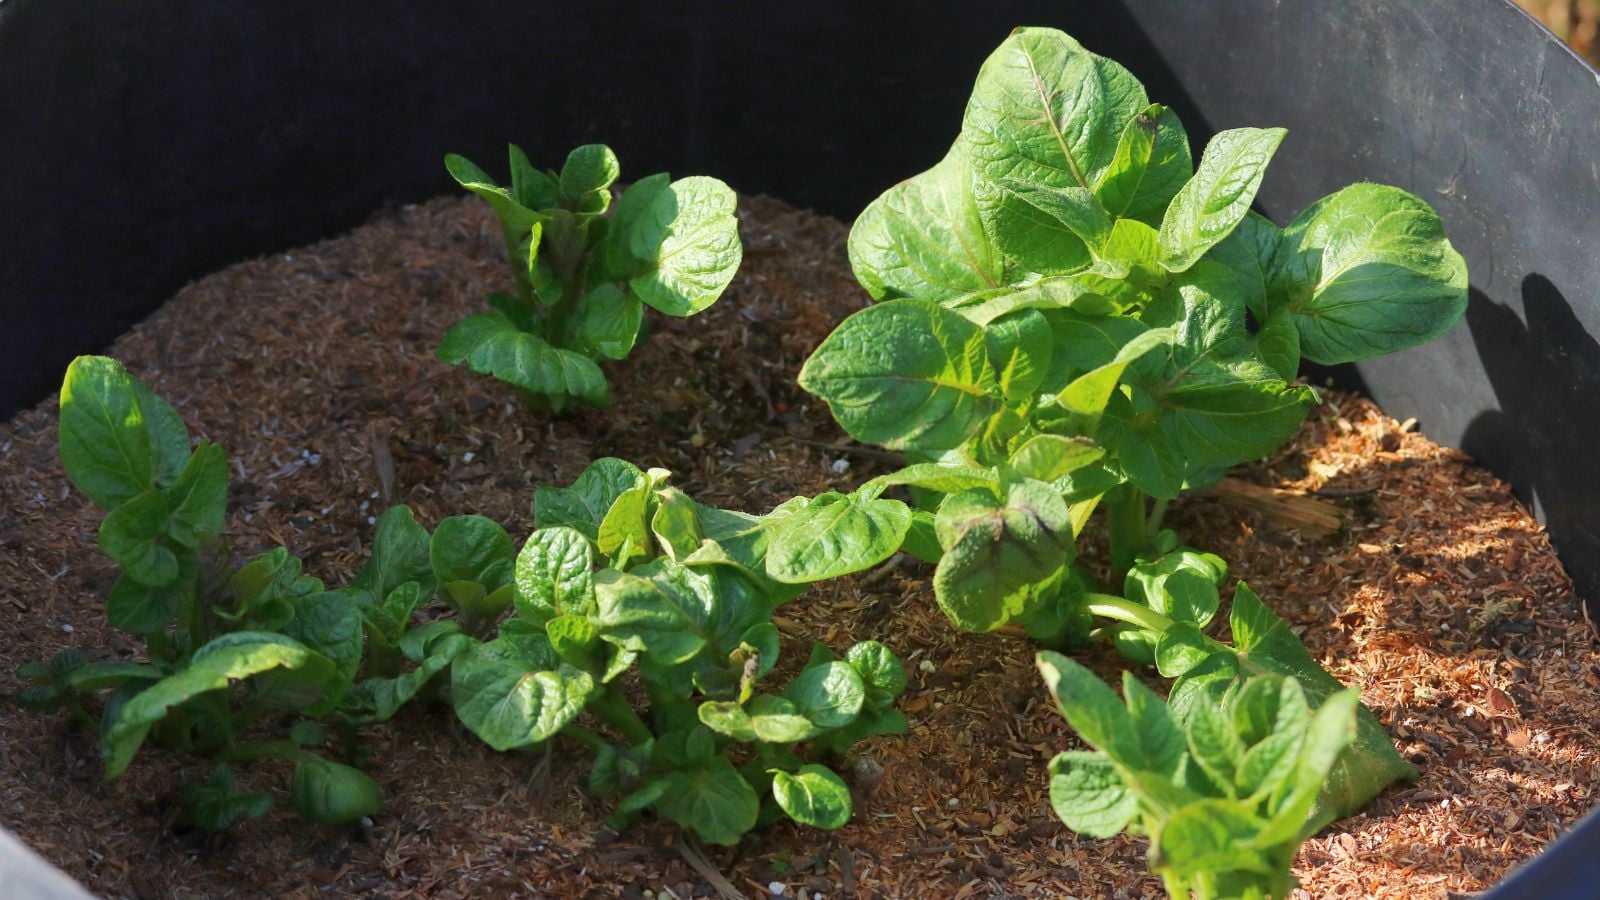
Plant certified seed potatoes or grocery store potatoes that have begun to sprout. You can give sprouted potatoes a head start by chitting them. To chit potatoes, place them in a container such as an egg carton and set it in direct sunlight at 50 to 70°F (16 to 21°C). After about one week, the potatoes should develop one-inch sprouts and be ready for planting. Set seed potatoes or whole tubers on the soil surface after filling the bucket to the four-inch mark.
When planting potatoes, space them at least six inches apart for the best yield. This usually means planting two to three potatoes per bucket, with two being the better option. Once planted, add more soil until you reach the 10-inch fill line.
Potatoes do not require heavy fertilization, but treating the soil once or twice during the growing season is beneficial. Apply a high-nitrogen fertilizer after planting sprouted potatoes, along with any bone meal added when preparing the bucket. These nutrients support early growth and root development, improving yields over time.
If bone meal is not available, use a high-phosphorus fertilizer once foliage begins to grow. Both liquid and granular organic fertilizers work well. Since potatoes are not heavy feeders, fertilize during the hilling process rather than applying frequent feedings.
Hilling Potatoes

It’s especially important to hill your plants to keep green tubers covered. If potatoes are not hilled, the exposed tubers can turn green and become inedible due to the presence of solanine.
Hilling involves adding layers of soil, allowing the plant to produce more tubers as the soil level increases. Some gardeners use straw or hay, but when growing potatoes in buckets, it’s best to use the same quality soil you started with.
In five-gallon buckets, wait until the green foliage reaches the height of the bucket or grows to six to eight inches tall, then add about three inches of soil on top. Most potato plants will not grow more than 12 to 18 inches above the original planting depth.
You will only need to hill a few times during the growing season. If the soil level begins to approach the rim of the bucket, you can add a cardboard collar to extend the planting depth. Once your potato plants begin to flower, harvest time is approaching.
Pruning and Propagation
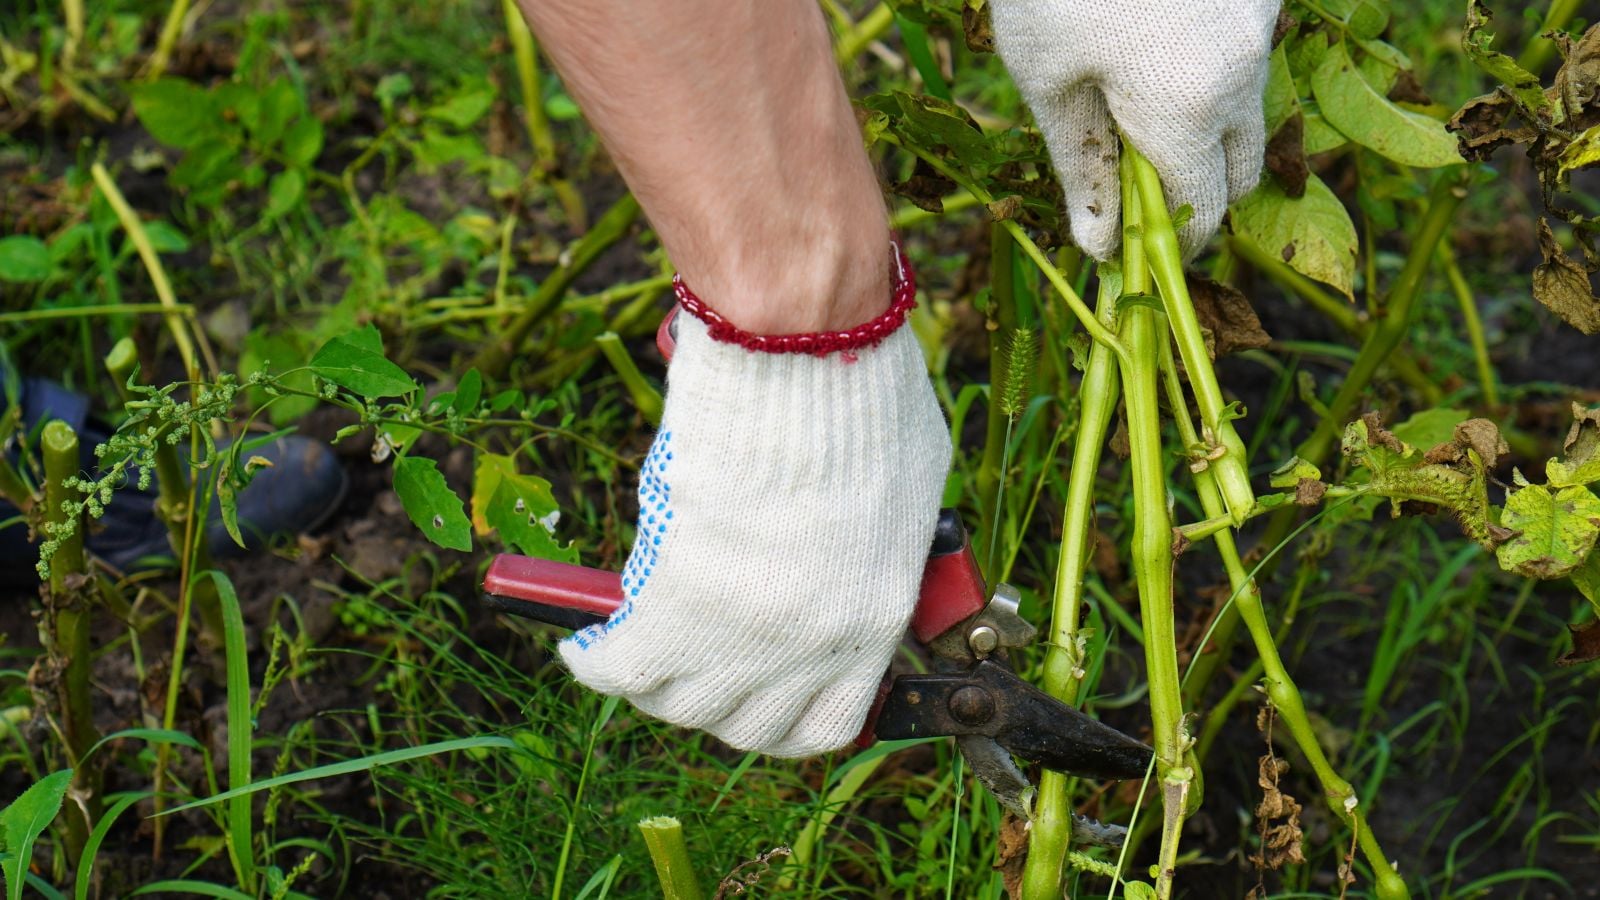
When the foliage begins to brown and die back, prune it away in preparation for harvest. If any leaves become damaged while the tubers are growing, remove them as needed. You can continue the growing cycle by sprouting some of your harvested potatoes.
The easiest way to sprout potatoes is to do nothing at all. Simply wait for them to sprout naturally, and you’ll be ready for the next growing season. Just be careful not to wait too long, as the tubers will eventually rot.
Harvesting

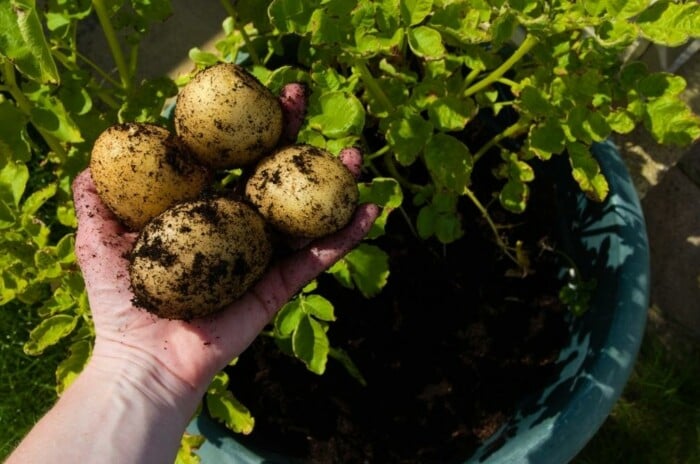
After the plant flowers and the green foliage dies back in your five-gallon buckets, it’s time to harvest your potatoes. New potatoes can be harvested as soon as the plant flowers, but they should be eaten right away. Because of their thin skins, they do not store as long as mature potatoes.
Gardeners growing potatoes in the ground often use a potato fork, but that isn’t necessary with containers. This method eliminates the risk of accidentally piercing tubers with fork prongs. Simply tip the entire bucket over and sift through the soil to find your potatoes. If you plan to reuse the soil for another garden project, empty the contents onto a tarp to make cleanup and reuse easier.
Frequently Asked Questions
How many pounds of potatoes can you grow in a 5-gallon bucket?
A five-gallon bucket will give you about two pounds of potatoes. It’s a fun and no-fuss method of gardening!
How long does it take potatoes to grow in a bucket?
It takes about two to three months from the time you planted potatoes to harvest. It’s even sooner if you’re interested in new potatoes.